How to Make a 3D Pop-Up Card
Are you a crafter who loves making 3D projects? Or maybe you’ve always wanted to make 3D pop-up cards but weren’t sure where to start? Join us and discover how you can take your dies and create a fun 3D shed! Add lots of fun details decorating with paper and inking techniques, using dies from the In the Garden Collection.
Hi everyone, Heather here to share a fun pop-up card created with Devid’s new Into the Garden collection.
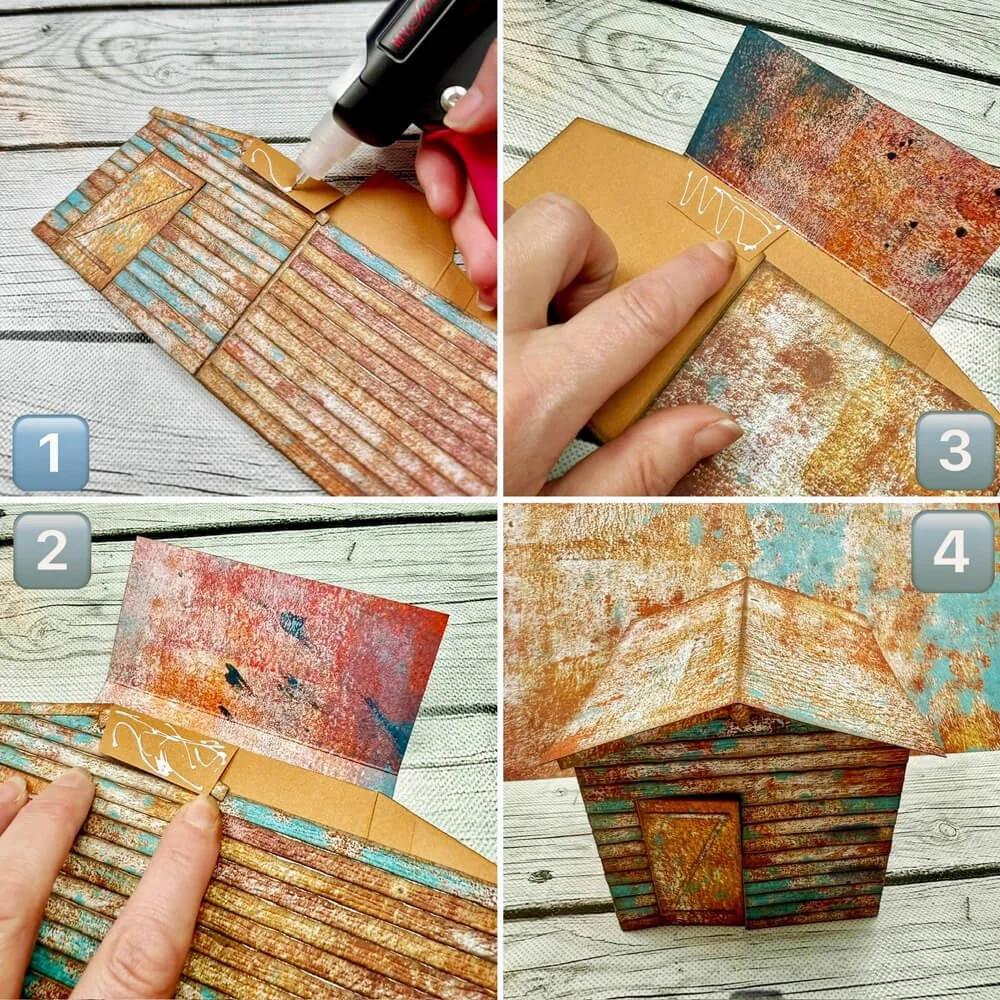
Step 1: Start by cutting out all of the components. I chose this nice, rusty-colored paper from the new Backgrounds Volume 2 paper pack. Cut out two side pieces measuring 4 ¾” x 3” and score each a ½” from both ends. Cut the roof from the patterned paper measuring 4 ¼” x 4 ¼”. Score it down the middle. Cut out the front and back with the shed shapes using die set 2265, In the Garden Shed. I chose to use a neutral cardstock color for this as it coordinates well with the patterned paper. Use the wood plank dies from the same set to cut out lots of the boards. You will need 16 of the large, 10 of the medium, and 10 of the small. Cut out the door pieces also.
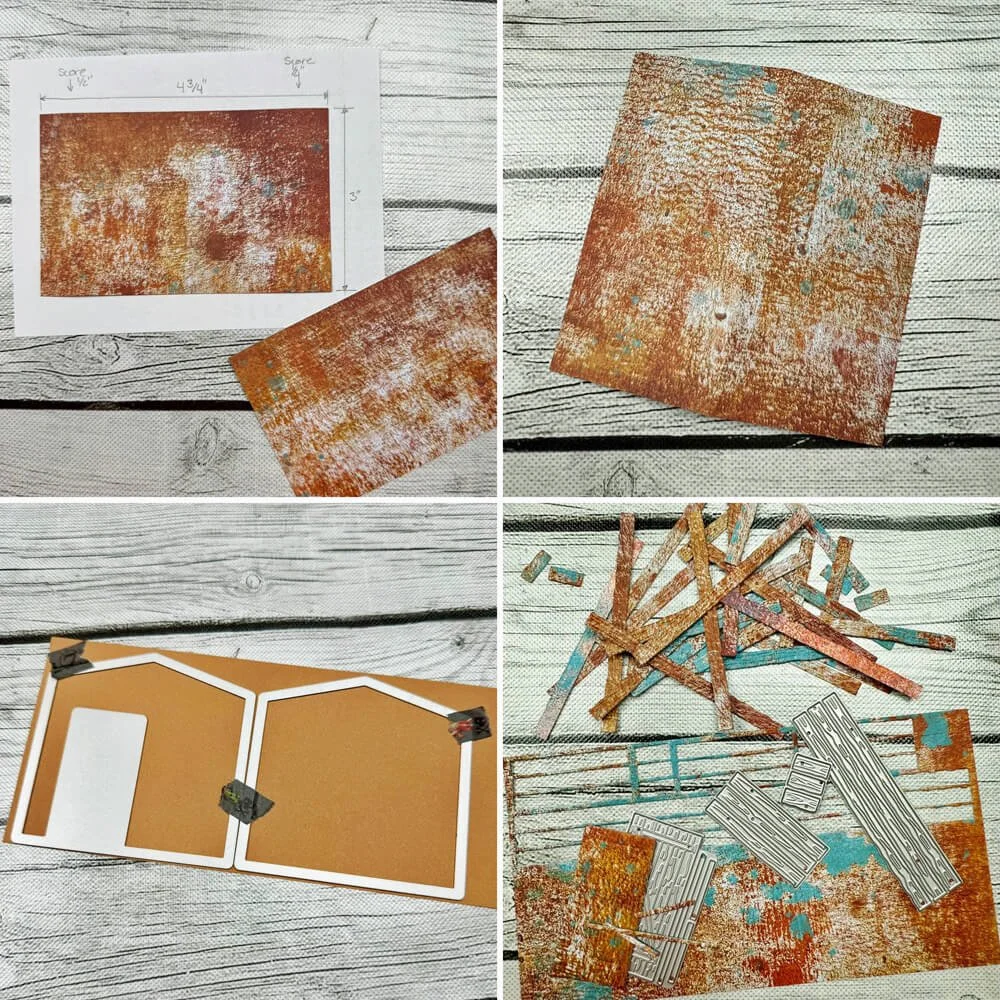
Step 2: Apply Distress Ink on all the edges, including the score lines. Trim the edges of the side tabs and add double-sided adhesive. You can use other adhesives, but I prefer the tape.

Step 3: I prefer to distress all the boards with ink, even though it is a time-consuming process. You can see the difference it makes when the ink is added.


Step 4: Cut out the roof trim, which is the die shown in the picture. Ink the edges of those pieces as well.

Step 5: Your fingers might look a bit like this once you’re done, but I think it’s well worth it!

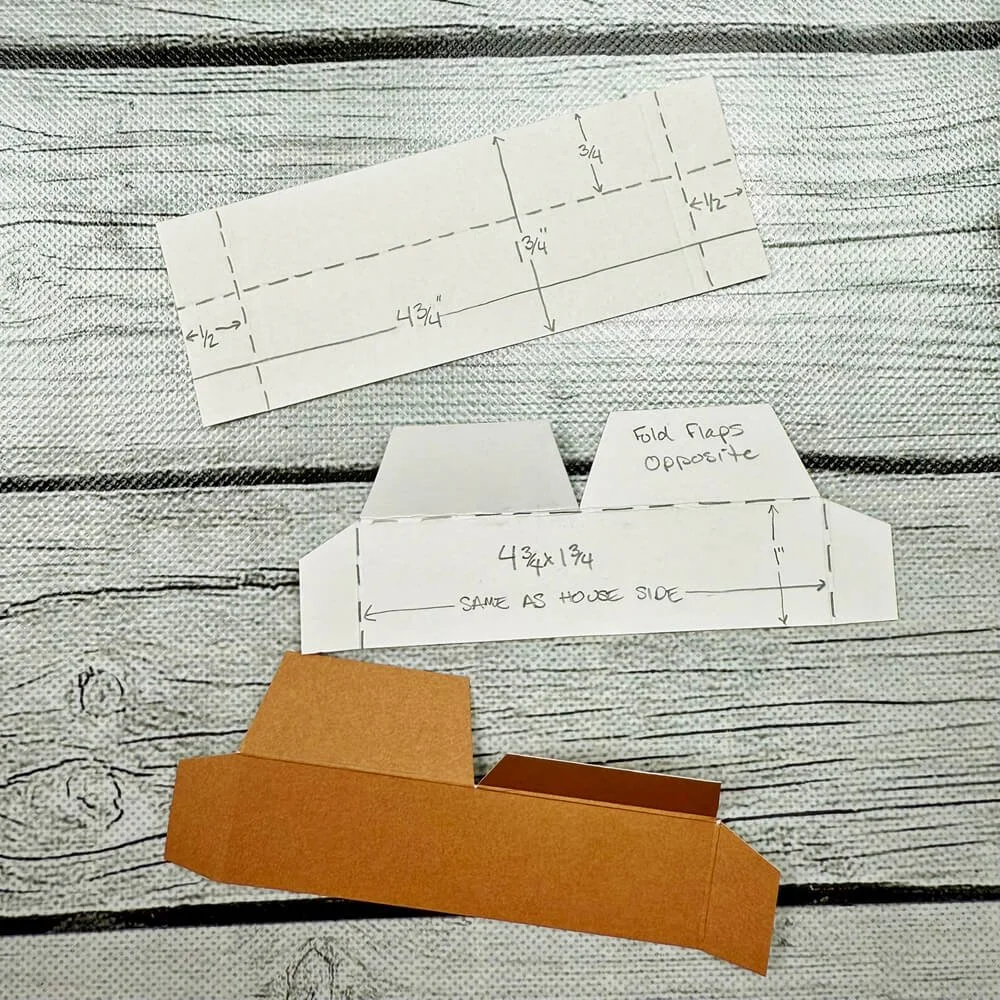
STEP 6: Cut out the mechanism by starting with a piece of cardstock 4 ¾” x 1 ¾”. Score at ½” on both ends and ¾” from the top, and trim the tabs as shown in the image.
Step 7: Attach the door to the front panel, making sure it does not interfere with the opening and closing of the door. Attach the thin door pieces according to the embossed lines on the door. They can be hard to see on the patterned paper, but you can find them if you look closely.


Step 8: Cover the rest of the front panel with adhesive. I find it easiest to use my tape runner, but you can use whatever adhesive you have.

Step 9: I started at the bottom and placed the first board, making sure that it didn’t interfere with the opening of the door. Alternatively, you could start at the top of the door frame, as I did in the following video.
Click play and watch the video below.

Step 10: Continue to stack the boards one above the next, butting them together. Once I reached the top of the door, I overlapped the first long board to line up with the top of the door. When I got close to the peak, I used a long board and trimmed it along the angle until I filled it all in. Add the roof trim with the boards meeting at the peak and overhanging the edge. Place the diamond over the seam, but do not overhang the top, or it will interfere with the roof.

Step 11: Attach the boards to one or both sides of the shed. Since I cut the sides with the patterned paper, I could have left them without boards, but I think it looks better when the card is flat to have the boards on one side.

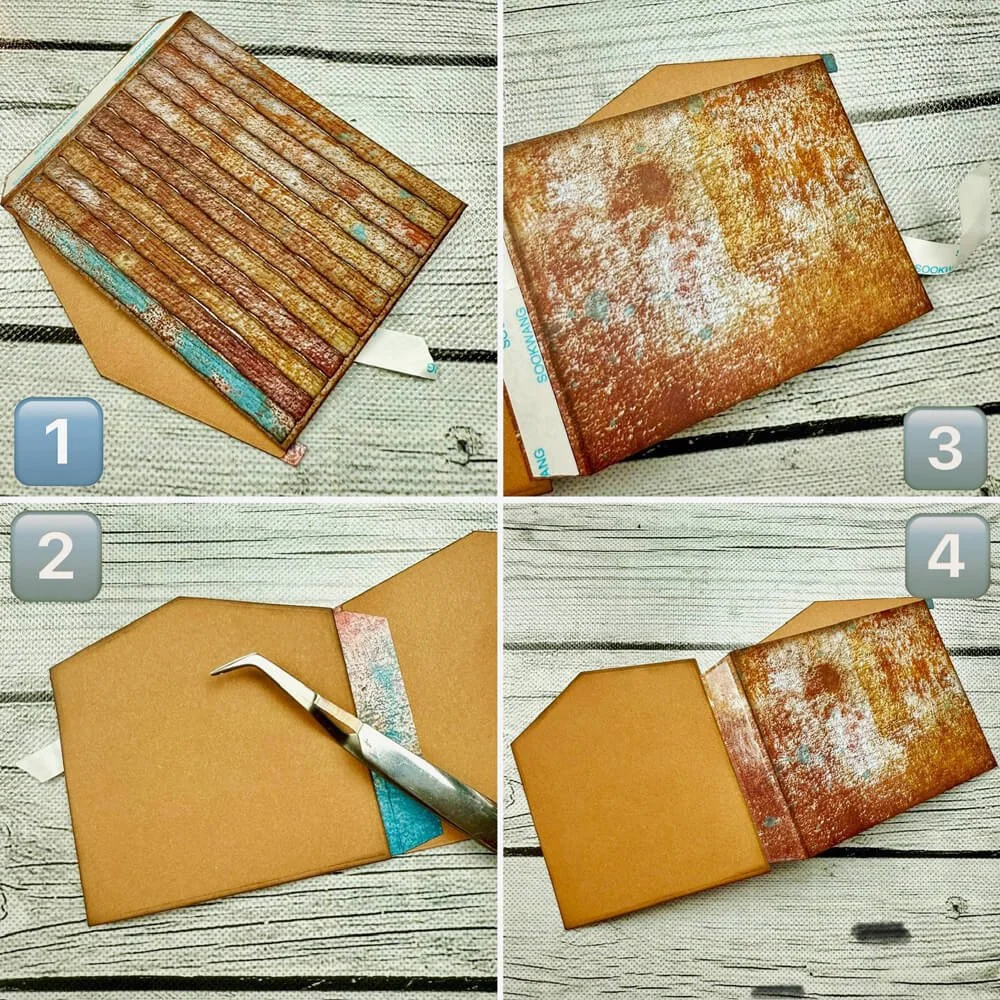
Step 12: The next step is the assembly. I started by attaching the side to the front (1). To do this I only pull back a tiny bit of the tape backing and line up the two pieces. Once lined up, I held them in place while I removed the remainder of the backing. I then attached the back to the already attached side (2). Next, I attached the other side to the front (3) and lastly, I attached the last two pieces together when lying flat so that they lined up nicely (4).
Step 13: Now that the base is assembled (1). Add adhesive to the side tab of the mechanism (2) and attach it to the inside of the roof peak. Flip over and attach the opposite tab to the opposite roof peak (3). Now the mechanism is attached (4).

Step 14: To attach the roof, lay the base flat and add glue to one of the tabs (1). Slide the roof under the base, ensuring it is centered and the fold is butting up against the mechanism (2). Press it down onto the tab and check that the adhesive doesn’t seep out onto other components. Flip the entire piece over and make sure the last tab is on the side now facing up. Add adhesive (3) and press the roof down. Pick up your shed (4) and it pops up with the roof attached!
Click play and watch the entire assembly in the video below!
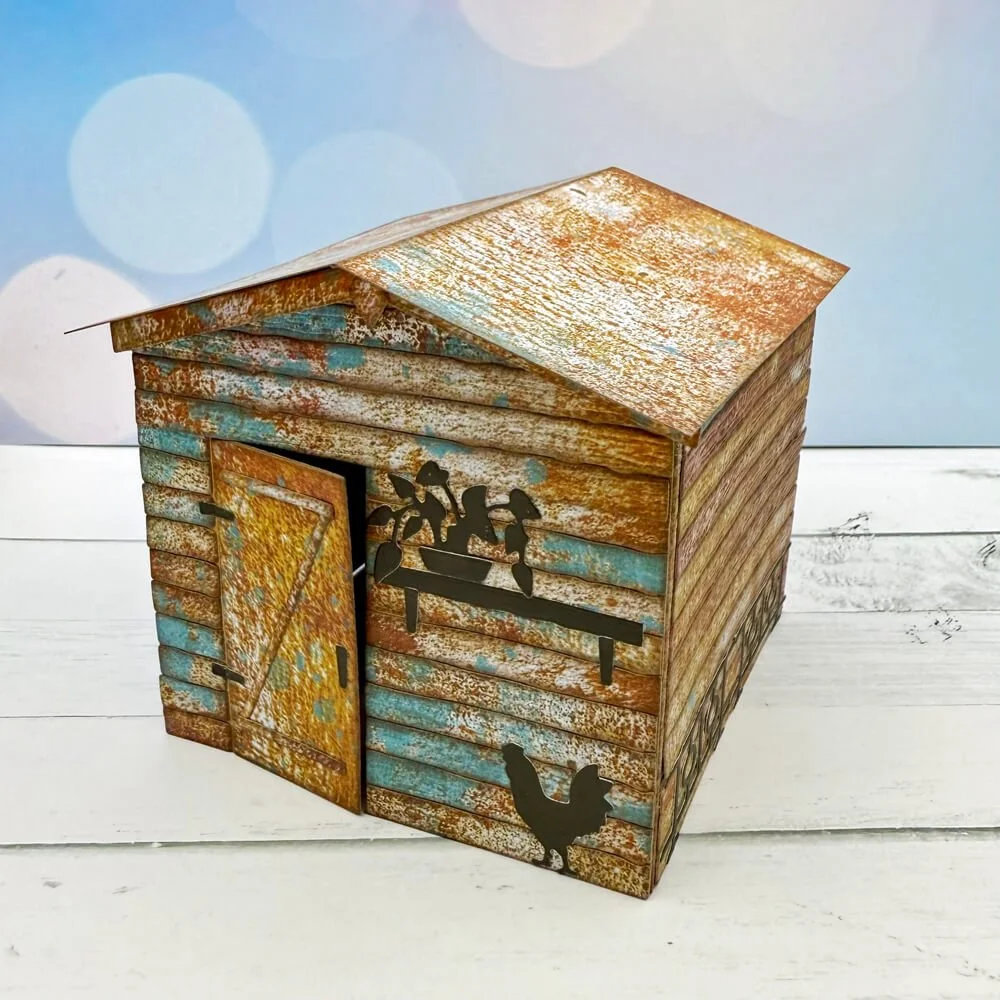
Step 15: I like to add hinges and a door pull to my shed, so I cut out an extra set of the shelf brackets and used them. It’s a little tricky to attach the hinges on a movable door, so just make sure that you open it up and press the hinge down before the glue dries.
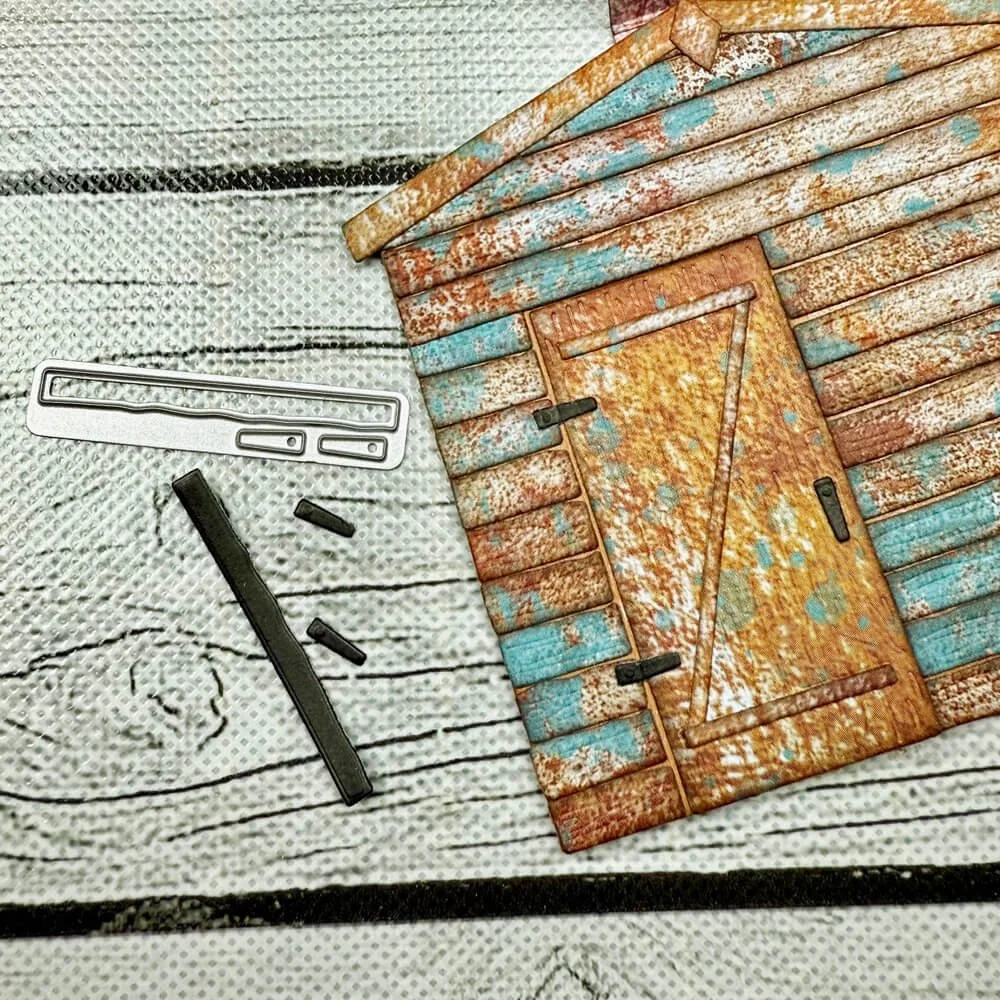
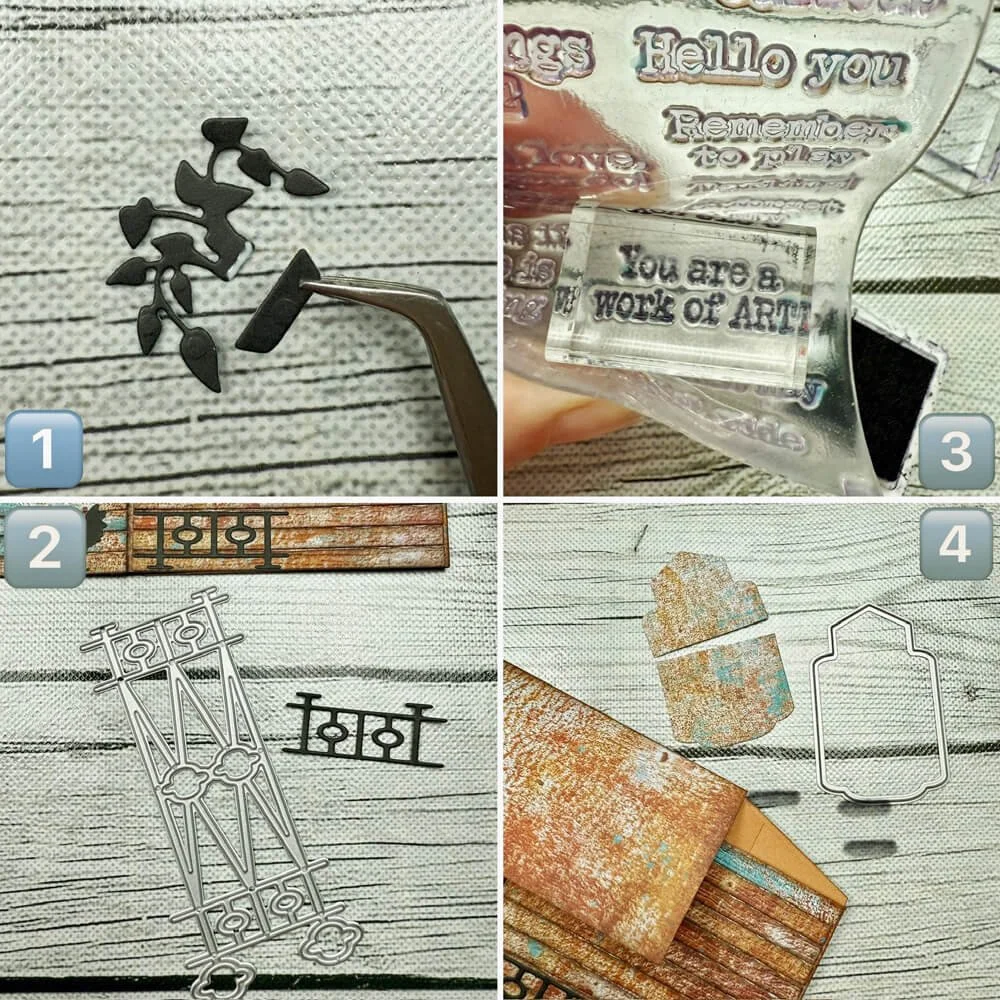
Step 16: Decorate your shed however you like. I really like the way this plant and pot match up, as they fit nicely on the shelf (1). You can mix and match the plants and pots in set 2265 In the Garden Shed. I also trimmed a small piece from the lattice (2) in the set 2266 Plant Index Folder to create a tiny fence on the side of my shed. I wanted to stamp a sentiment on the back of the card (3), so I used Journal Phrases 4 and a tiny block so that I only inked the sentiment I wanted. I wrapped the sides of the stamp around my block. You can see in the video how I added shingles to my roof. I cut the garden tag die (4) in half, also from the set 2266 Plant Index Folder.
There are so many different options for building this garden shed. I hope this has inspired you to give it a try yourself.