Create Interactive Elements for Your Journals
Hi everyone,
Heather here to share a fun interactive element for your art journals using the new Hinged to the Past collection from Art Journal Specials.

Step 1:
I started out by cutting 3 of the pockets from set 2211, Shielded Window, using some Coffee Dyed paper.

Step 2:
I trimmed off the bottom tab from each pocket and the side tab from just one of them.

Step 3:
I also cut out quite a few smaller rectangles from coordinating cardstock and then inked the edges of everything with some light brown ink. This included folding all the score lines and inking those as well. I didn’t ink the edges of the tabs so that they blend in better.

Step 4:
My next step was to attach the pockets together end to end. I added some double-sided adhesive to the tabs and then attached them to each other.

Step 5:
This formed an accordion type of piece so that each page folded back and forth and made a little mini book.

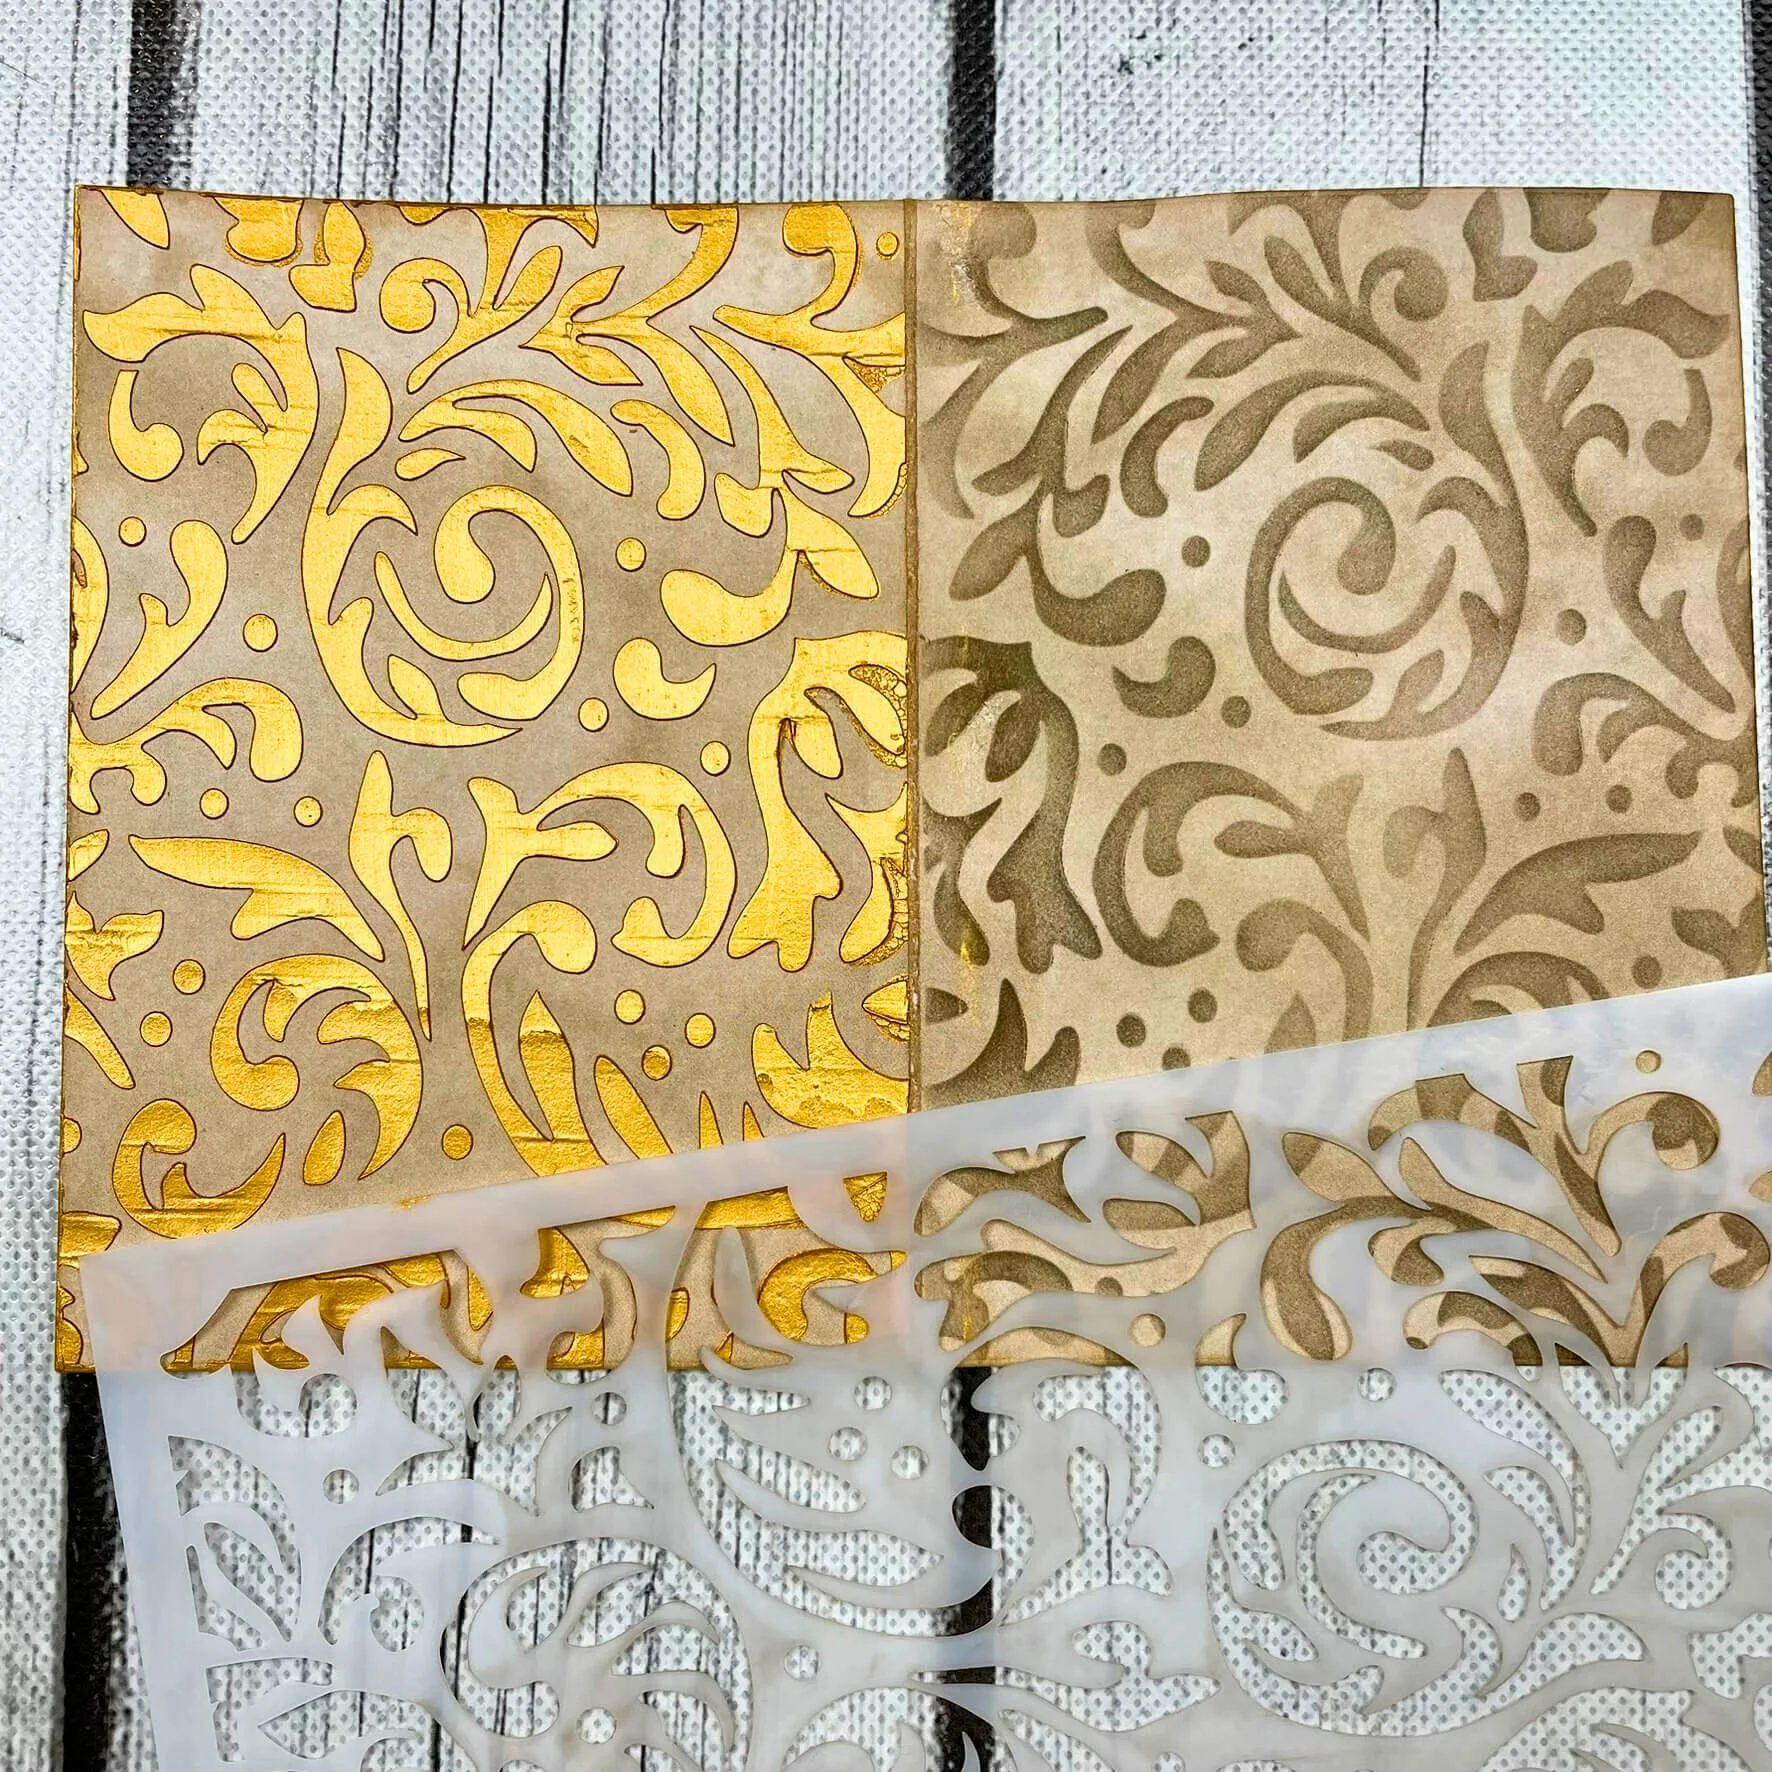
Step 6:
I added gold texture paste onto three of the small rectangles using a different stencil for each one. I also added the paste onto one side of a base page I cut with 2210 Laced.

Step 7:
I used the same stencil on the other side of the base page to add some dark brown ink. I really like how the background is mirrored but with different mediums.
Step 8:
Next, I stamped the border stamp from the CS392 Rose stamp set along the top and bottom of one side of my little mini book.

Step 9
On three of the blank rectangles, I added the butterflies and the frame that I cut from gold foil paper. Then I attached them all to the mini-book.

Step 10
For the other side of the mini book, I die cut some gold foil & dark brown cardstock with the large lace die from set 2210 Laced and then cut it a second time with the pocket die. This allowed me to add the lace pieces directly on top of the pages, and all the edges matched up nicely. I guess I could have attached the lace piece to cardstock and then cut both with the pocket die, but I didn’t have this idea until I was already halfway done my project, lol.

Step 11
I trimmed off the side of the lace die cut once it was stuck down. I tried to do this a few different ways. I tried using double-sided adhesive, but it was so time-consuming to weed out the little pieces. Eventually, I gave up on that and just cut the cardstock and used a brush type of adhesive to attach them.

Step 12
I left one side at the end of the mini book blank so I could easily attach it to my base page. To do this I added lots of double-sided adhesive. Before attaching it to the base page I added some ribbon to hold my mini book closed.

Step 13
I also added a couple of pictures and some of the sayings from set CSD390 Journal Phrases 4. I just love how that lace die cut looks on those pages! It really is a great effect.

I think the gold foil paper and the gold texture paste really makes this page and mini book look so classy!
I hope you enjoyed this project and are inspired to create your own Art Journal pages. Have a fantastic day!
Heather