Make Vintage Journal Pages with the Mr. & Mrs. Collection
Are you looking to explore new techniques in your art journaling and don’t know where to get started? Do you want to learn how to create in the NEW larger sized Passport XL journal? Join us and discover how you can create a beautifully styled art journal page featuring the Mr. & Mrs. Collection from the Art Journal Specials.
With so many elements to choose from, Reanna highlights the corset to create a page full of texture, charm, and vintage flair. Follow along to learn fun techniques and get inspired to create your own vintage spreads.

Hi, My name is Reanna, and today, I will share fun techniques for making an art journal page with the new Mr. & Mrs. Collection from Art Journal Specials. This collection has so many great sets that it was hard to pick which to use, but I chose the corset and belly band for this page.
Step 1: I started by die-cutting the page from the Playful Grunge set using a sheet of paper from the Coffee Dyed paper pack. This page will fit into the new! Passport XL size and the TN Square XL journals.

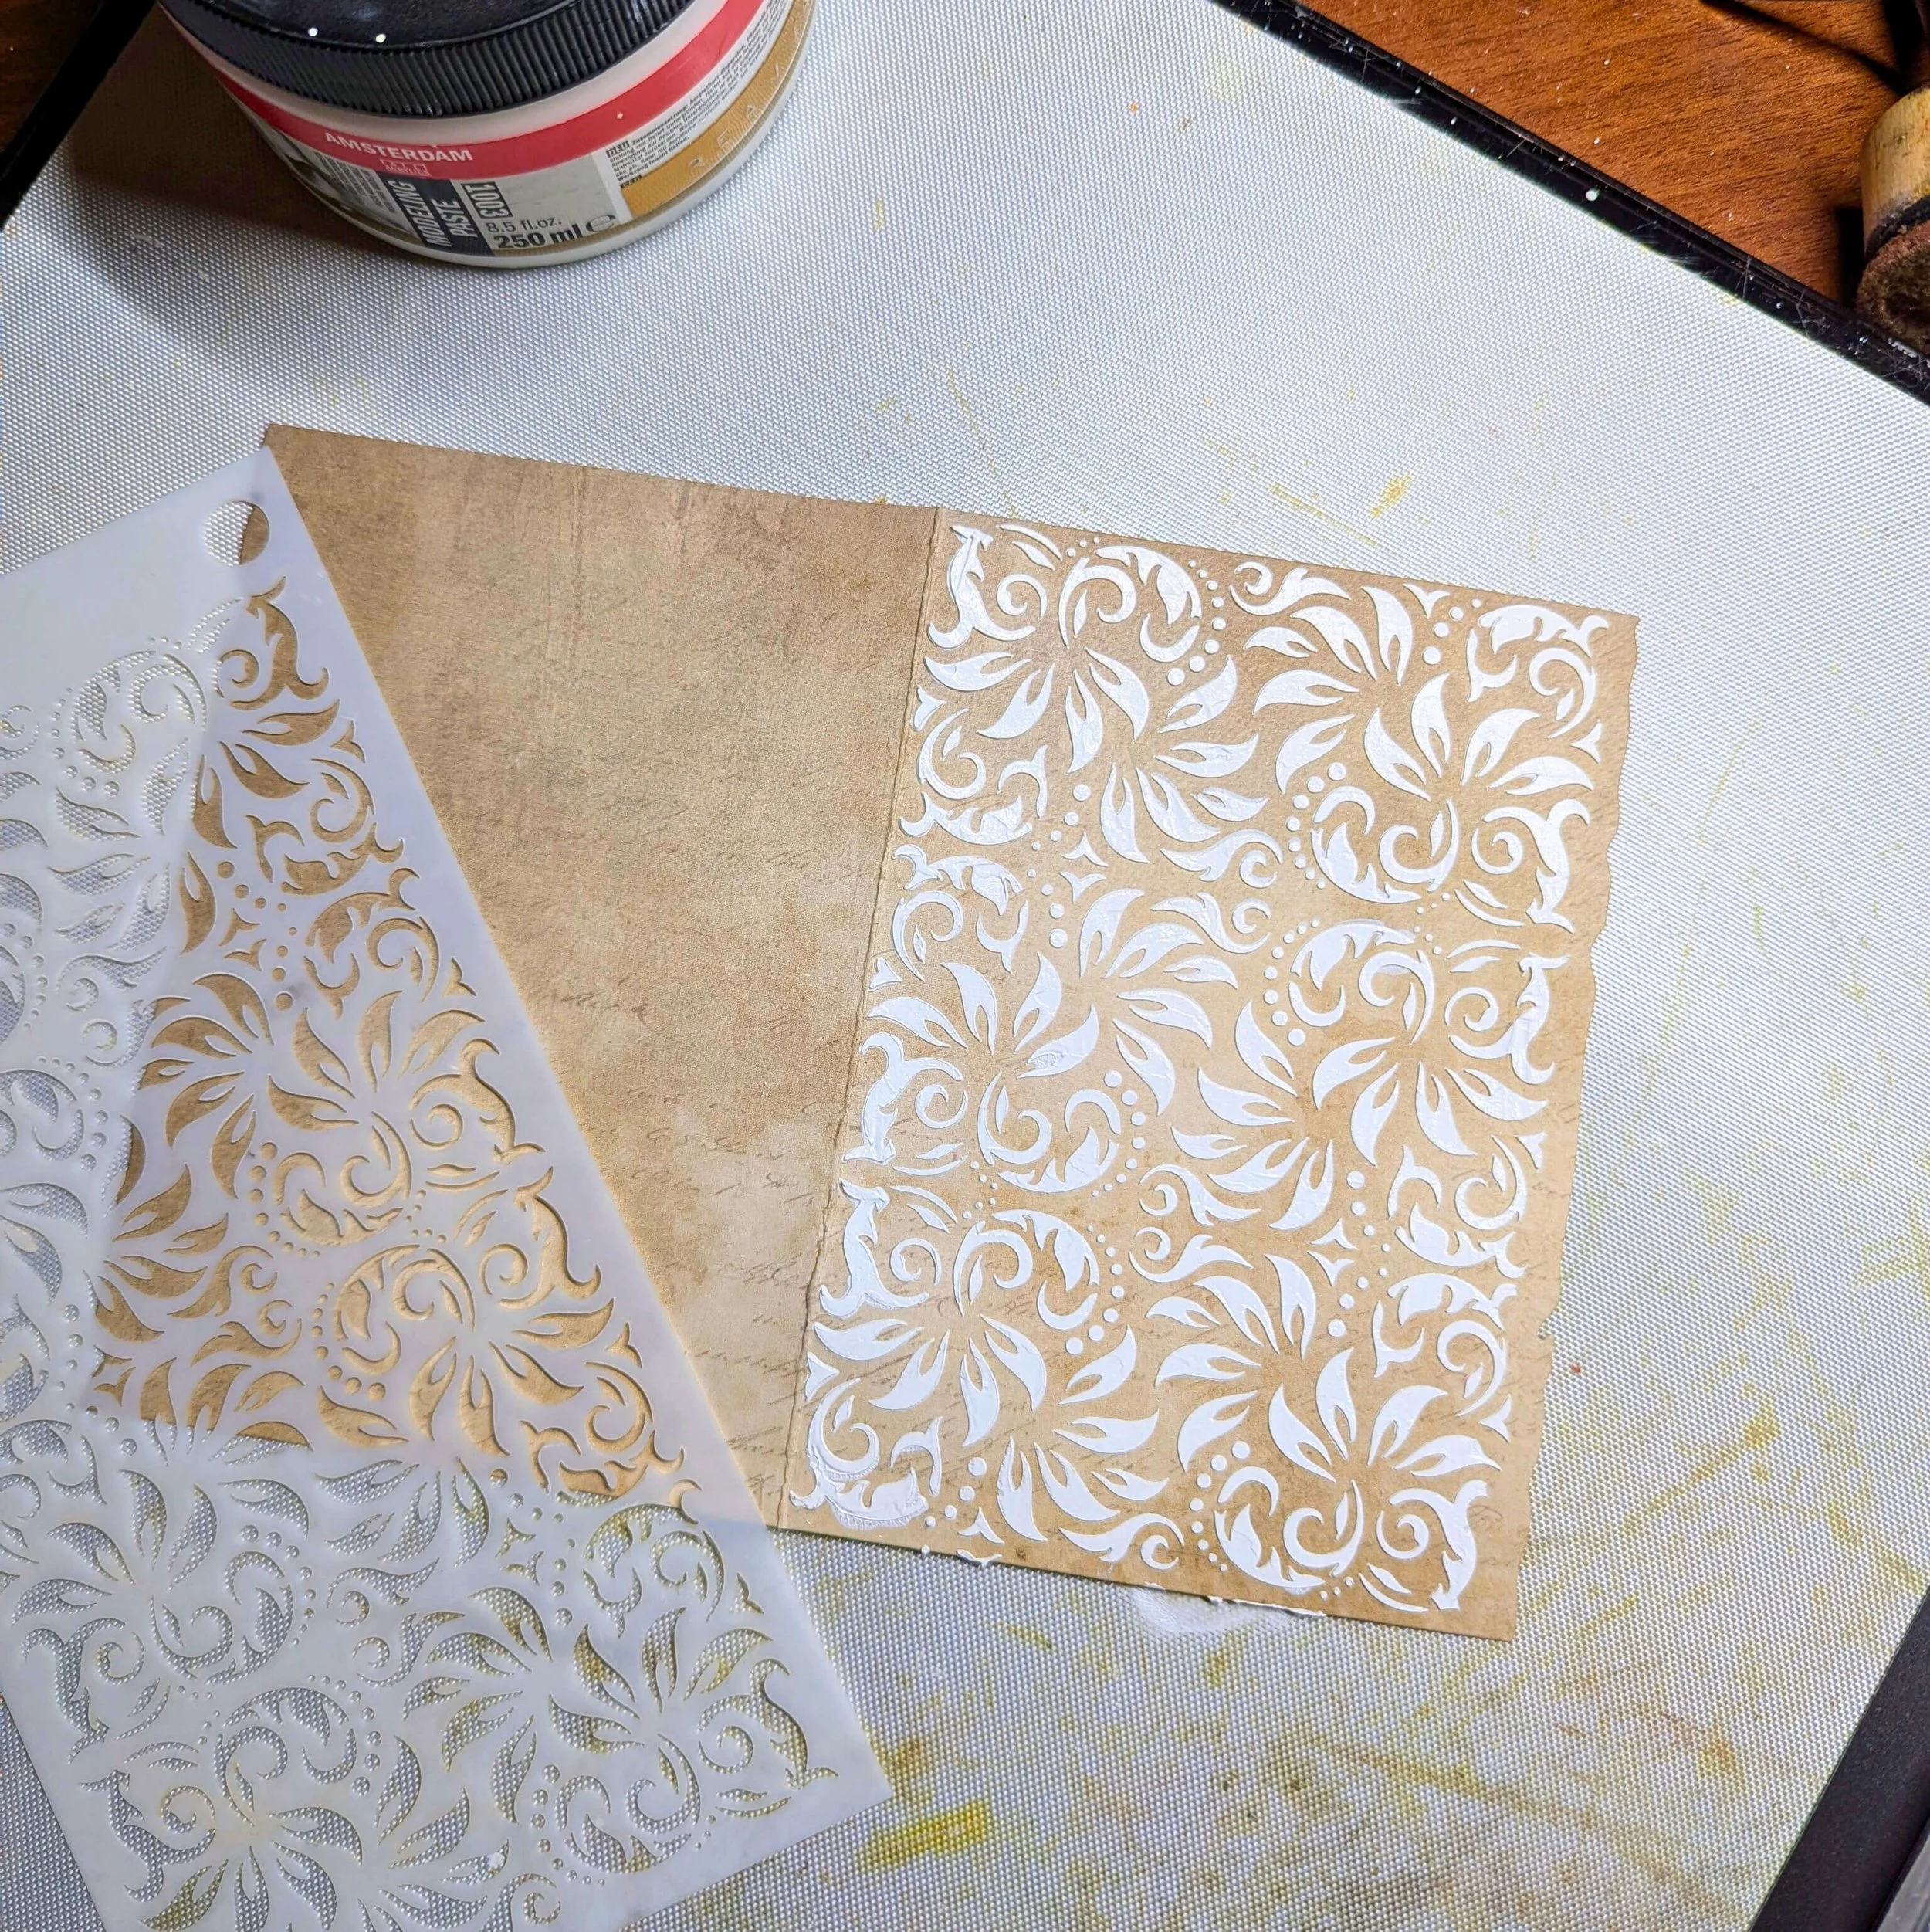
Step 2: I absolutely LOVE playing with stencils, and the new Mr. & Mrs. Collection has some gorgeous ones. After choosing one, I applied white modeling paste to my page with a palette knife through the stencil. It is like spreading butter on a sandwich. Do not use too much paste, as it might get under the stencil. Just a little bit at the time, and take as much paste off as possible before you remove the stencil. Once you remove the stencil, you will see the wonderful effect! Just dry it with a heat tool, and it will be ready for the next step.


Step 3: As the modeling paste is applied on design paper, you need to protect it before you apply more mediums. In this case, I used clear Gesso, as this is a medium that will help protect your background.

Step 4: Ink Sprays are a fun and fast way to color your project. I used Lindy’s Starburst sprays, but you can use whatever sprays you have. You can also make your own sprays from pigment powder and water. I added color to the page with light and darker brown sprays and dried it with my heat tool.


Step 5: The Laced Up set includes a corset-cutting die. I love this die set! As I am not using the page with the corset extension, I just cut the base for the corset with brown cardstock and the corset itself. For the corset, I used the new Background Volumes 1 design paper pack. In the set, you will also find lace that will fit exactly on the holes (as shown in the picture).


Step 6: I decided not to use the lace from the die-set as I wanted to use ribbon. To do that, I made the holes a bit bigger by punching the small hole from my Big Bite. Also, I ended up punching two extra holes in the bottom. It just depends on how you use the ribbon. I used a simple 3 mm ribbon for this, as it threaded through the holes easily.


Step 7: Lace works really well with this collection. I’ve used it in lots of my projects. For this one, I chose a small piece of lace and added it to the bottom and top of the corset using double-sided tape.


Step 8: The belly band in this collection is very cute! For this project, I cut it from brown cardstock. I also cut three small (circle) pictures to go on the belly band. I applied transparent crackle paste to the three small pictures to give them an aged effect. This always works out great!


Step 9: The Laced Up set includes this cute, Victorian-style mirror. The base is made from brown cardstock, and the decorative element is from gold cardstock. I used mirror paper for the mirror.

Step 10: Looking at the belly band, I thought it was a bit dull, so I applied a bit of gold wax to it with my fingers. In the meantime, the crackle paste on the three pictures dried, and I love it!


Step 11: Now, we need to glue everything down on the page. In the end, I decided to die-cut the belly band again and assemble it to the first one so it slides over the front and back of the page (as an actual belly band).


I hope you enjoyed learning about this project as much as I enjoyed creating it and are inspired to create your own.
Love, Reanna