
Make an Interactive Card with a Hidden Surprise
Are you a crafter who loves making cards with interactive elements and hidden surprises? Or maybe you’ve always wanted to try making a design that looks simple on the outside but has a fun reveal on the inside? Join us and learn how to make an interactive winter cabin card with the adorable Living It Up Collection. While this card is perfect for the winter season, with a few changes, you can easily adapt the design for celebrations all year long.
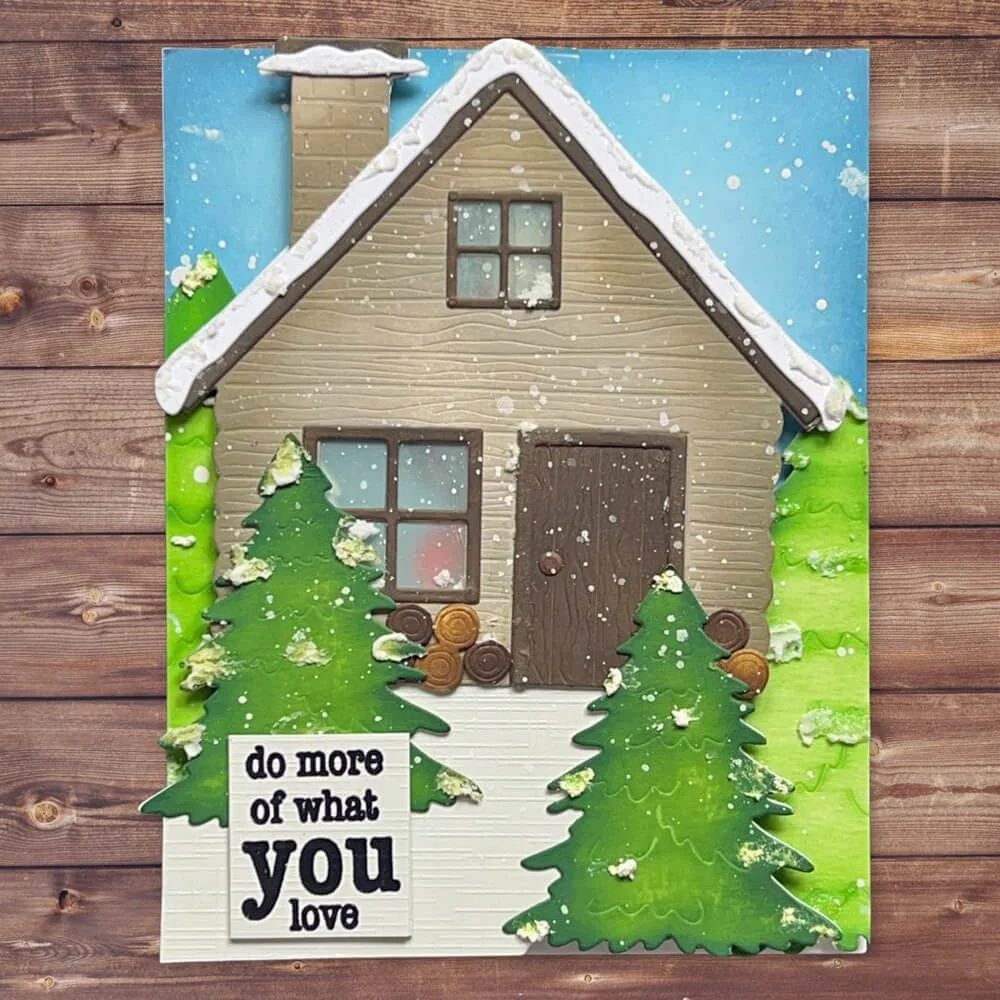
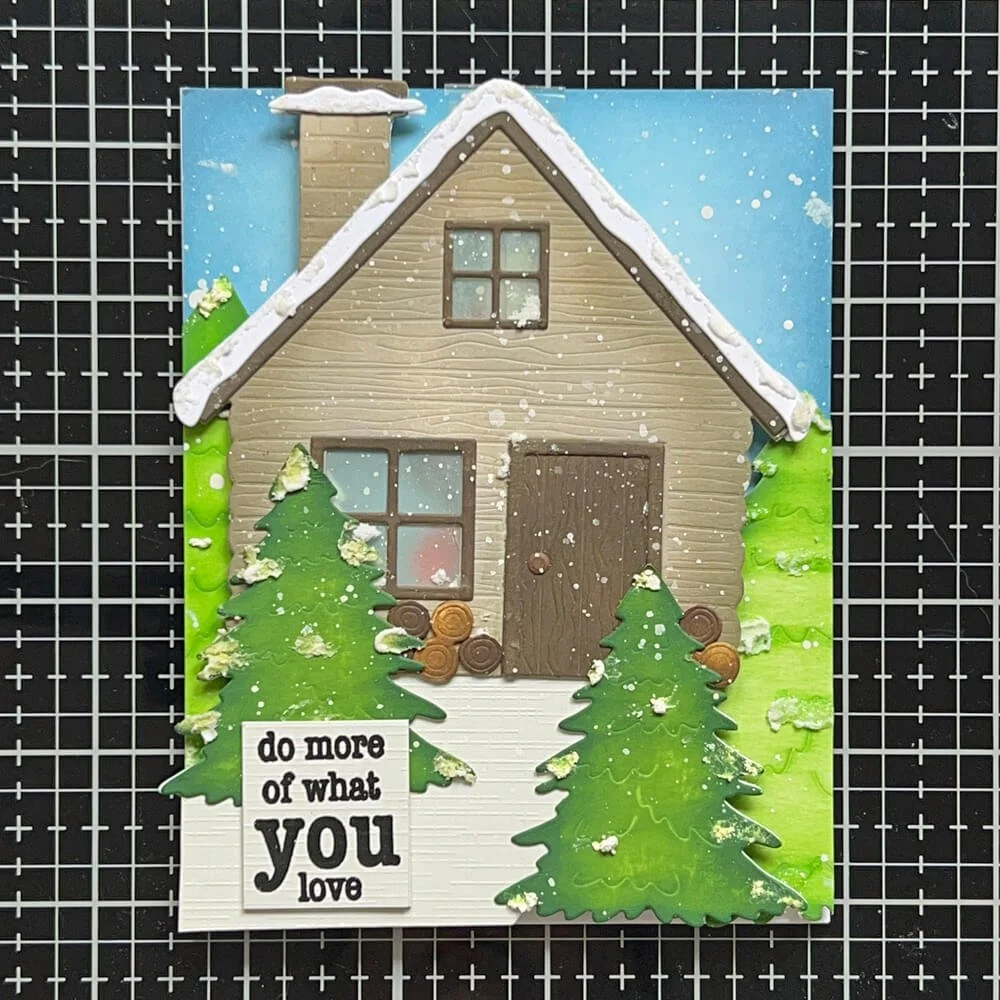
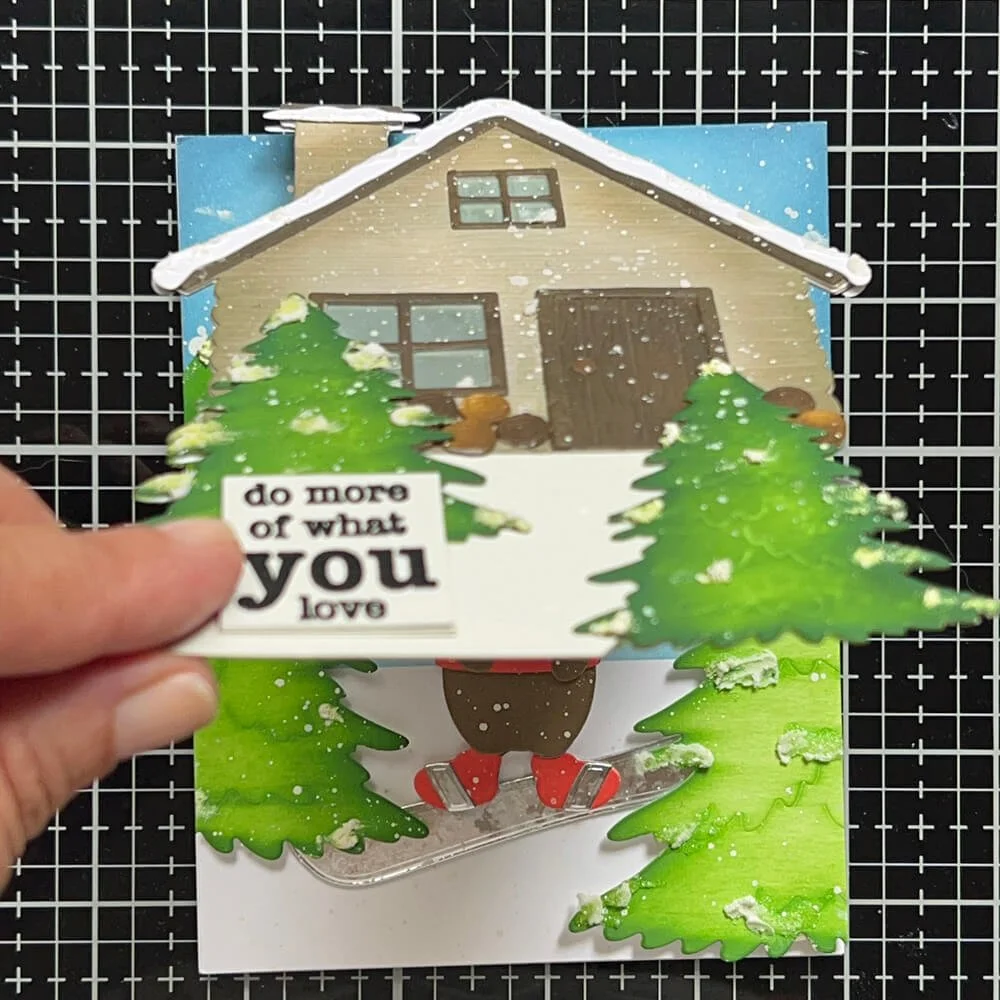
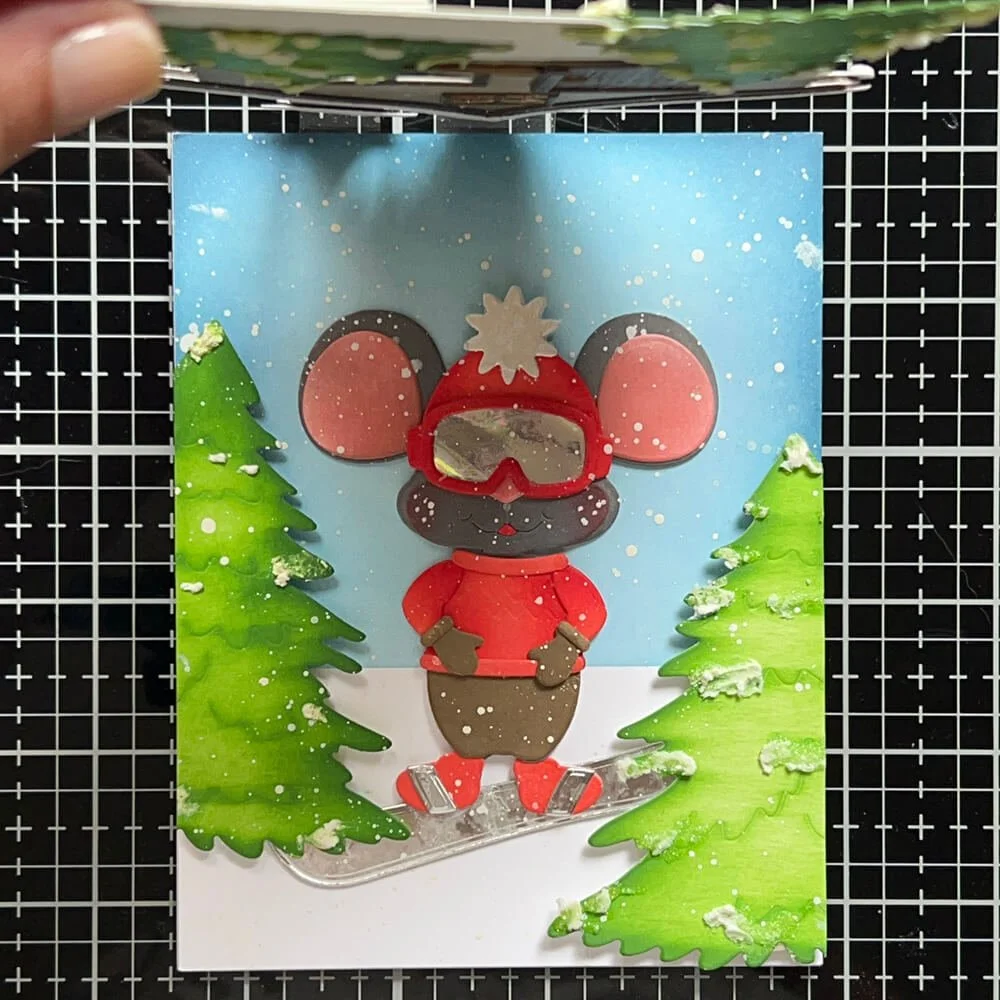
Hi everyone! I’m Liliana, and today I’m sharing an interactive winter card created with the adorable Living It Up collection. This card is filled with cozy details, playful characters, and a fun hidden surprise, all made with die cuts and a bit of ink blending magic. From the outside, this card looks like a peaceful winter landscape with a cozy cabin nestled between snowy trees. But lift the flap, and you’ll discover a sporty little mouse ready to hit the slopes! The interactive element makes this card extra fun to make.

Step 1: Create the card base
• Cut a piece of white cardstock to 11” x 4 1/4”, score and fold in half to create a top-folding A2 card.
• Cut a second piece of white cardstock to 5 1/2” x 4 1/4” for the card front.
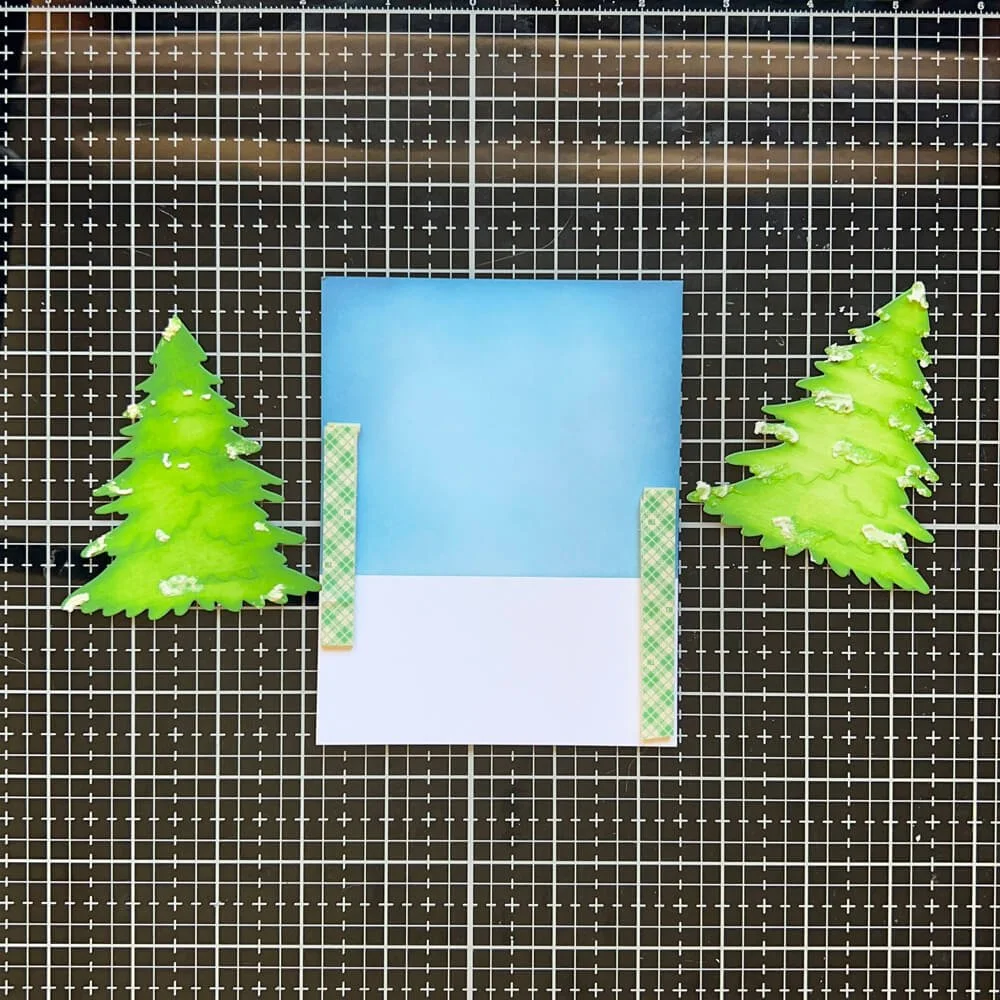
• Blend ink onto the top 2/3 of the card front with shades of blue to create a soft winter sky.

Step 2: Ink Blending & Die Cutting
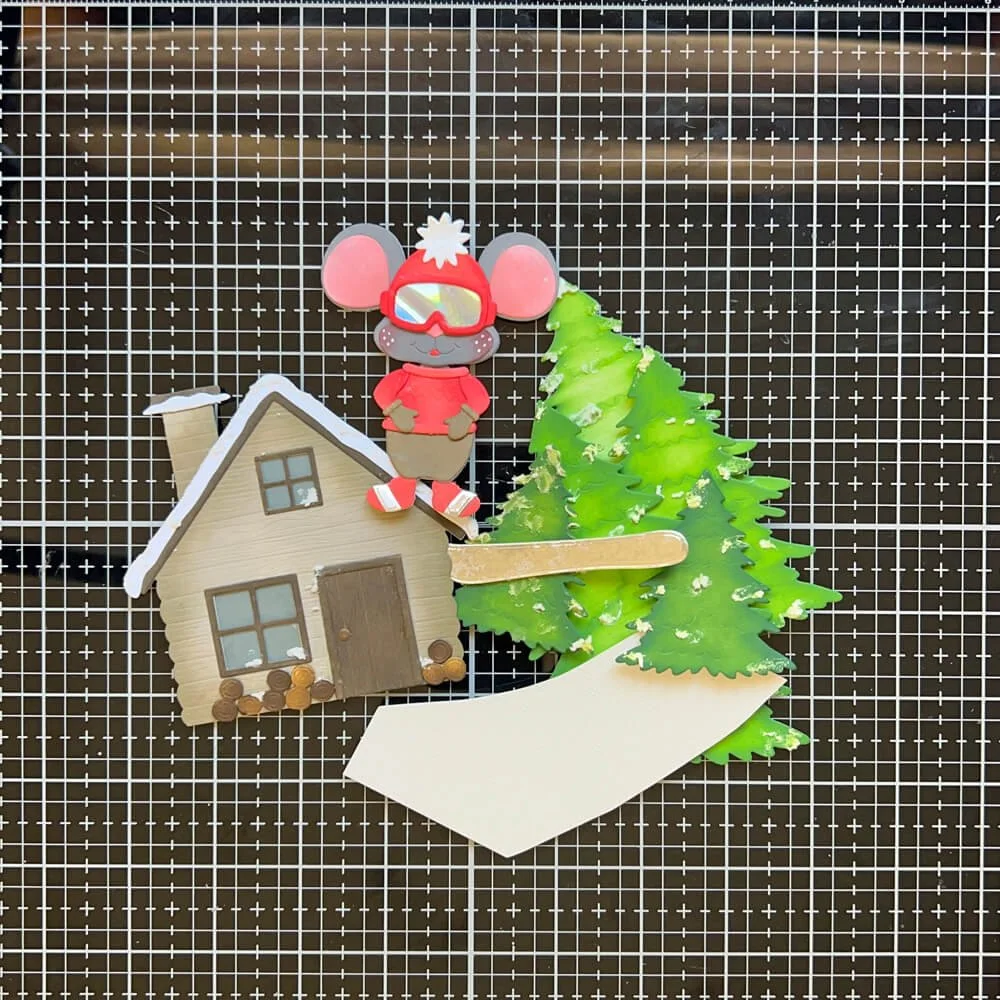
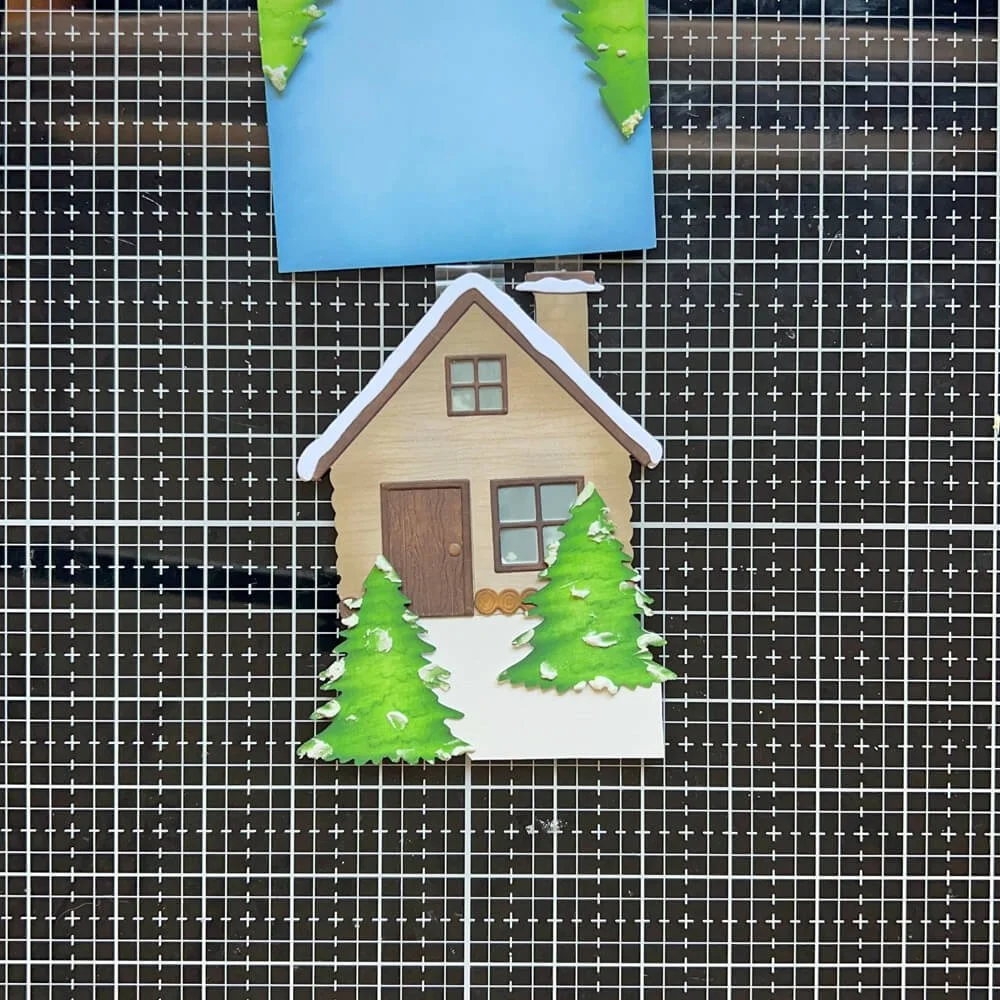
• Die cut the cabin, large and small pine trees (I ended up using two of each) , a small mouse, and winter accessories from white cardstock.
• Use ink to color each piece as shown. Don’t be afraid to add depth and texture with darker shades on the edges!
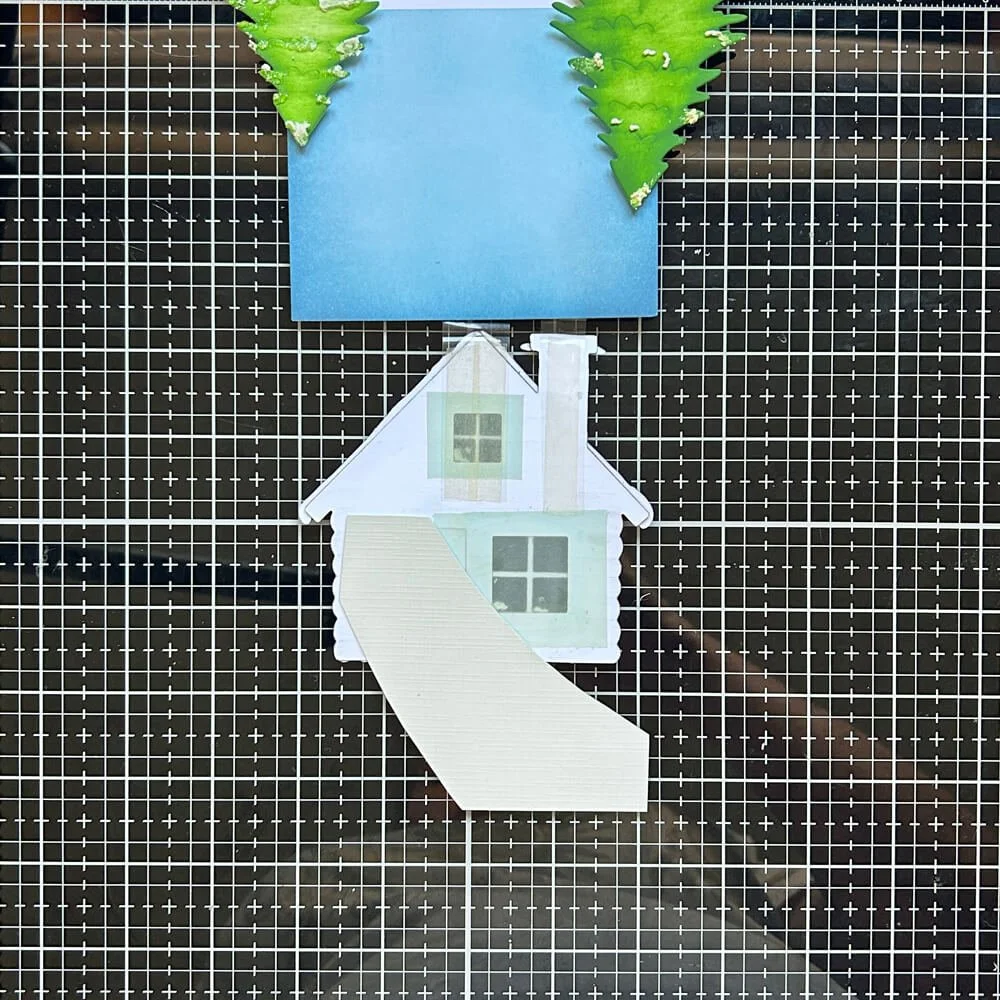
• Cut a curved path from light grey cardstock (freehand works great!)
Step 3: Building Dimension & the Flap Mechanism
Double up foam tape and place it on the left and right sides of the card front.
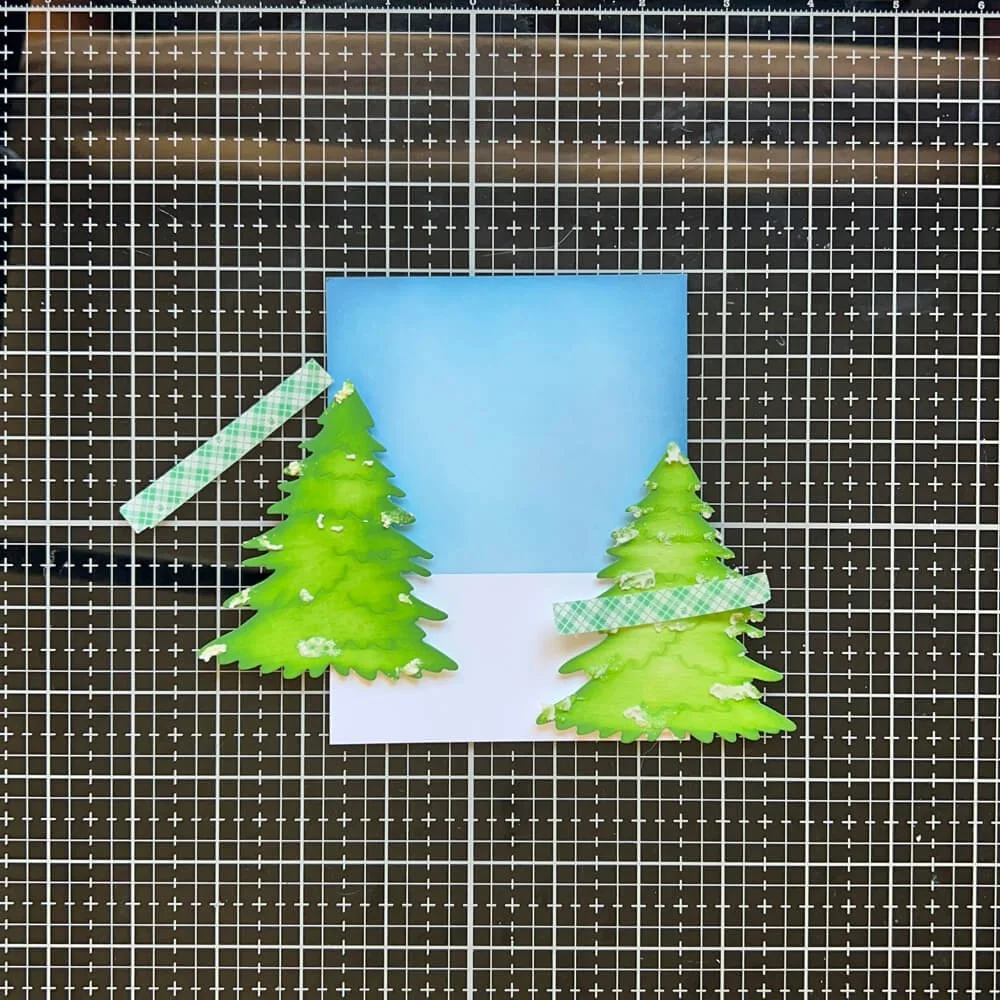
Adhere two large trees on top of the foam tape, letting their tops hang beyond the base for a natural look.
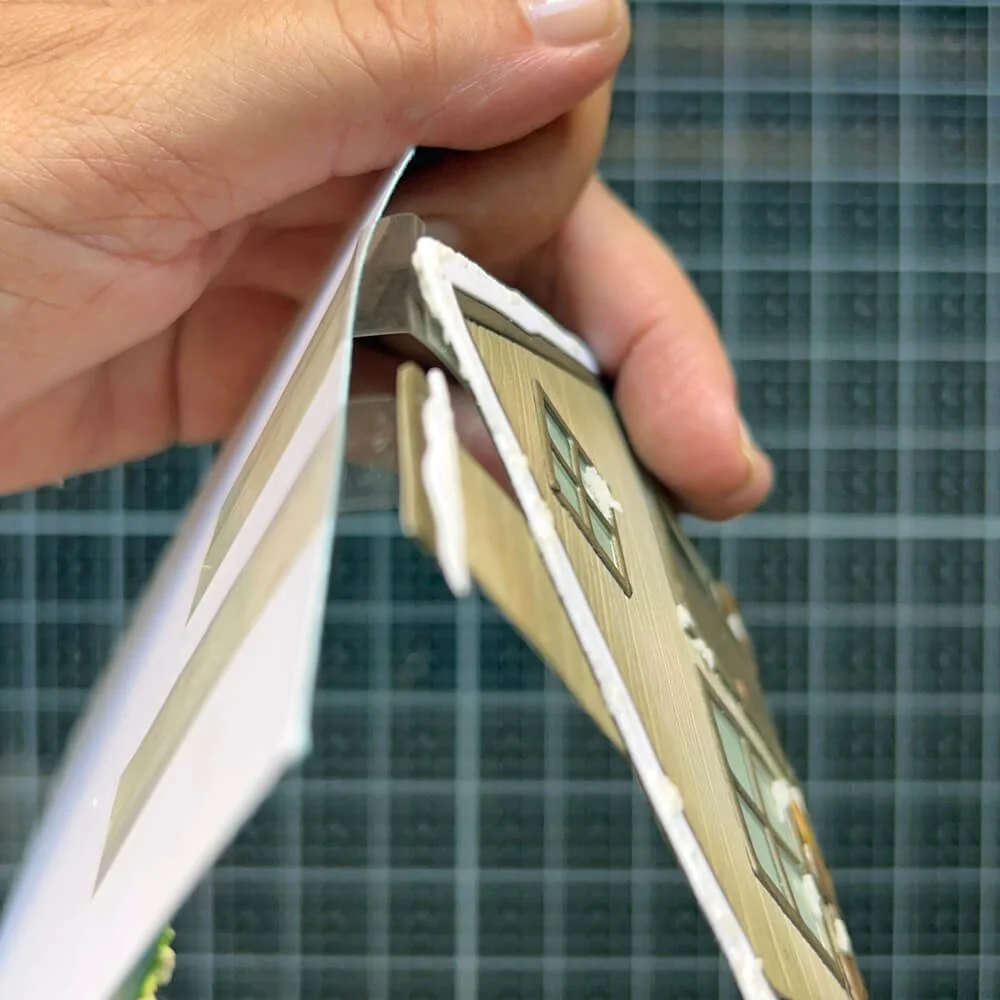
Trim two acetate strips, fold them in half, and attach one half behind the cabin roof and chimney.
Use the width of your doubled foam tape to measure and score a second fold in the acetate. This creates space for dimensional elements while keeping the flap straight when closed.

Step 4: Position the Cabin
• Hold the cabin in place, then adhere the other ends of the acetate strips to the back of the card front.
• Align the cabin so that it closes neatly over the path and trees.
•Adhere the path in place, ensuring it remains hidden when the flap is closed.
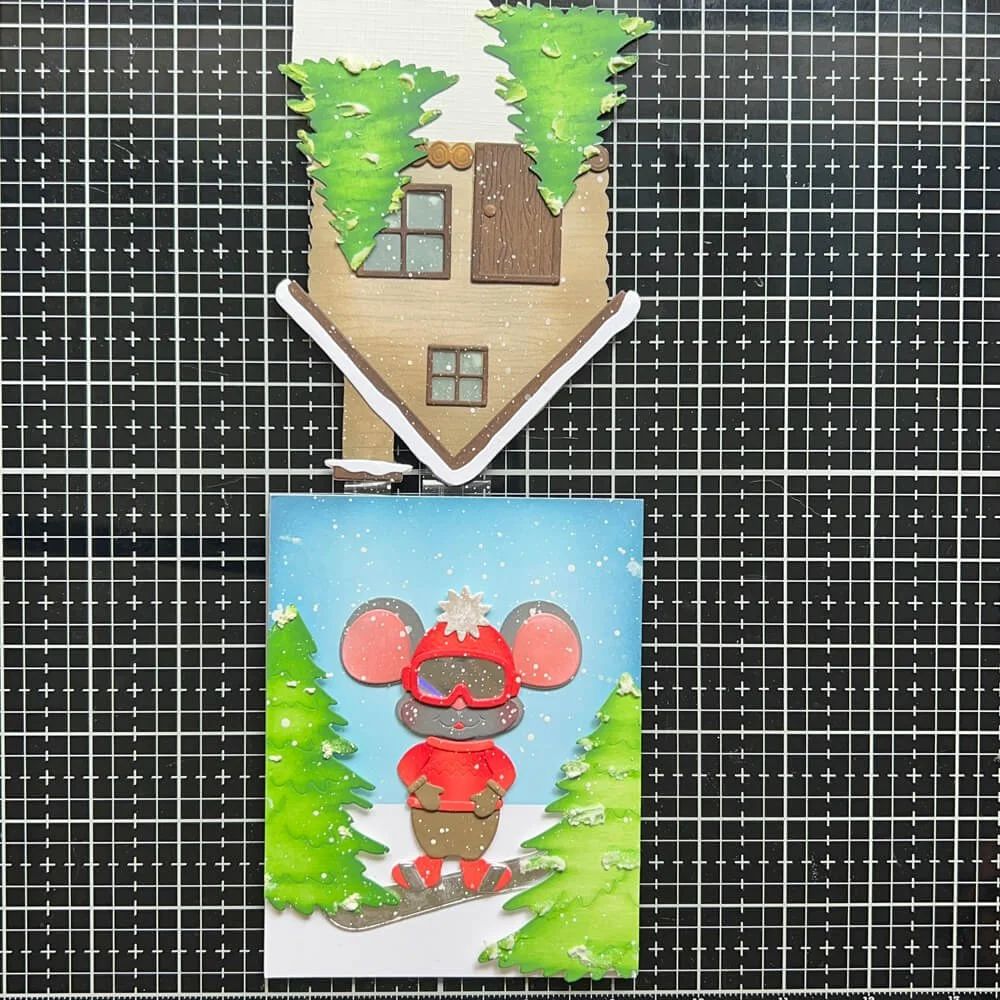
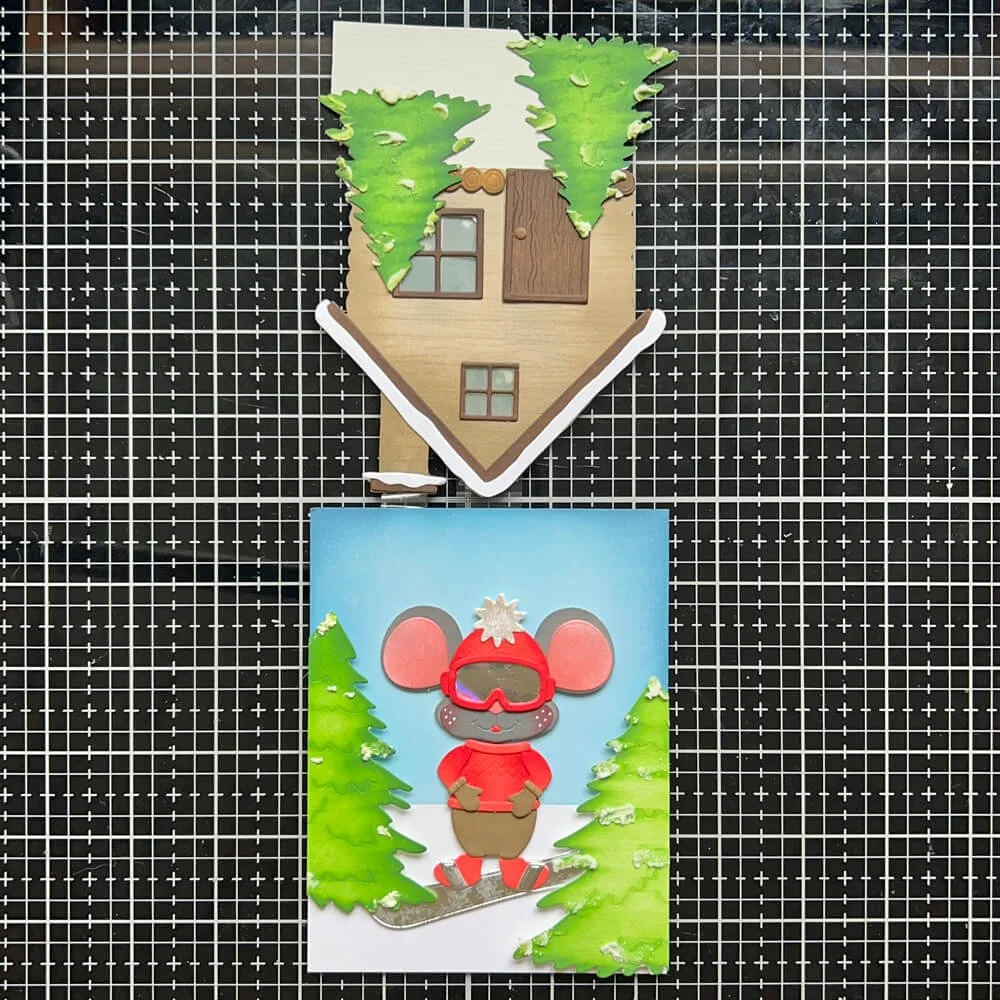
Step 5: Mirror the Elements for the Inside. To keep the magic going when the flap lifts:
• Die cut, ink blend, and assemble another cabin and two small trees.
• Ink blend the backs of each piece so they look finished from every angle.
• Trim the overhanging parts of the large trees, so they don’t interfere with the flap mechanism.
• Make sure you align the front and back cabin and pine trees.
Step 6: Reveal the Surprise
• Position the snowboarding mouse in the center of the card front, hiding him completely behind the flap.
• Adhere him in place and enjoy the charming surprise he brings when revealed!
Step 7: Finishing Touches
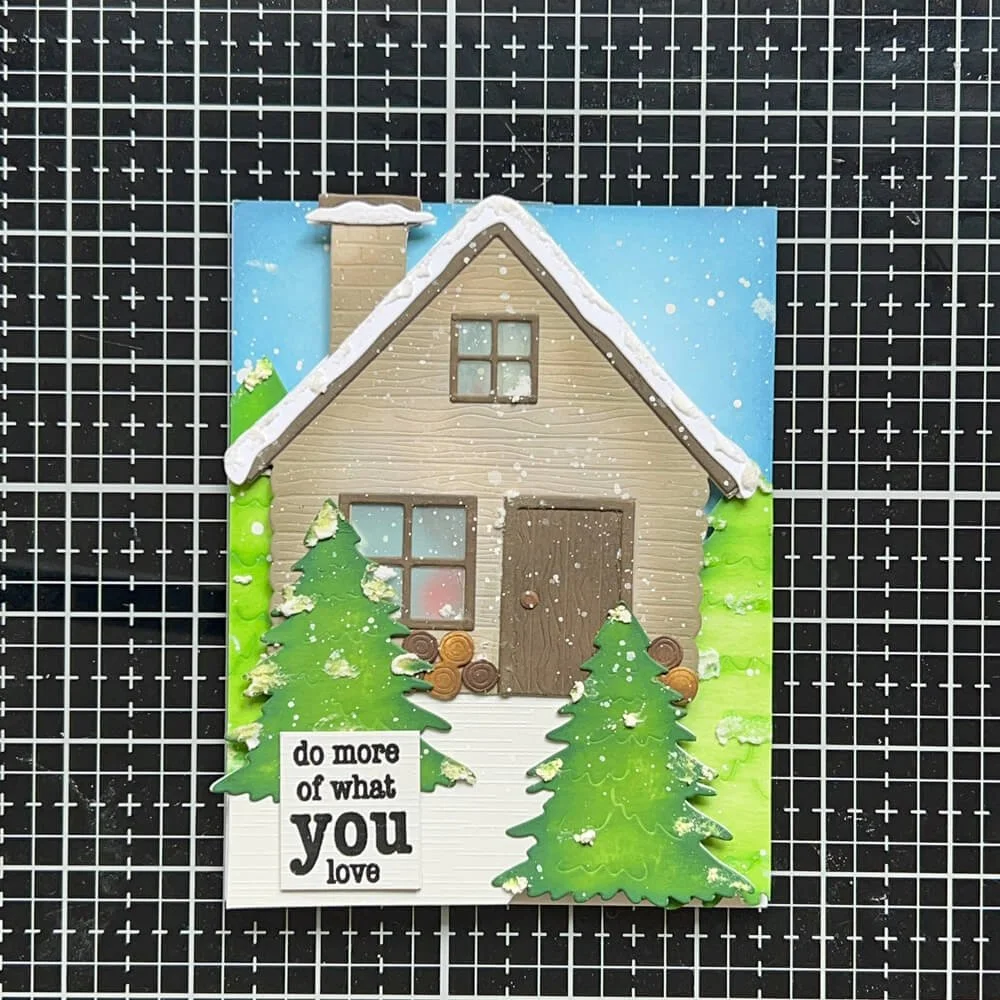
• Add white splatter to both sides of the cabin and to the card front using white paint, ink, and embossing paste to mimic falling snow.
• Mount your card front to the top of the folding white card base
• Finally, add a sentiment and your interactive winter card is complete!


This card combines cozy winter charm with playful interactivity—perfect for bringing a little extra joy to someone’s mailbox. The dies from the Living It Up collection are full of personality and detail, making it easy to tell a story through paper. Thanks for crafting along with me! I hope this inspires you to create your own whimsical winter scenes. Don’t forget to share your version—I’d love to see what you make!
Make sure you share your projects with us in our Facebook Group HERE. We love to see what you create!
Never miss a tutorial and sign up for our emails today HERE.
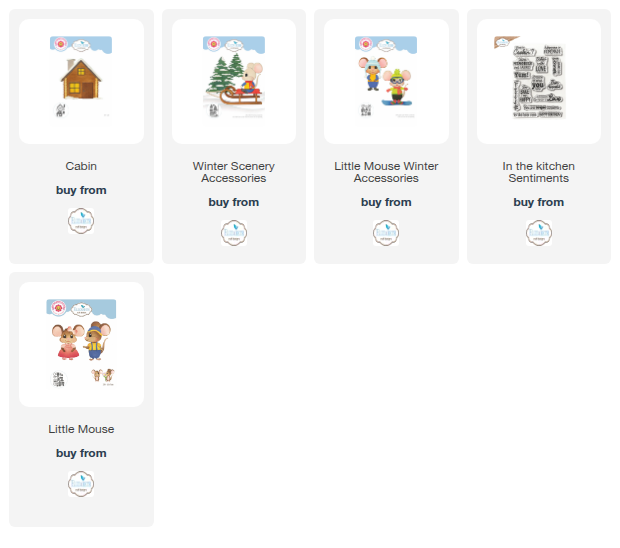
Elizabeth Craft Designs Products Used:
Other products needed: White and light grey cardstock, Vellum, Inks in shades of blue, green, brown, red, and grey, White embossing paste or paint, Acetate strips, and Foam tape.