How to Emboss Velvet with Dies
Are you a crafter who loves finding new ways to use your dies, or maybe you’ve always wanted to learn techniques to include fabrics in your projects? You’re not alone! In this tutorial, we’ll show you how to create beautiful embossed velvet. This technique is perfect for adding interest to any project, or, as Denise has done, making amazing gift card holders. The techniques in this tutorial are a great way to get more from your stash.

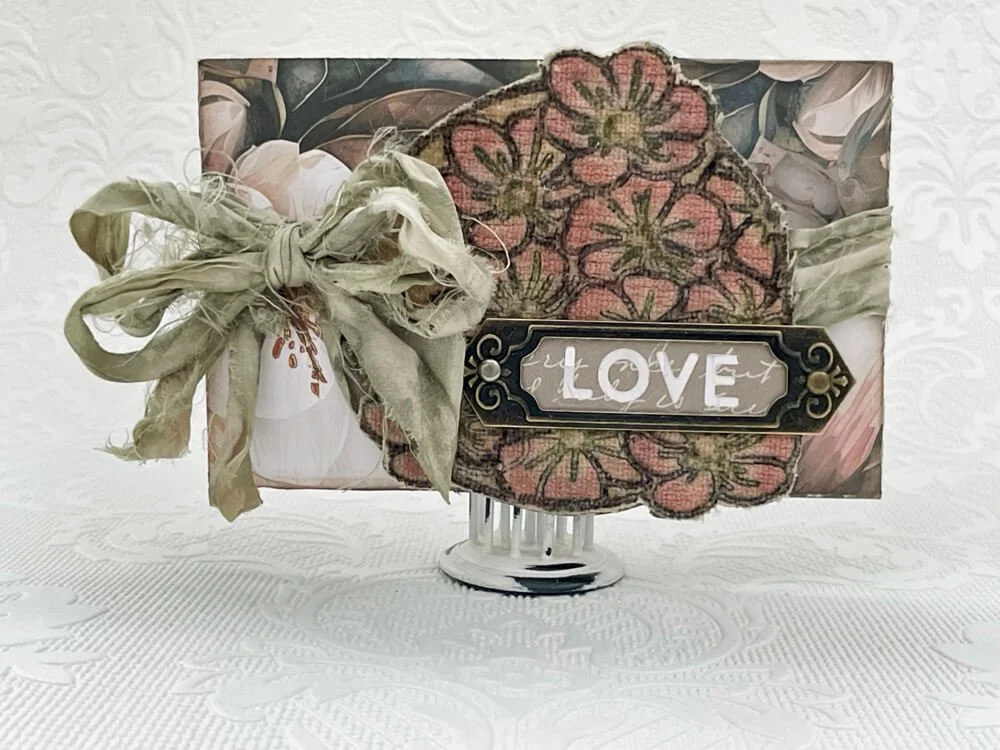
Hi paper crafting friends – this is Denise with PaperKraftD. Have you ever wondered if there are other ways you could be using your dies? Today I’m sharing a technique to stretch your stash and create some beautiful embossed velvet with your Elizabeth Craft Design dies to add texture and interest to your planner, journal, cards, and more. In this project, I demonstrate how embossed velvet can be used as the focal point closure for a gift card holder.
Step 1: Die-Cut Cardstock
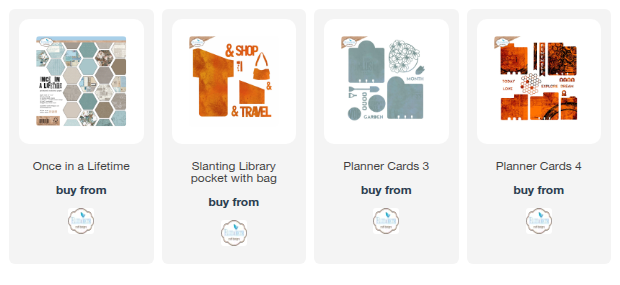
For this project, select a 12” x 12” double-sided piece of cardstock with a print on one side and a coordinating solid on the other, like this cardstock from the Once in a Lifetime Paper Pack that has a flower print on one side and a brown solid on the back. Fold the cardstock in half horizontally, with the flower pattern on the outside. Place the library pocket die from the Slanting Library Pocket with Bag set (2255) and the flower cluster die from Planner Cards 3 set (2225) on top of the folded cardstock and cut. You will end up with mirror-image die cuts of the library pocket and flower cluster. The library pocket with the ‘downhill’ slant is (A) and the one with the ‘uphill’ slant is (B).

Step 2: Trim Cardstock
Cut a ⅝” x 3” rectangle from brown script cardstock. Cut the ‘love’ die in the center of the rectangle from Planner Cards 4 (2226). Cut another ⅝” x 3” rectangle from the flower paper with as much white on it as possible. Cut two 4” x 4” squares – one from any heavyweight cardstock you have on hand (you won’t see this in the final project), and one from grey script cardstock. Finally, cut a 3.5” x 5.25” rectangle from the grey script cardstock.


Step 3: Fold Library Pockets
Fold the library pocket (B) in the normal way. Fold library pocket (A) with the flaps backward. Note: fold flaps so they are flush with the cut line.


Step 4: Assemble Gift Card Holder
Ink the edges of the library pockets before assembly, if desired. Position library pocket (B) on the right and library pocket (A) on the left. Slide flaps of (A) over (B) as shown. Position it so that it just slides under the slanted flap of (B). When satisfied with the positioning, glue flaps of (A) on the back of the gift card holder, and then fold and glue (B) flaps to the rear of the card as well.

Step 5: Assemble Bookplate
Use the negative space from the ‘love’ die. Glue the brown script .5”x 3” ‘love’ die cut on top of the white .5” x 3” strip of flower (mainly white) cardstock. Remember to put the dot in the middle of the ‘o’ in ‘love.’ Center a metal bookplate over the ‘love’ layered die cut and attach with brads. Trim around the bookplate if necessary so paper isn’t visible around the edges.


Step 6: Emboss Velvet with Die
Protect your surface (don’t use any surface you wouldn’t normally iron on). Pounce Versafine Clair Nocturne (or any Versafine ink pad) over the entire cut side of the flower cluster die. You need a very juicy ink pad for this process. Lay die (cut side up) on a heat-resistant iron-safe surface. Center 4” x 4” piece of beige velvet, nap side down, over the die. Top with parchment paper, if desired, to protect the iron. Cover with a hot iron for 3.5 minutes (use linen setting). DO NOT MOVE FABRIC OR IRON. This embosses the velvet and sets the ink in one step. When completely cool, lift the fabric straight up when removing. Note: acetate/rayon velvet blends work best. You may need to experiment a little with your particular fabric and iron to get the desired results.

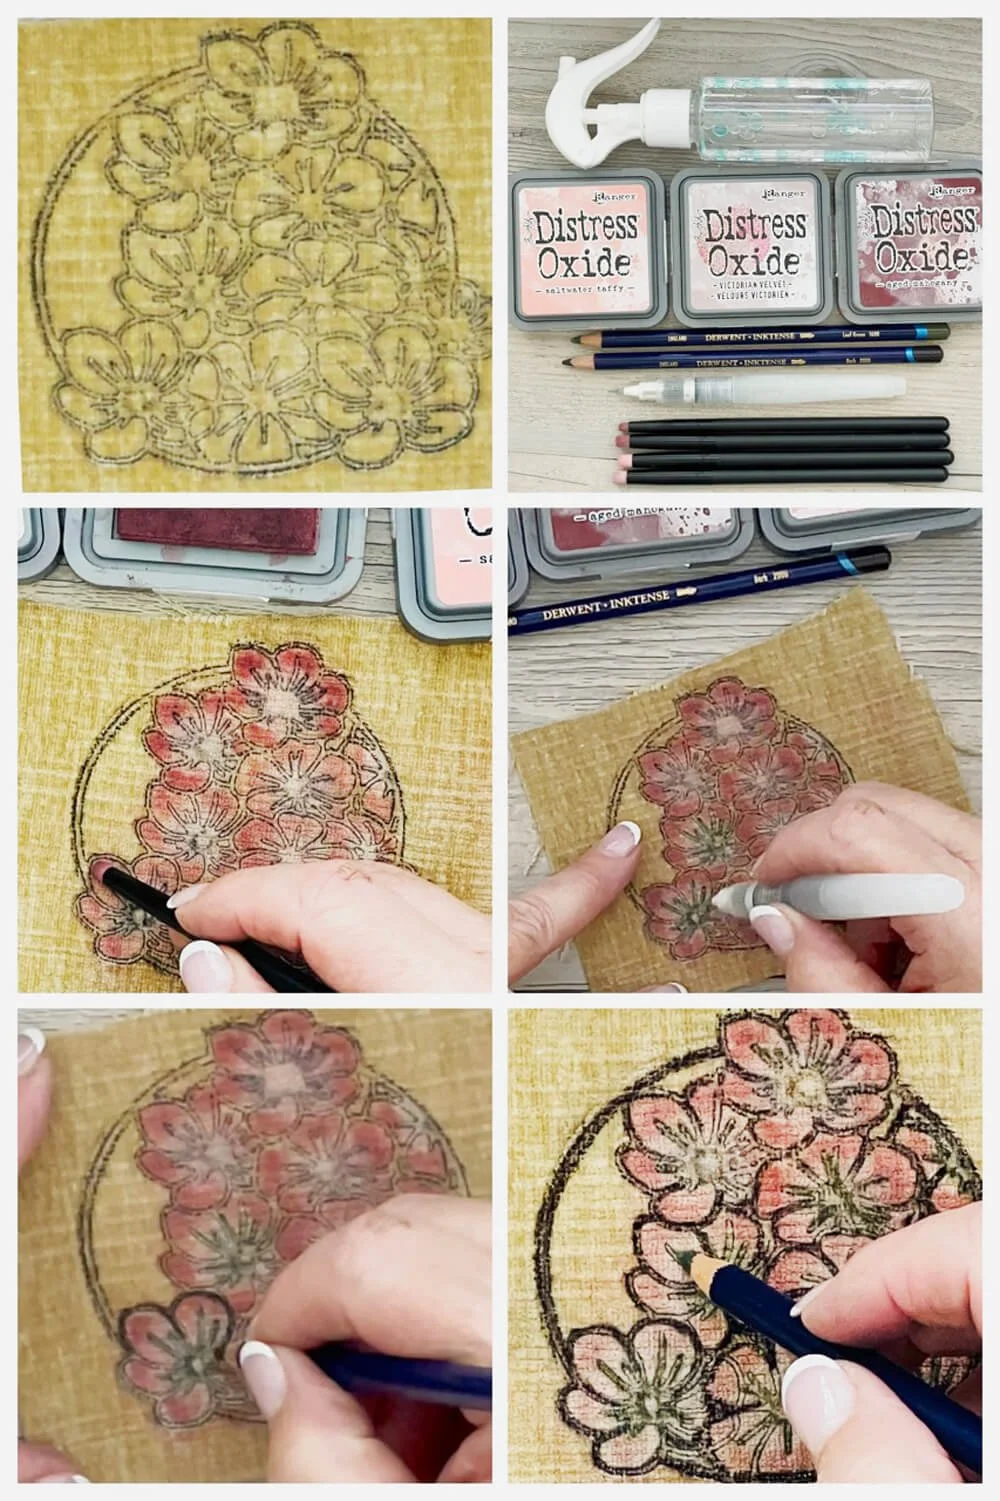
Step 7: Color Velvet Flowers
Use ink brushes to apply Distress Oxide Inks (or pigment ink that’s permanent on fabric) to flowers. I chose shades of pink and rose. Start with the lightest ink near the center and darkest at the edges. You can build up color by adding more color at the edges with a fine ink brush. You can set the ink by spritzing it with water and drying it with a low-heat dryer ASAP. Ink will most likely fade a bit and bleed into areas where you don’t want it, so use a water brush and a clean cloth to remove ink in those areas. When dry, draw over lines in the center of the flowers with a water brush, followed by the green Inktense watercolor pencil. Next, draw over the outlines of the flowers with the water brush, followed by the brown Inktense watercolor pencil. Let dry completely. If you’re impatient, you can throw the velvet in a hot clothes dryer for a couple of minutes like I did.
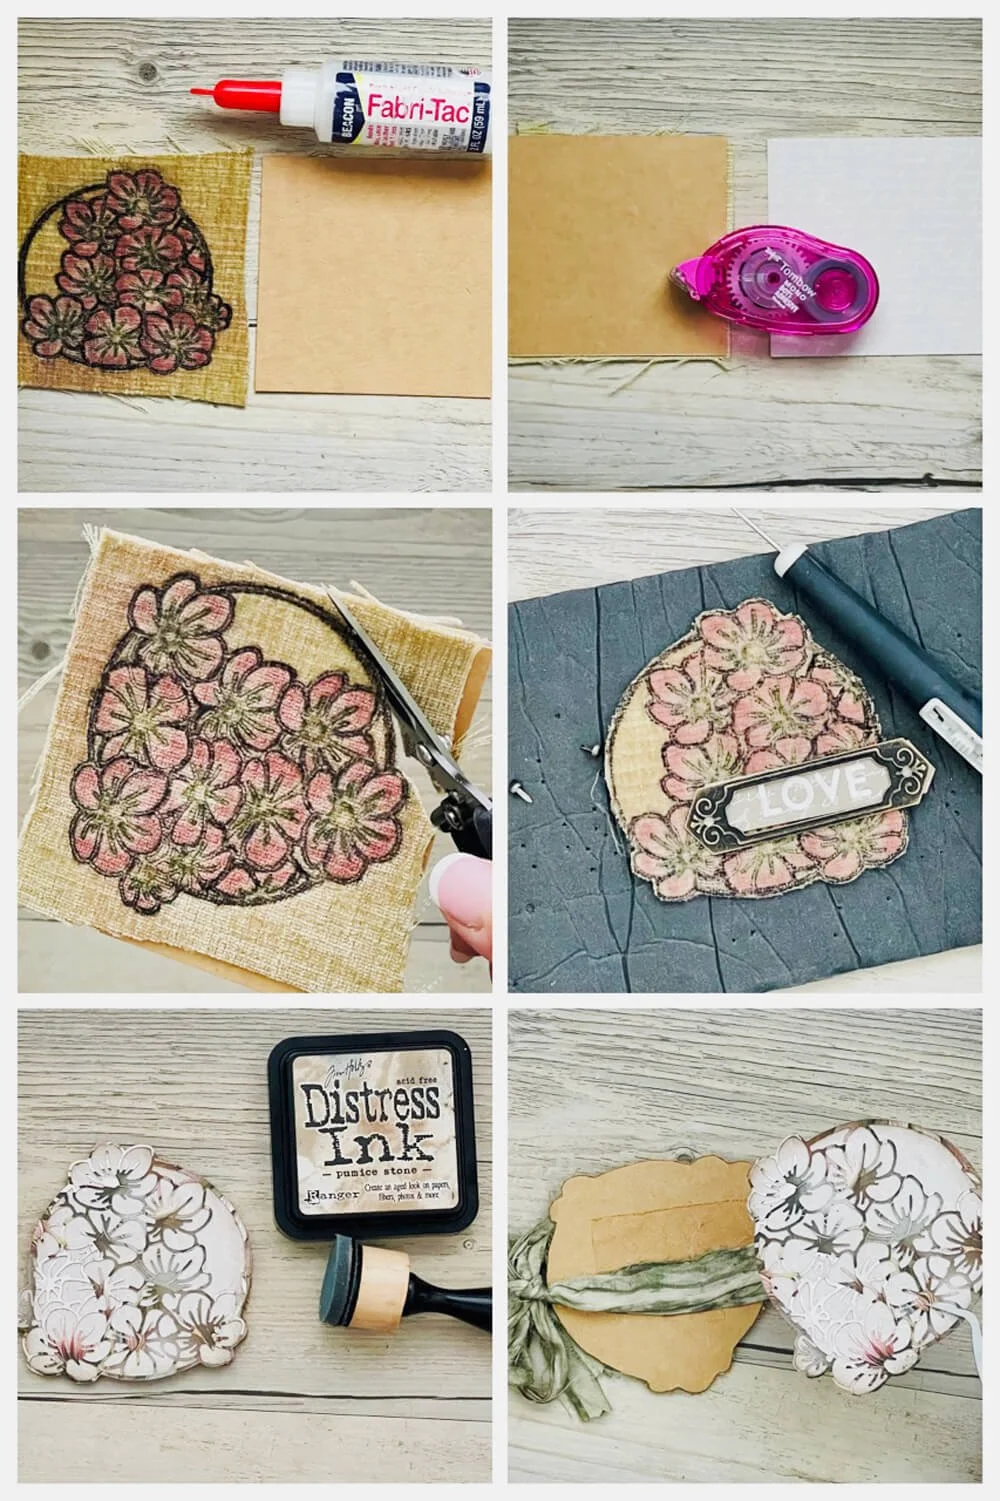
Step 8: Assemble Velvet Flower Closure
Use fabric glue to adhere the back of the fabric to the 4” x 4” piece of heavyweight cardstock. When dry, use temporary adhesive to attach the 4” x 4” gray script cardstock to the back of the heavyweight cardstock. Fussy cut around flower cluster: cut through velvet, heavyweight cardstock, and gray script cardstock. Ink the edges of the gray script cardstock if desired, and glue the flower cluster die cut (A) to it. Remove the gray script cardstock from the back of the velvet flower cluster. Attach the bookplate to the front of the velvet flower cluster with brads. Turn over to the back and glue a 26” ribbon tie (I used doubled-up sari silk) between the heavyweight cardstock and gray script cardstock.
Step 9: Embellish Gift Card Holder
Glue grey script cardstock 3.75” x 5.25” rectangle to the unfinished back of the gift card holder to hide the flaps. Trim if necessary and ink edges if desired. Glue the remaining flower cluster to the back of the gift card holder for decoration.


Step 10: Finishing Touches
After inserting your gift card, writing a note to the recipient, and closing the holder (by tucking the card front under the right slanted tuck), tie the velvet flower cluster to the front of the gift card holder and…Voila! You have a lovely gift card holder for any occasion.


This fun velvet embossing technique is incredibly versatile. For a more subtle look, no ink is needed at all on the die or to color the flowers. I used ink to demonstrate what is possible. For a bolder look, you could even try the non-cutting side of some dies. There are so many ways you could use this technique with different dies in your projects. I look forward to seeing what you come up with. Kraft on! ❤️ Denise