
How to Assemble the Cats From the Meet the Cats Collection
Do you love making cards with cute characters? Or maybe you’ve just picked up the Meet the Cats Collection and aren’t sure where to begin? In this tutorial. You’ll learn how to assemble the base cats from the collection, step by step. Once you’ve got the basics, you'll be ready to customize your cats with different colors, accessories, and expressions. So you can add them to all your projects, making the perfect cards and gifts for everyone in the family.
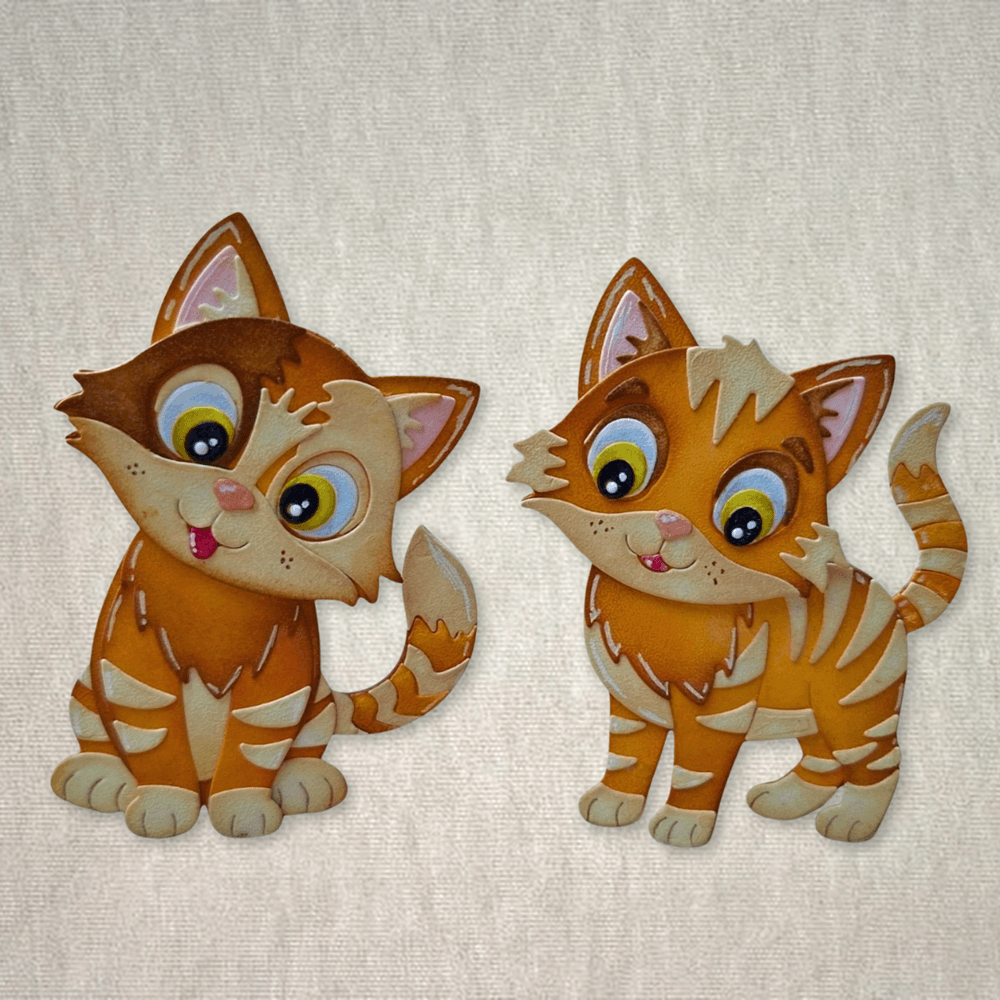
Hello everyone! José here with a ‘how-to’ on assembling the Cats from the NEW 'Meet the Cats' collection. I know it can sometimes look complicated when you see all those little pieces and wonder where they all go, and that it might hold you back from getting started with your beautiful dies. I hope this how-to shows you clearly how to assemble these super cute cats! The more often you do it, the easier it gets. Have fun!
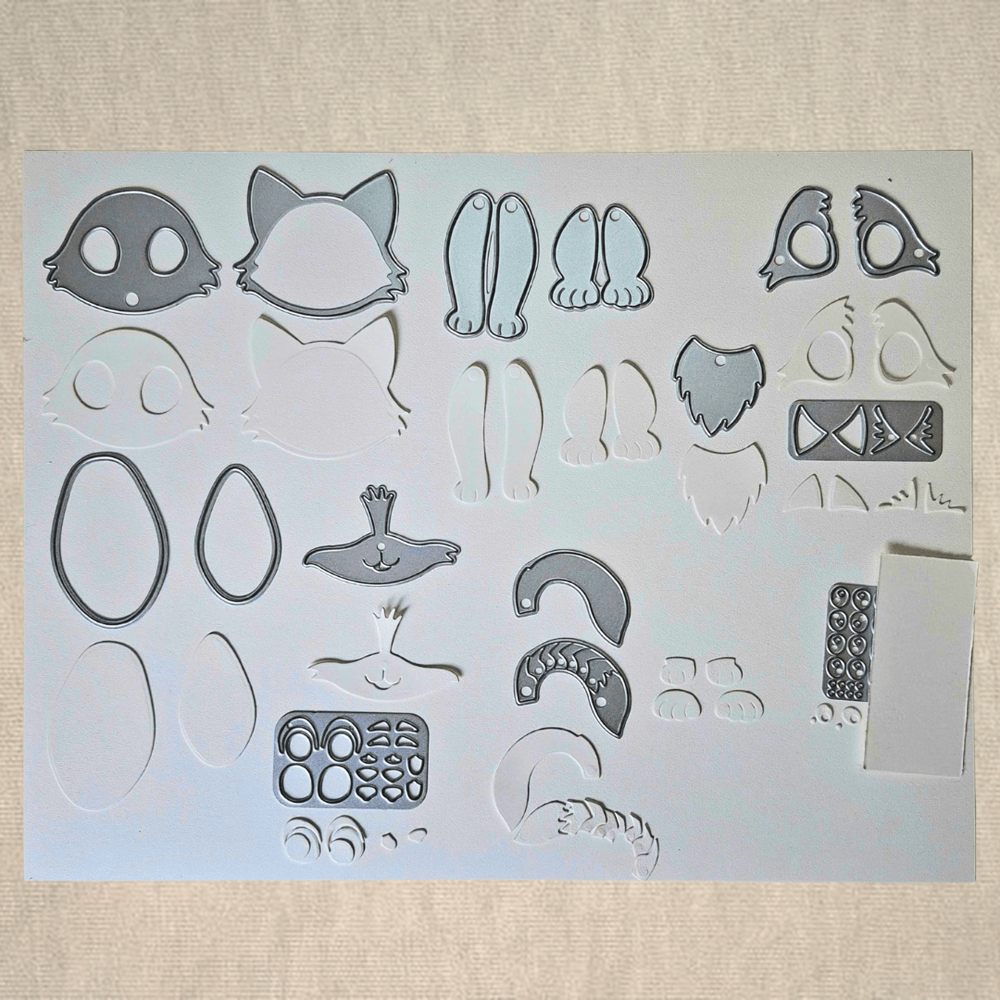
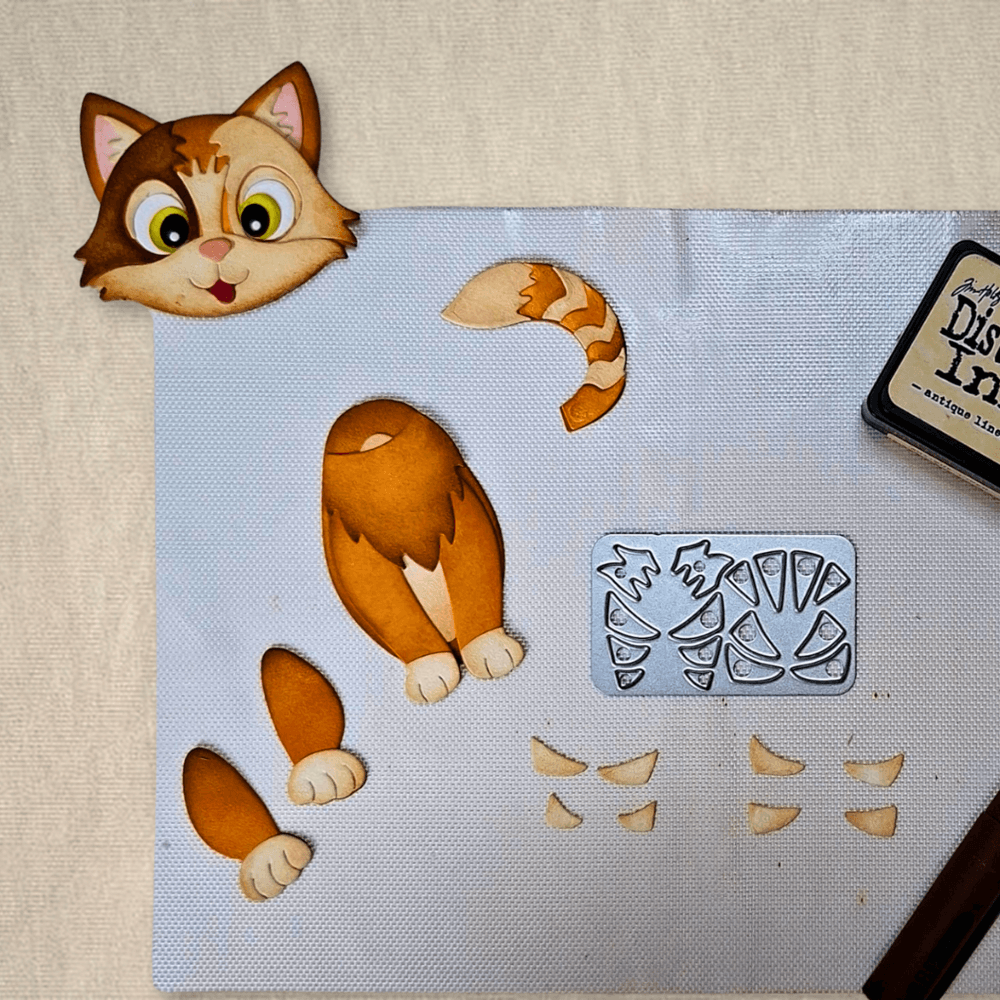
Step 1: Let’s start with the sitting cat. Use all the dies you see die-cut in the photo, except for the stripes, which are die-cut later. Die-cut everything from Soft Finished Cardstock. Start by inking all the cat's pieces in the same color. I used Rusty Hinge and Gathered Twigs as the base colors of this cat. You can use Distress Oxide or Distress Ink; I used both. I started with the Rusty Hinge as my base color, then darkened it in certain places with Gathered Twigs.
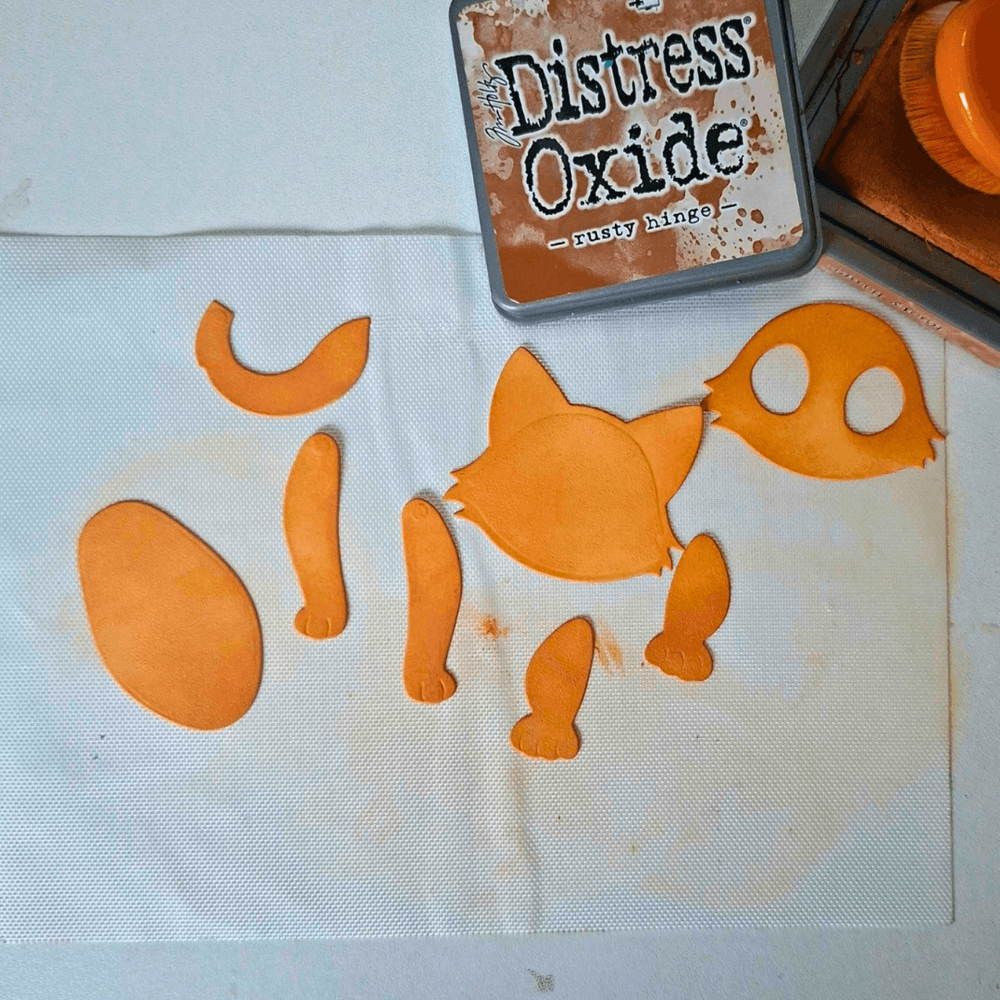
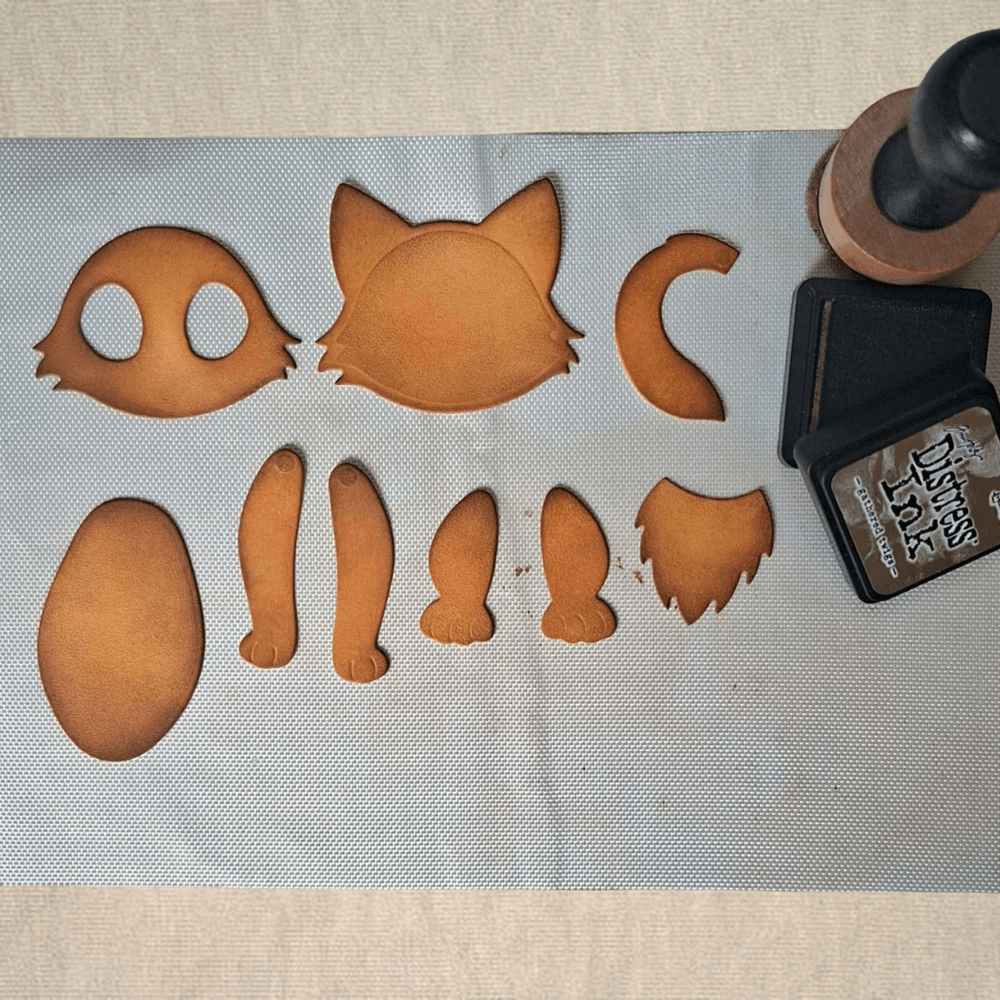
Step 2: Next, use the color Antique Linen to color the remaining parts of the cat. These are the next layer of the cat, the feet for the paws, the snout, the eyelids, the loose hairs near the ears, 1 layer for around the eye, and the stripes on the tail (Note: I color the tail stripes alternately, one part with Antique Linen and one part with Rusty Hinge.) I forgot these stripes in step 1, just like the other layer for the eye, which I will color in with Gathered Twigs.
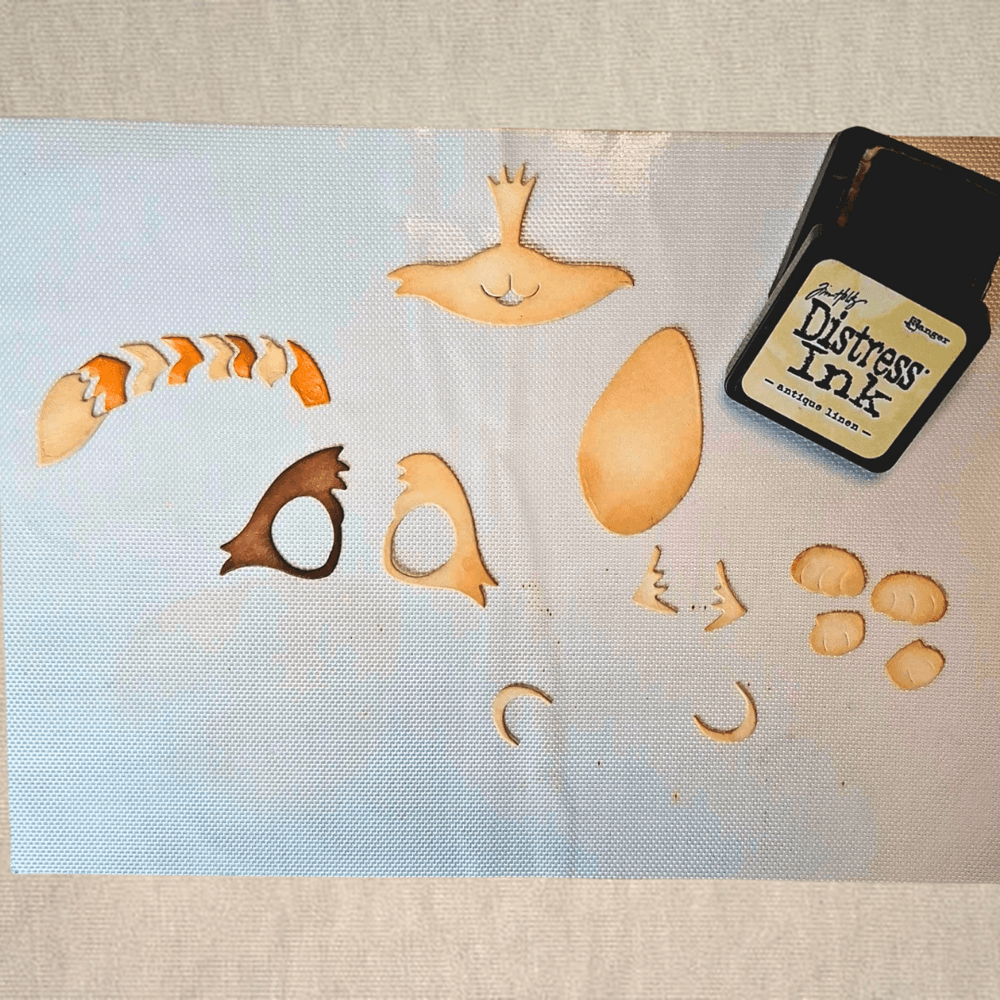
Step 3: Now color the eyes, nose, and the insides of the ears. I already did the upper eyelids in step 2 with Antique Linen; I am leaving the larger inner part of the eye completely white for now. I will add a shadow here with markers once the pupils are in place. I will color the smaller circle that goes on top of that with Crushed Olive Distress Ink. For the pupils, I am just using a black marker. I am also coloring the tongue red and the nose rosy. I will do the inside of the ears with Spun Sugar Distress Ink.
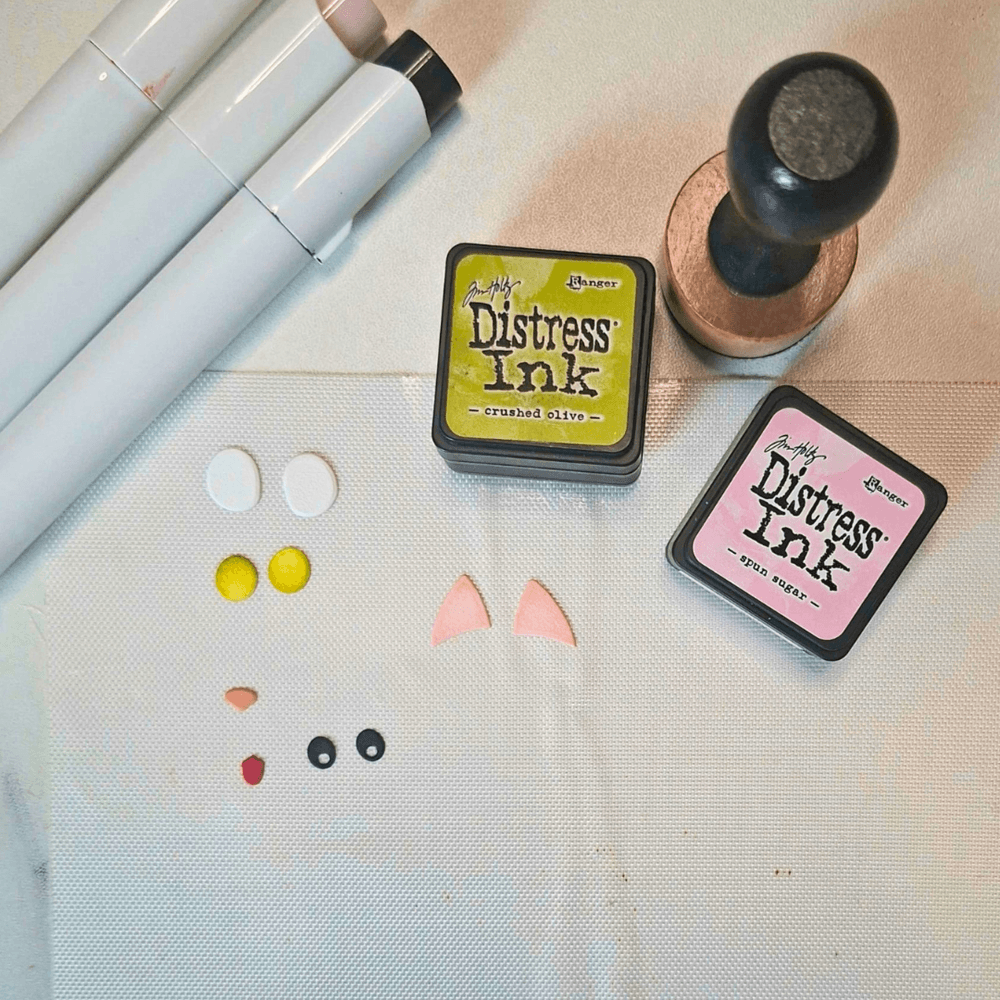
Step 4: Time to glue down all the parts that belong together, such as the paws and eyes. For the head, I find it easiest to glue the inside of the ears first (don't forget the little hairs), then the head layer, then the eyes, the layers around the eyes, and finally the snout, nose, and mouth layer.
Step 5: The cat's head can now be fully assembled. Now that the insides of the ears are glued down, I can stick the head layer over them. After that, I will start on the eyes. Once both eyes are glued on, I will stick the layers around the eyes, followed by the snout layer with the mouth and nose.
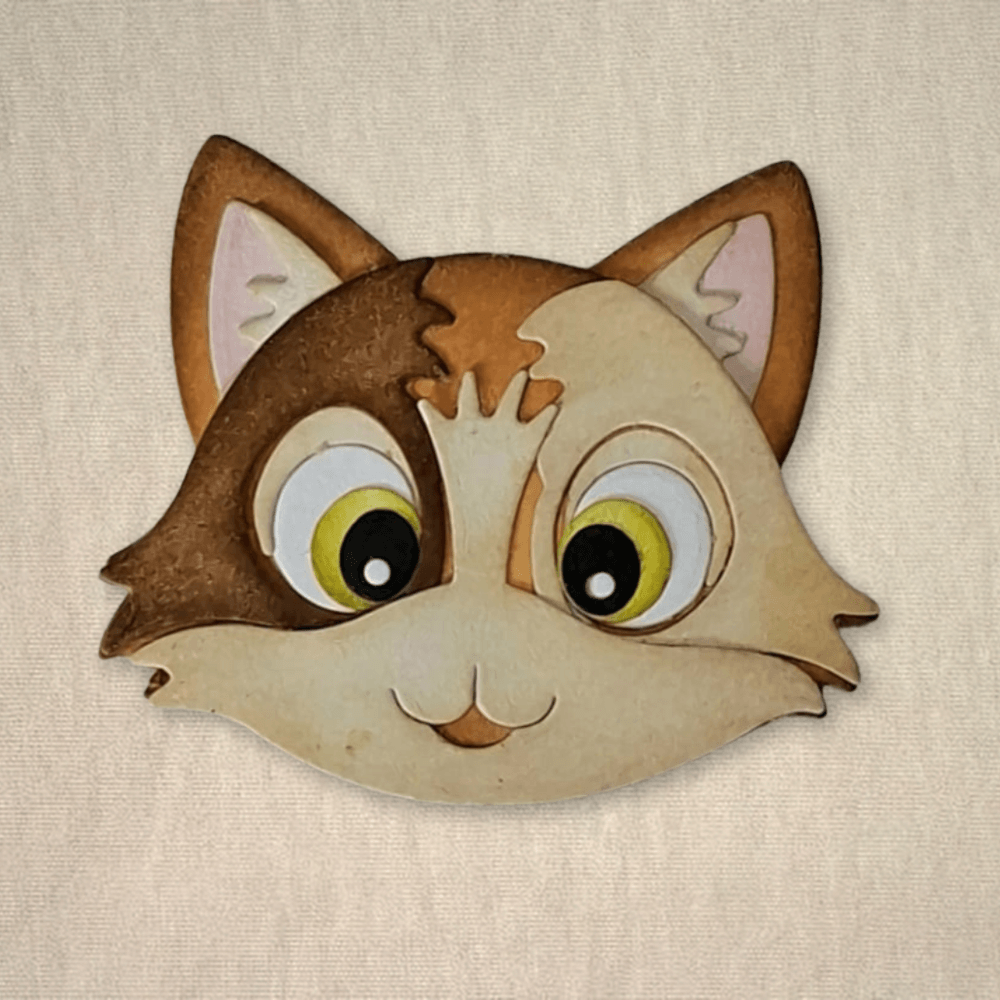
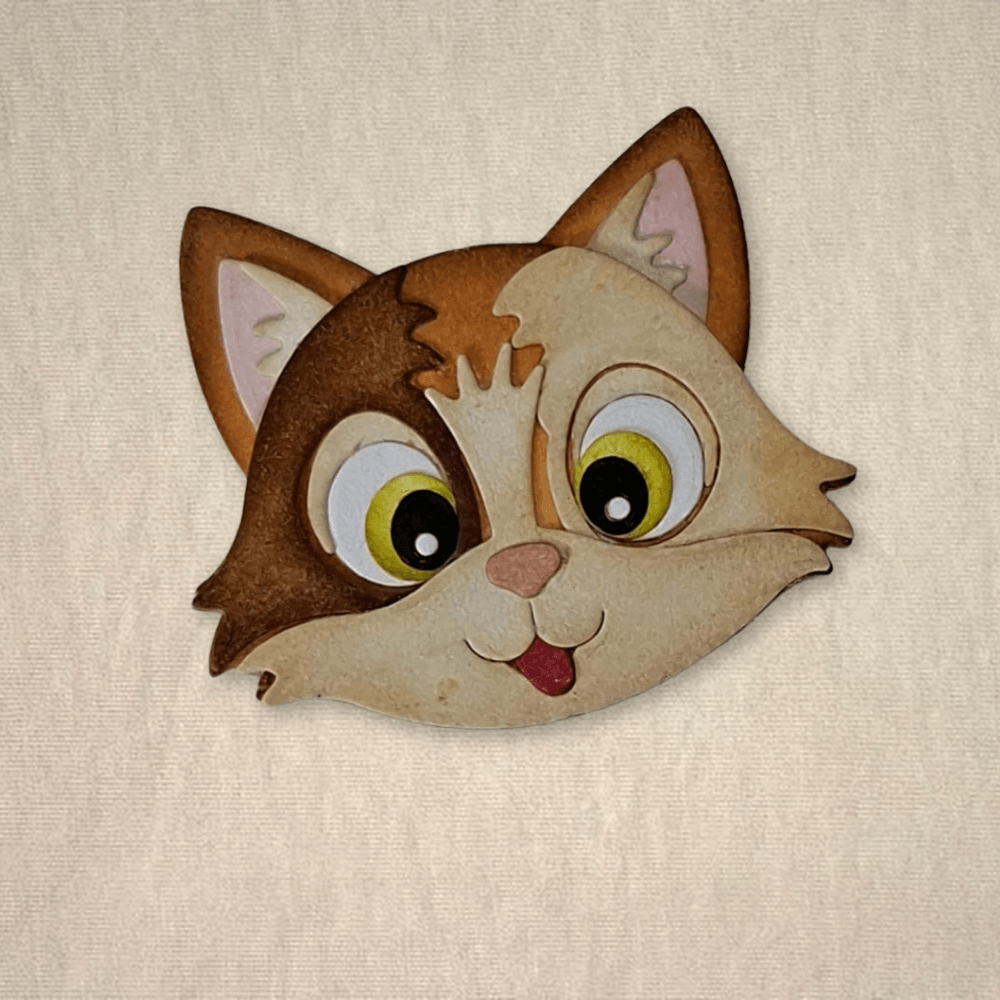
Step 6: The head is finished now; time for the body. The 2 longer legs are the front legs. You can follow the body's shape; the legs follow it nicely. I will glue the fur layer on top of this. I will place the shorter legs (hind legs) at the back of the body, but before I do that, I want to add a few things first.
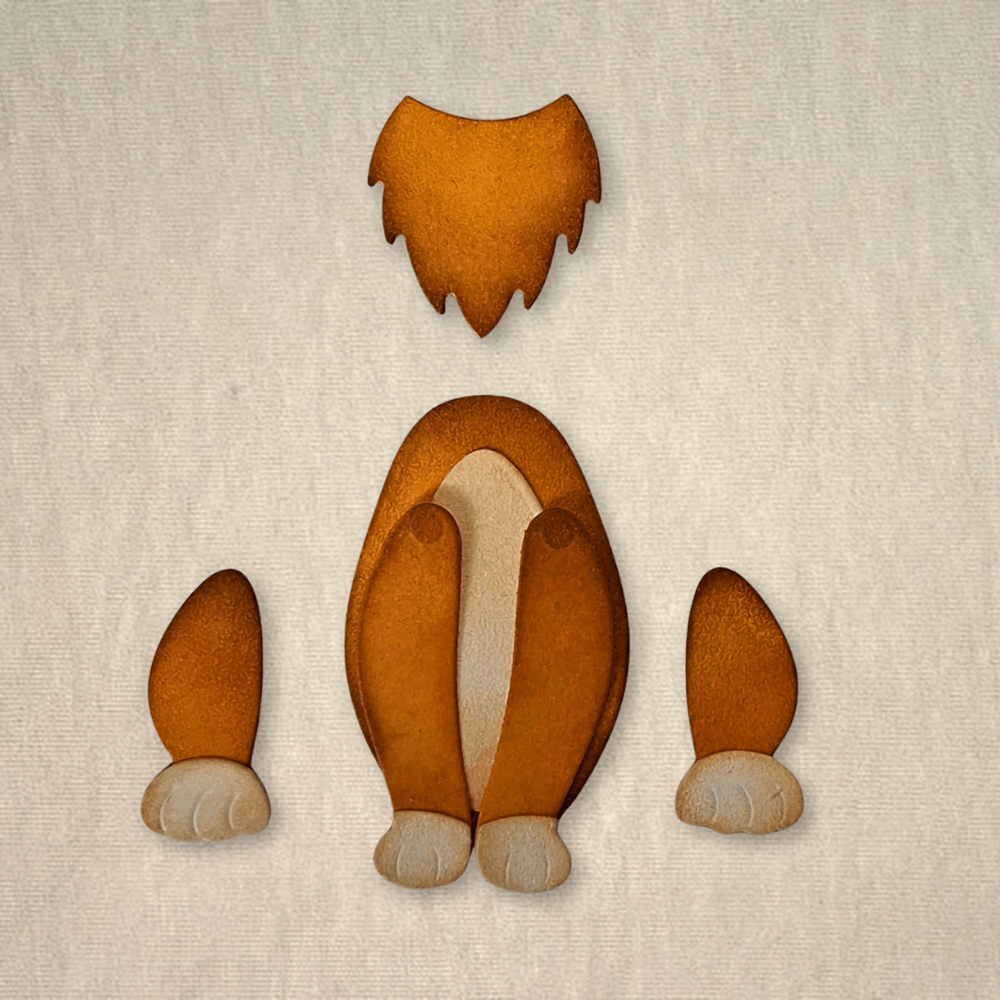
Step 7: I go over the embossing lines on the paws with a very fine brown 0.1 fineliner so they are just a little more visible. This is also the point for me when I decide that I want to give my cat some extra stripes in his fur, and there is a very nice die for that in the set. Of course, you can do this from the start, but I always decide later if I like adding something. I color them in with Antique Linen and stick the stripes where I want them. Once I have done that, I secure the hind legs in place and attach the tail behind them; you can choose the tail's position yourself.
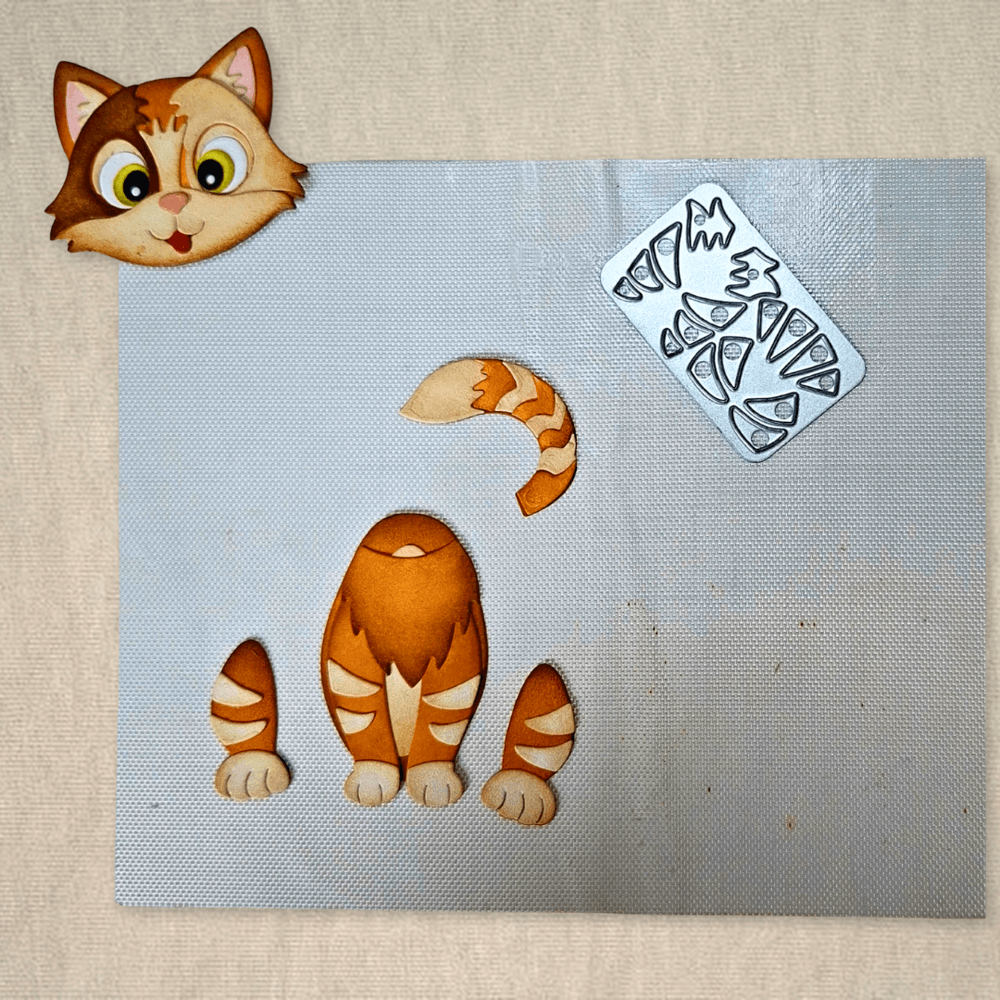
Step 8: Now it’s time to attach the head to the body. Here too, you can decide what you like; I always like it when the head is tilted slightly. So cute! In this final step, I also add some extra details, though this is of course optional. I want a bit more depth in the eyes, so I use two colors of alcohol markers for that (a very light blue and lilac). I carefully color on the whites of the eyes with them. With a white gel pen, I add an extra sparkle to the eyes and also add some highlights to the cat. I do the same with the brown fineliner on the cheeks. Once the white gel pen has dried, I go over the eyes and the nose with a transparent glaze gel pen for an extra subtle shine. Isn't the result of this sitting kitten super cute!
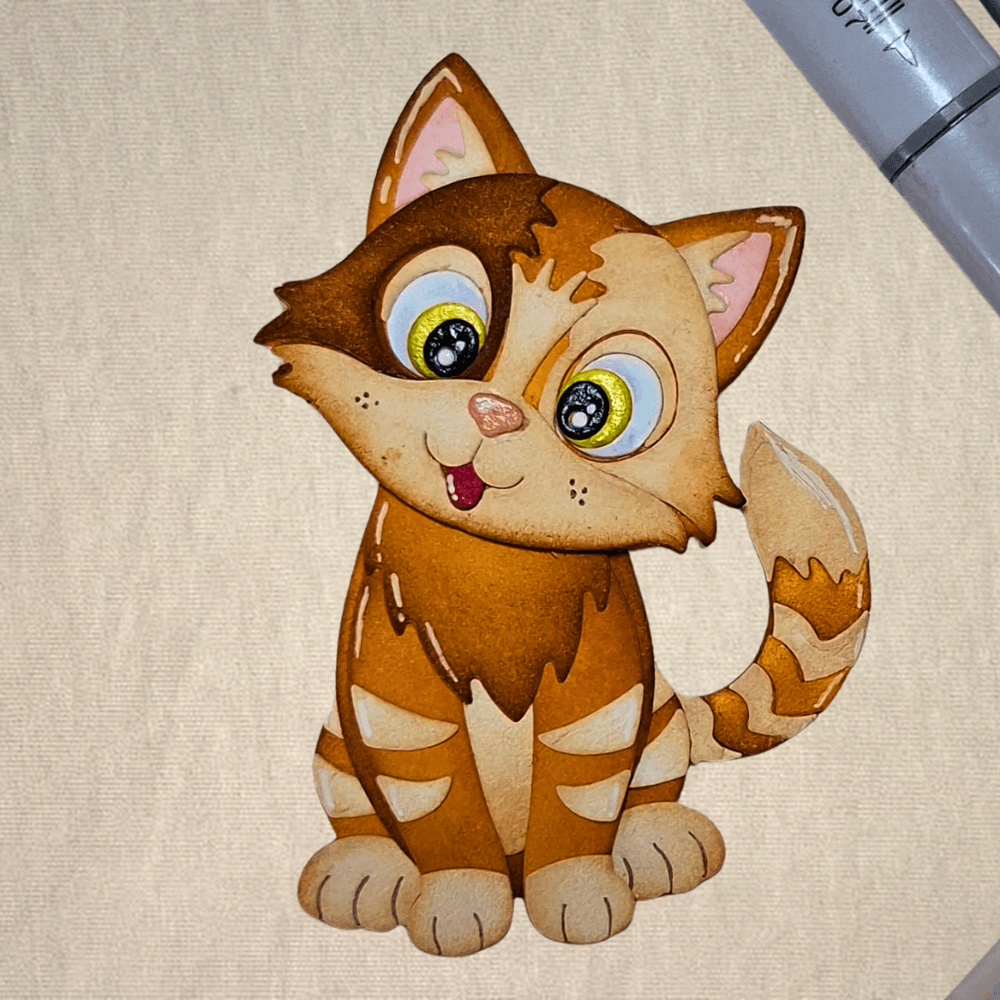
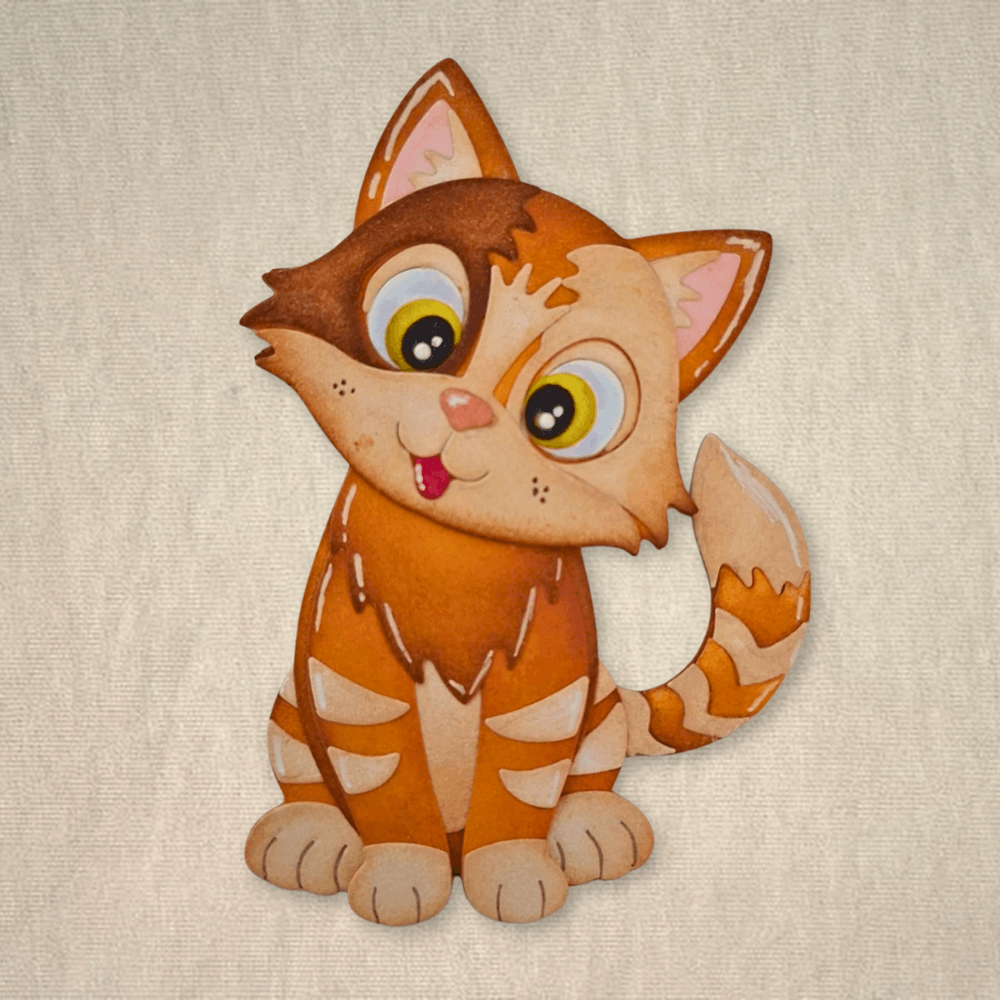
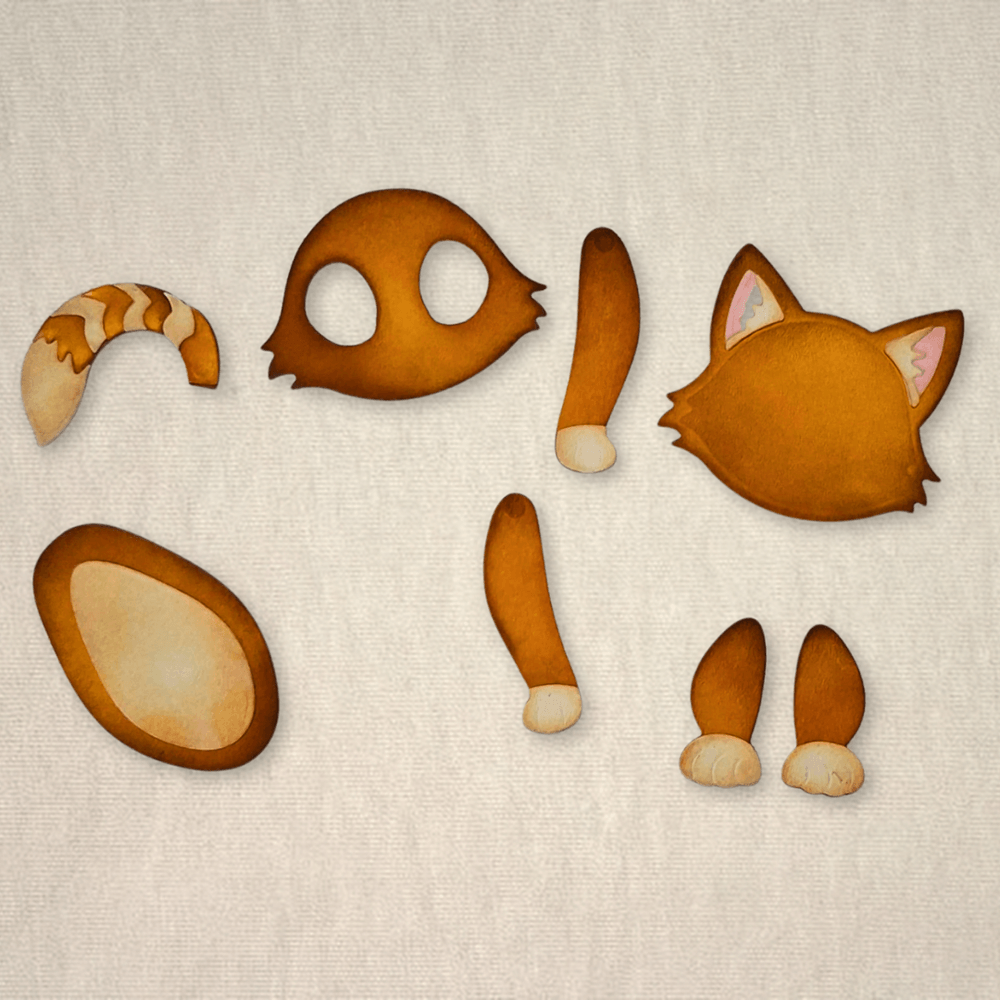
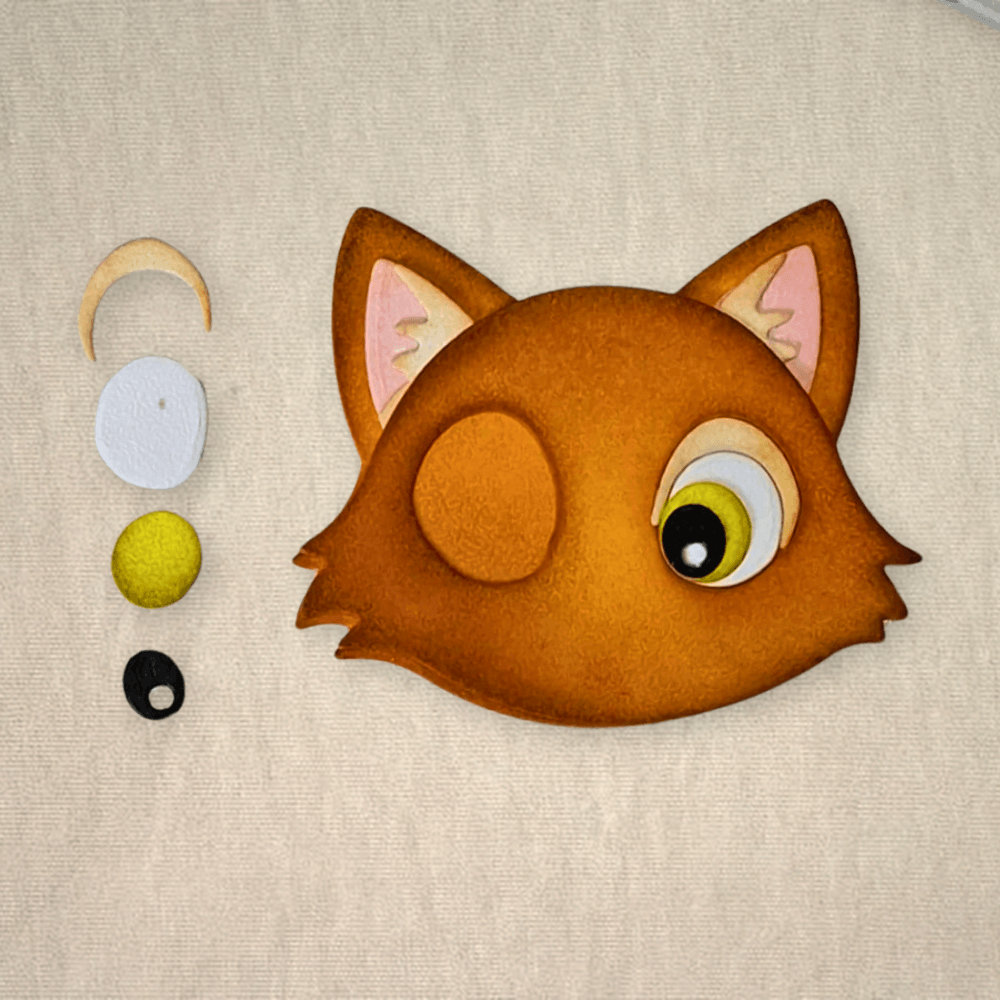
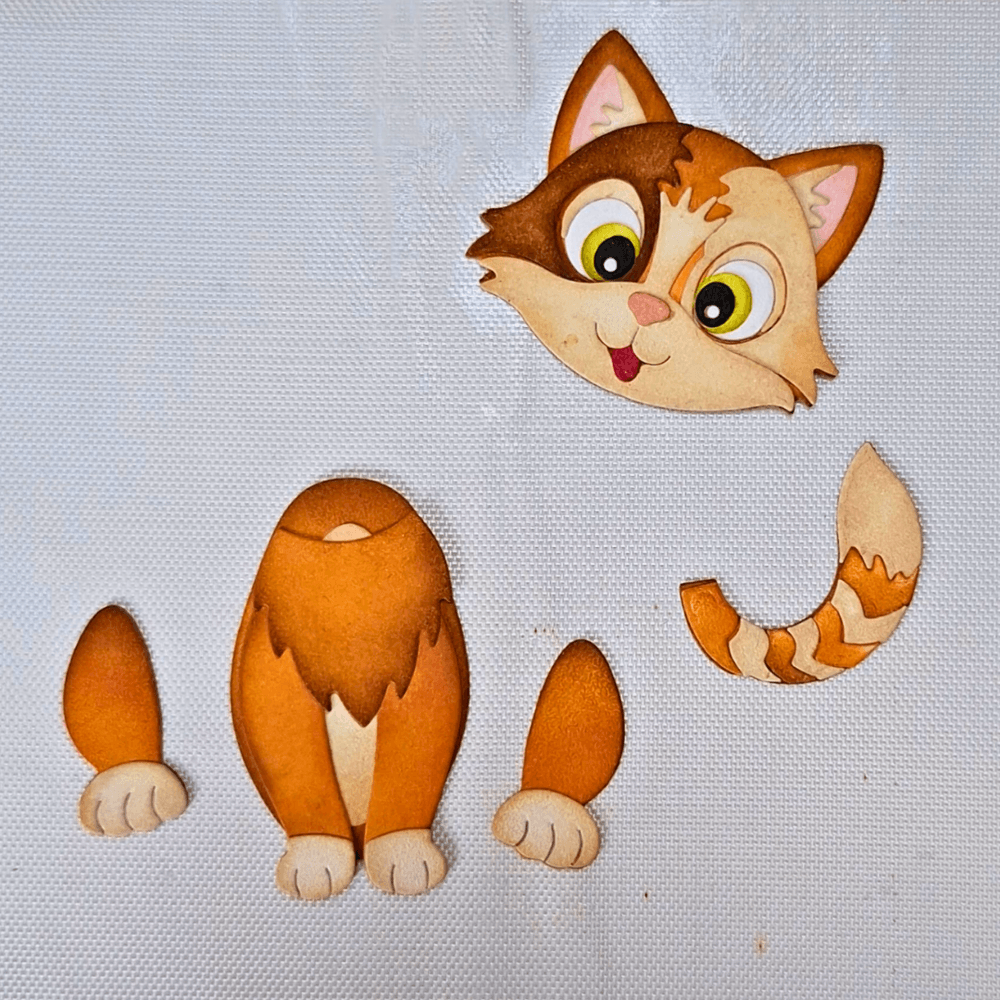
Step 9: Because the cats are completely new to the collection, I decided to also show how to assemble the standing cat. For this, I use a few different dies for the head than the ones I used for the sitting cat. You can see which dies I used in the photo. For this cat, I am using the same colors for convenience. I start again by coloring the base with my base colors, Rusty Hinge and Gathered Twigs. I color the remaining loose parts with Antique Linen, and I now do the hairs on the ears and eyelids with Gathered Twigs. For this cat, I also create eyebrows, also in the color Gathered Twigs. The inside of the ears with Spun Sugar, the eyes with Crushed Olive, and the pupil, mouth, and nose again with a marker. For this cat head, I chose to use the stripe/fur die right from the start so that I can give an idea of how to use these pieces. In the photo, everything is colored in with the mentioned ink colors, and I have arranged everything as well as possible so you can see how to place the pieces on the cat.
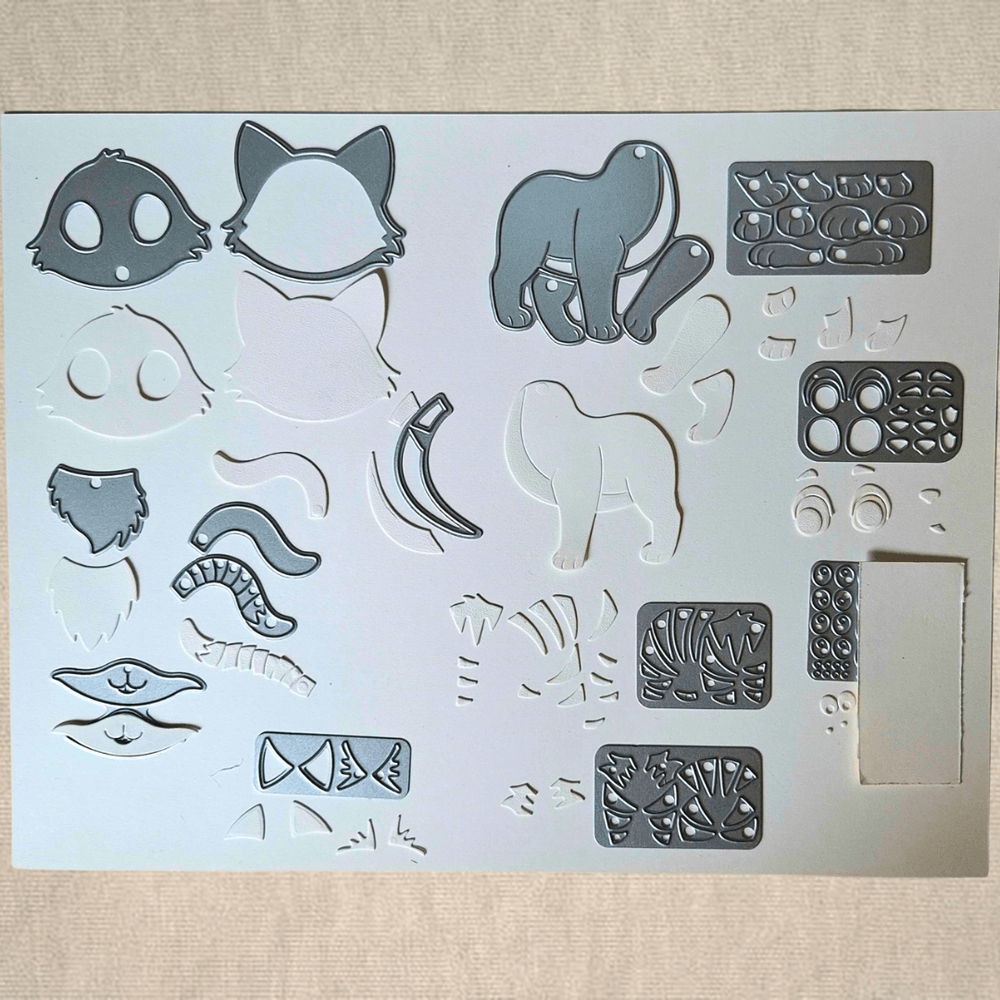
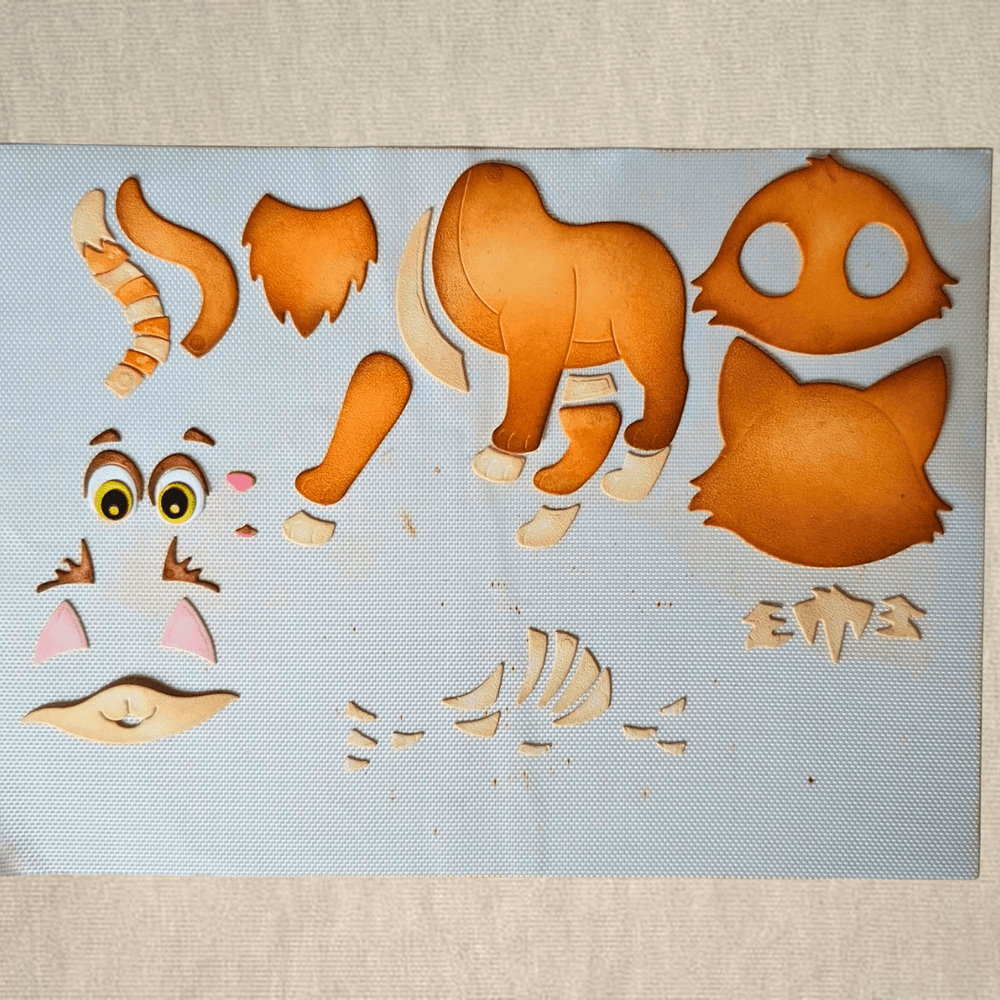
Step 10: I am now going to first stick all the loose pieces onto the cat. I am doing this in the same order as the sitting cat, so I start with the head by sticking the inside of the ears, then I stick the layer of the head on top, followed by the eyes and eyebrows, the mouth and nose, but now I am also adding the fur/stripes right away. Now everything on the body can be assembled, including the legs and the tail. The stripes you make on it follow the shape of the body. You will quickly figure out when the pieces fit. The narrow moon-shaped piece and the very small piece belong on the cat's belly/chest. I'm sorry, I think I forgot to take a picture of all the glued-on loose parts on the body. I hope it is also clearly visible in the photo (step 11) where the cat is already assembled.
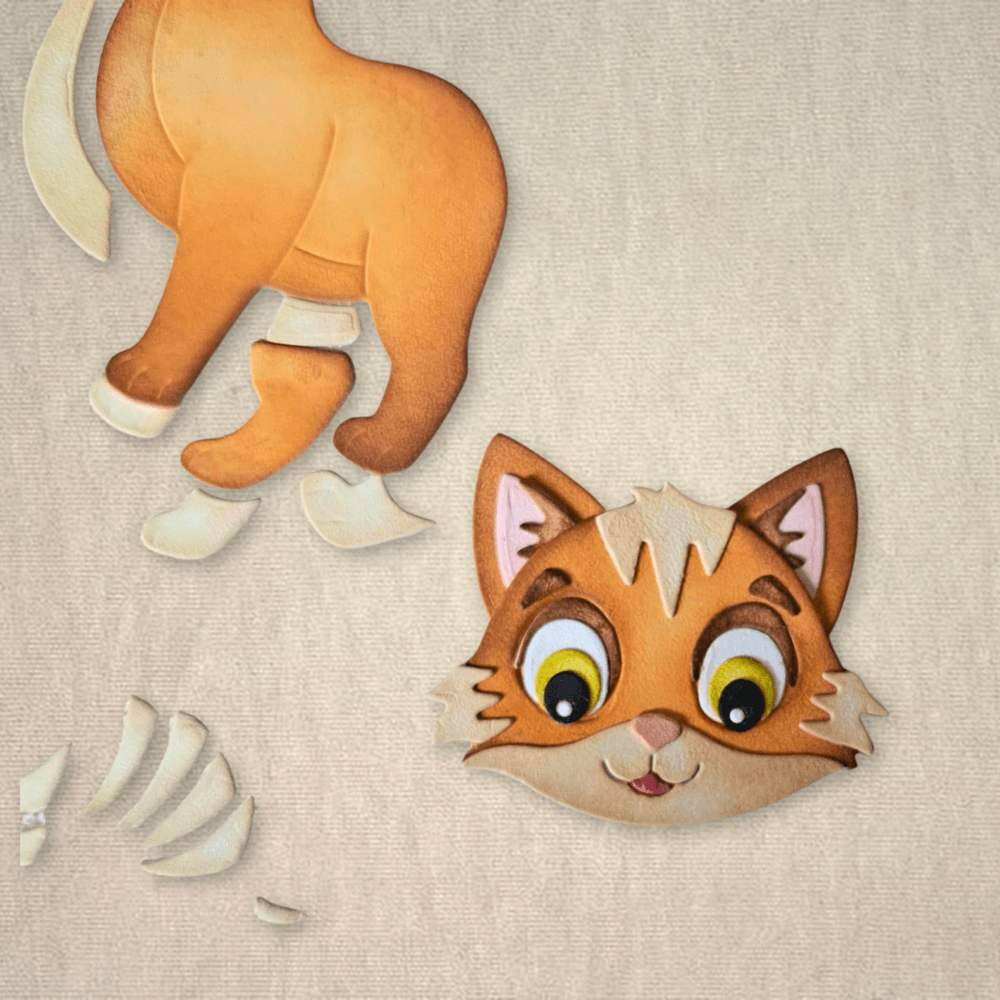
Step 11: Now that all the pieces are attached, I'm going to use the thin fineliner to draw the lines on the paws, and then the cat can be fully assembled! Followed by creating depth in the eyes, a little shine on the nose and eyes, and some highlights with a white pen. In the same way as with the sitting cat. And then the standing cat is finished too!
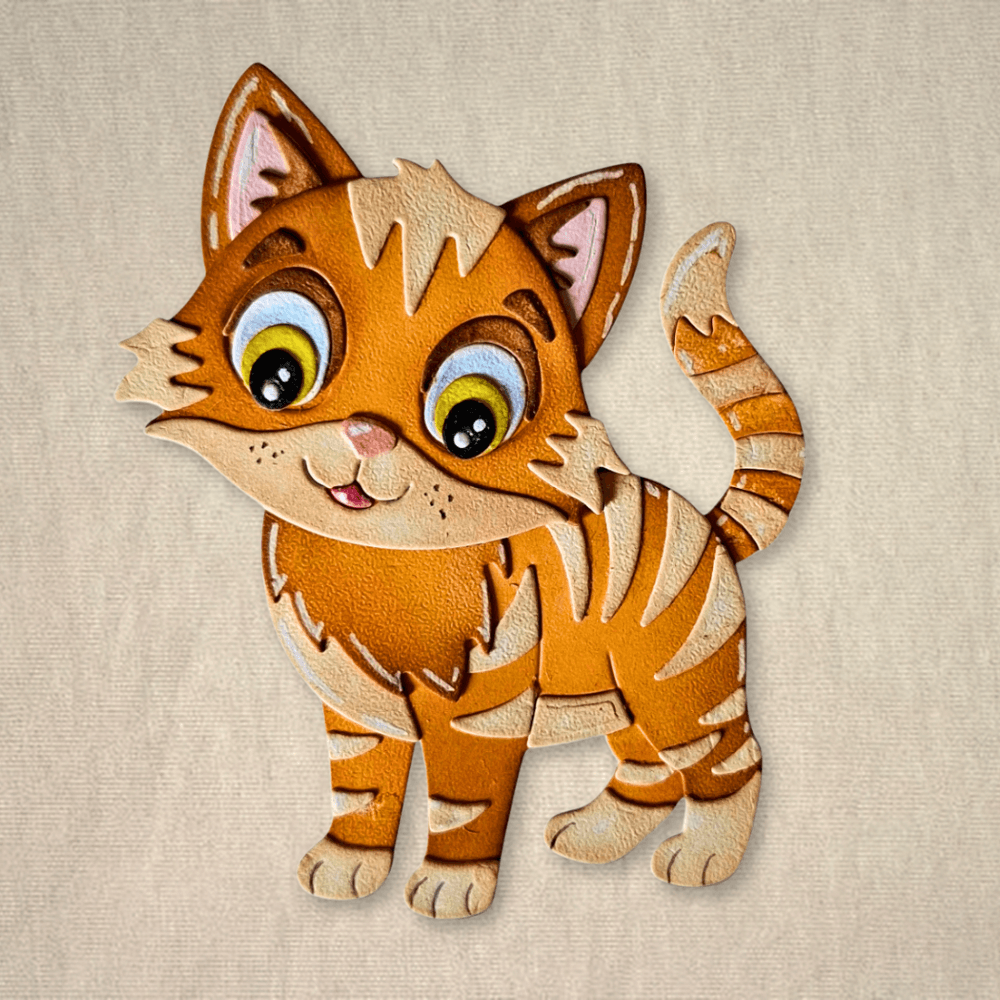
I hope you found this how-to useful and that I was able to show you a little bit of how to assemble these super cute kittens using these steps. Because it's actually quite easy, right? And just super fun to do! Of course, there are many more options for making the cats with these dies. You can even dress them up really nicely and add accessories with the other new die sets! I'm curious what kind of cats you're going to make. Thanks for reading my tutorial.
This is a great card to make, and depending on what sentiment is used, it will cover all occasions. I hope you’ve enjoyed this tutorial and I look forward to seeing your makes on the Elizabeth Craft Designs Family Facebook page.
Make sure you share your projects with us in our Facebook Group HERE. We love to see what you create!
Never miss a tutorial and sign up for our emails today HERE.
Elizabeth Craft Designs Products Used:

Other Products: Copic Markers, Ohuhu Markers, Hybrid Gel Pen White, Uni-Pin Fineliner Sepia (0.1), Gellyroll Glaze – Translucent, Distress Oxide Ink: Rusty Hinge, Distress Ink: Antique Linen, Gathered Twigs, Spun Sugar, Crushed Olive