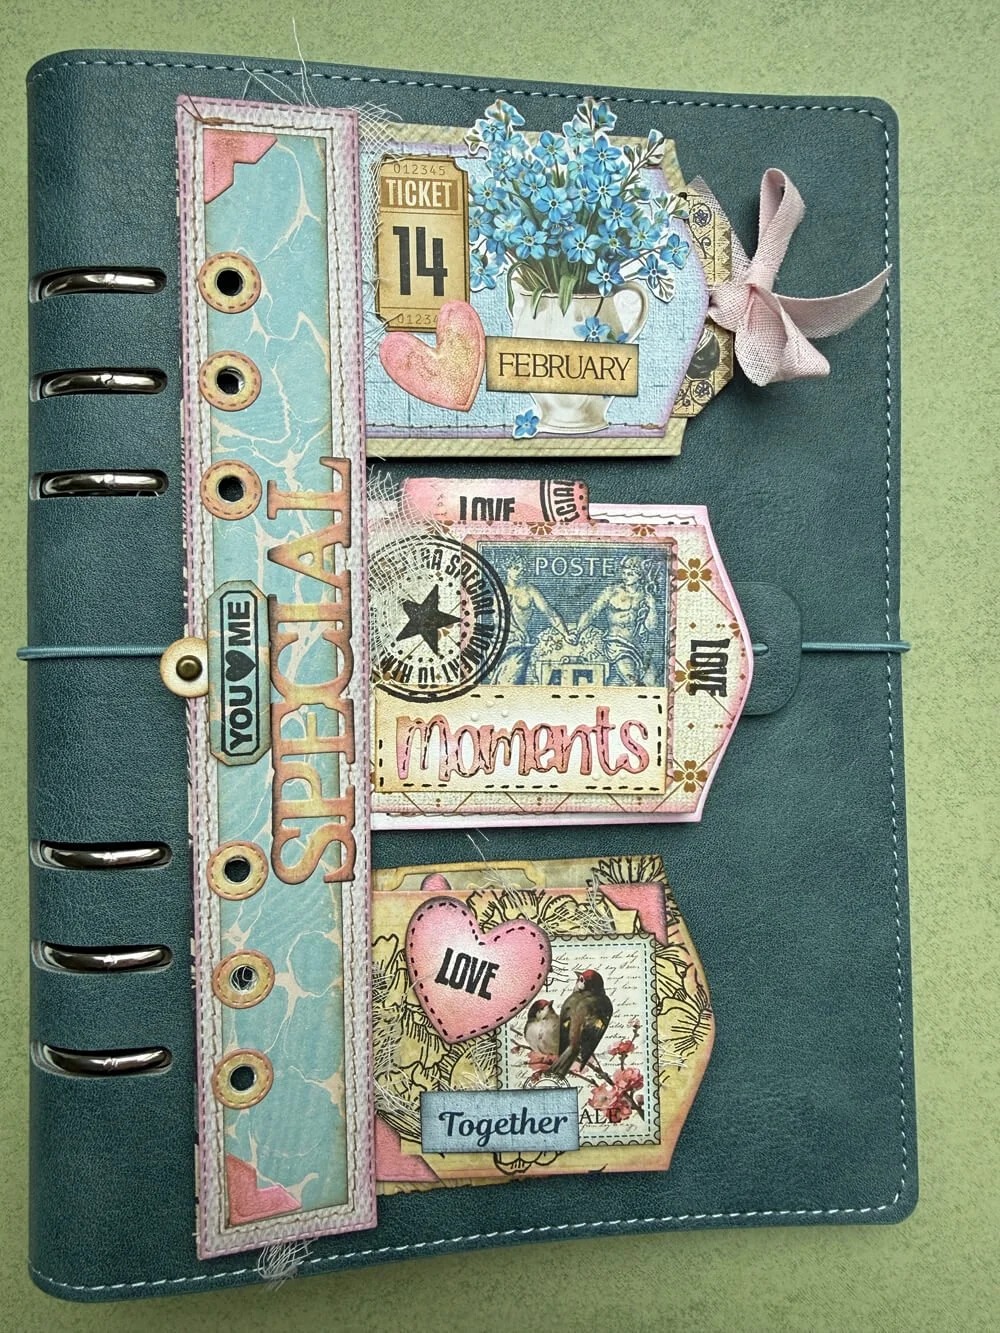
Easy Interactive Tag Page For Your Memory Binder
Are you a crafter who loves memory keeping and creating different pages in their binders? Or maybe you're looking for different ways to include tags in your projects. In this tutorial, you learn a fun way to create an interactive trio of tags that can be decorated with stamping and ephemera and added to your Memory Binders for unique pages.
Hello, it’s Ellen from the Everyday Memories Design Team with a tutorial for a page in your Memory Binder.
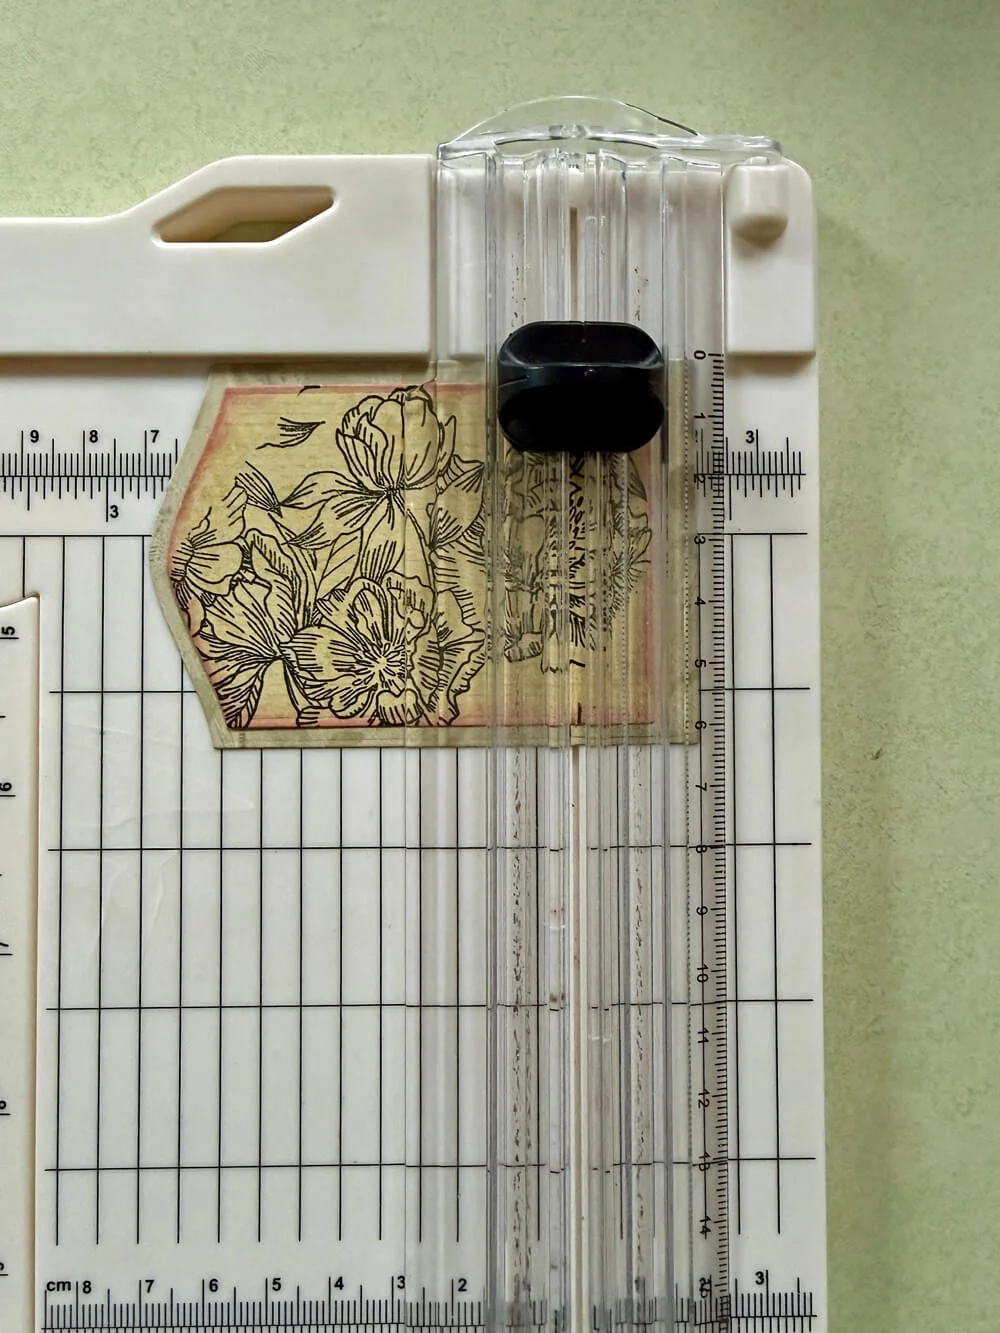
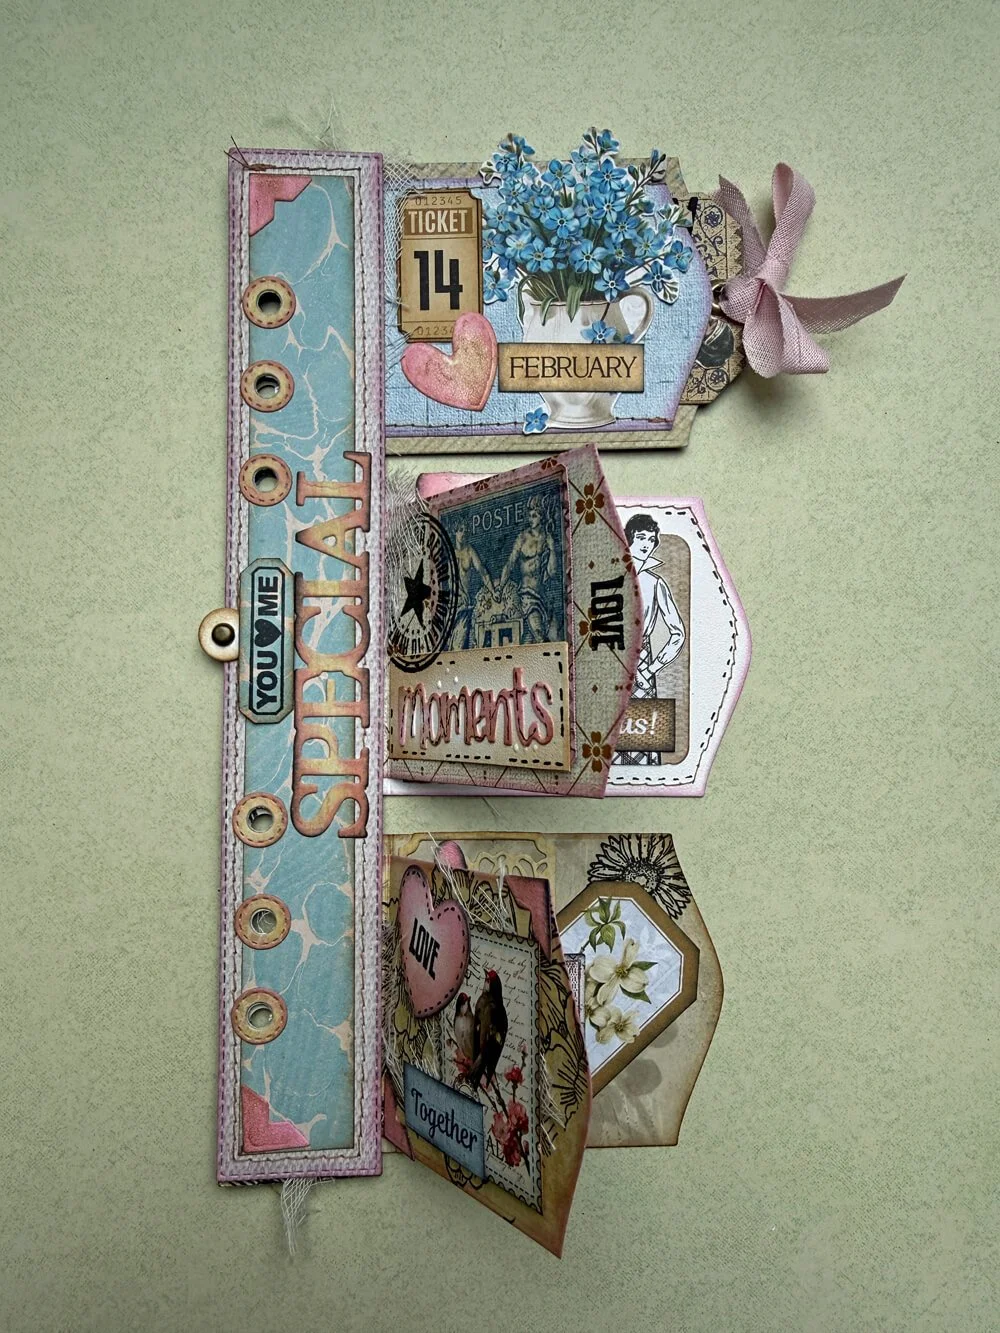
Step 1: Die-cut 3 large and 3 smaller tags and 1 or 2 extender strips (if you are going to glue this onto a base binder page, you only need one; if you want to place this page separately in your binder, then you need two for a nice finish on the back )

Step 2: Now you can add details to the tags by stamping on them. Once you are happy with how they look, place the smaller tags on top of the larger ones and make a fold at 1/3”. Then it’s time to glue the smaller tags to the larger ones. You need to make some choices when doing this. You can glue them down flat, glue just around the edges to create a pocket, or glue just along the folded edge to create a flap.
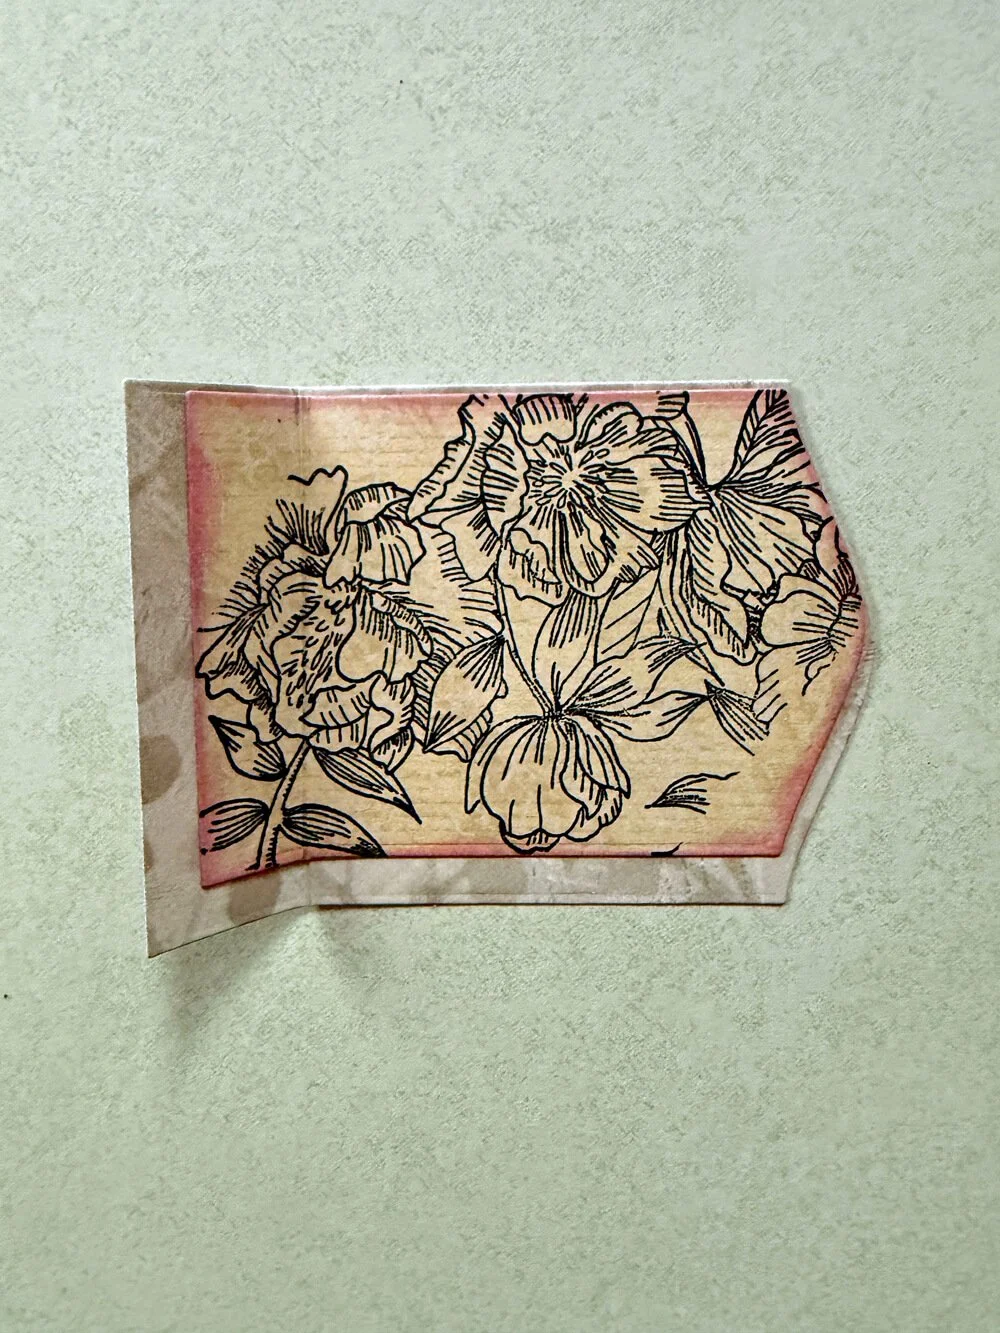
Step 3: Now it’s time to decorate the tags and the extender strip(s). I layered ephemera, with die-cut elements, and finished them off by adding some stitching and inking in places.
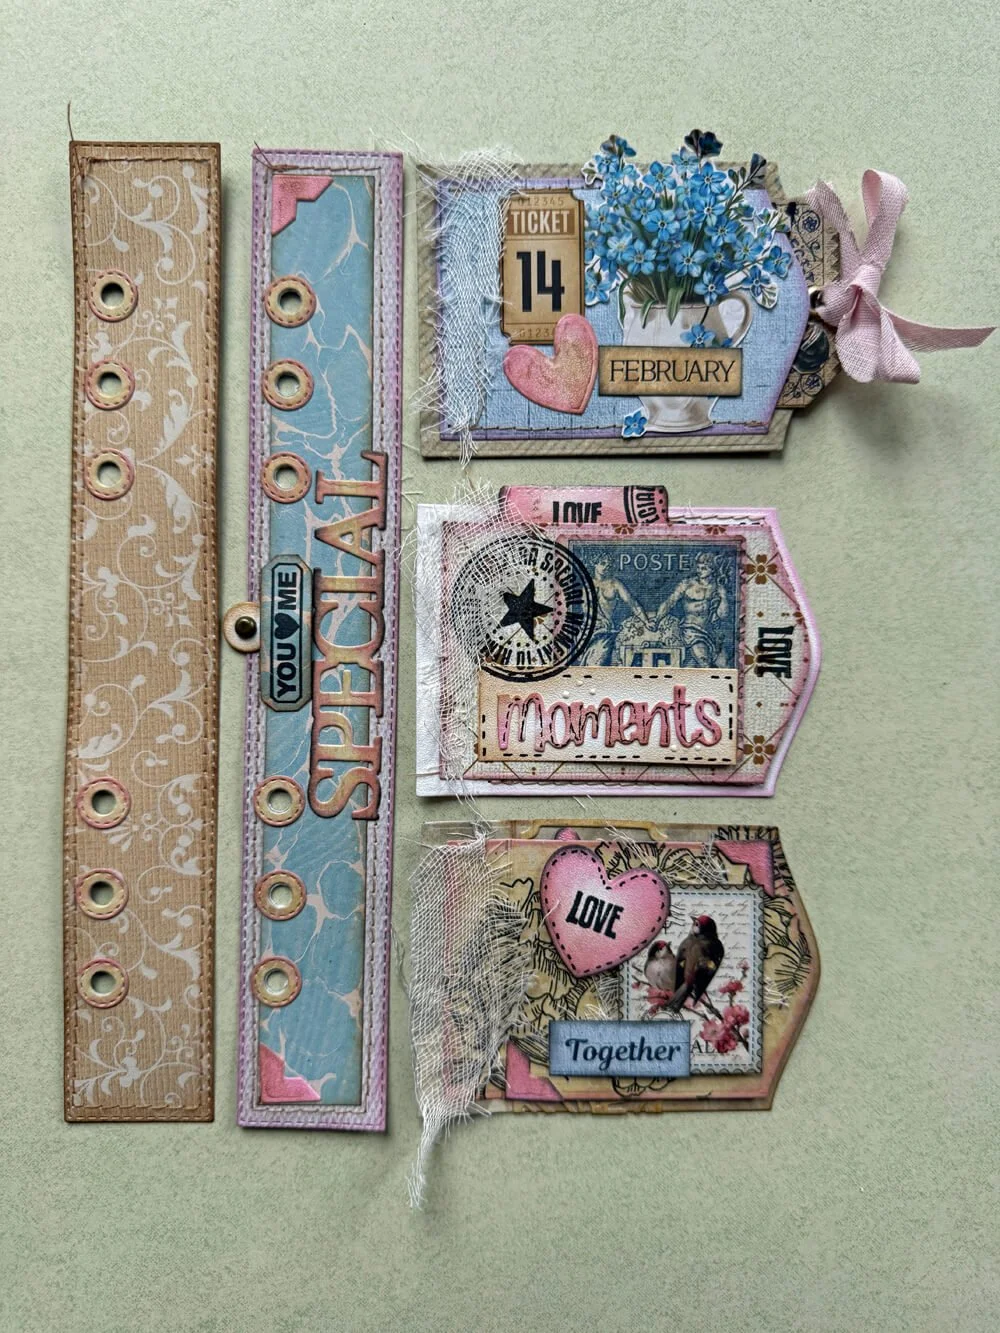
Step 4: When you’re done decorating, attach the tags to the extender strip, at the fold line, evenly spacing them along the strip. At this point, if you want to glue this to a base page, you can, but if you want it to be a standalone piece in your binder, turn it over and attach an extender strip to the back, making sure everything is lined up.
I hope you enjoyed this tutorial for a slightly different page in your Binder.
With Love, Ellen x.