
Easy Crackle Paste Background with the Destination Fun Collection
Do you love making cards with the Little Mouse? Or maybe you’re looking for card ideas that are perfect for family and friends who like to receive cute cards and gifts? In this tutorial, learn how to mix the cute Destination Fun Collection with an easy mixed media technique to create a card everyone will love.

Hello everyone, Lisanne here with a card, perfect for sunny days. I used the Destination Fun Collection for this card, along with some crackle paste and embossing powder to create a background.
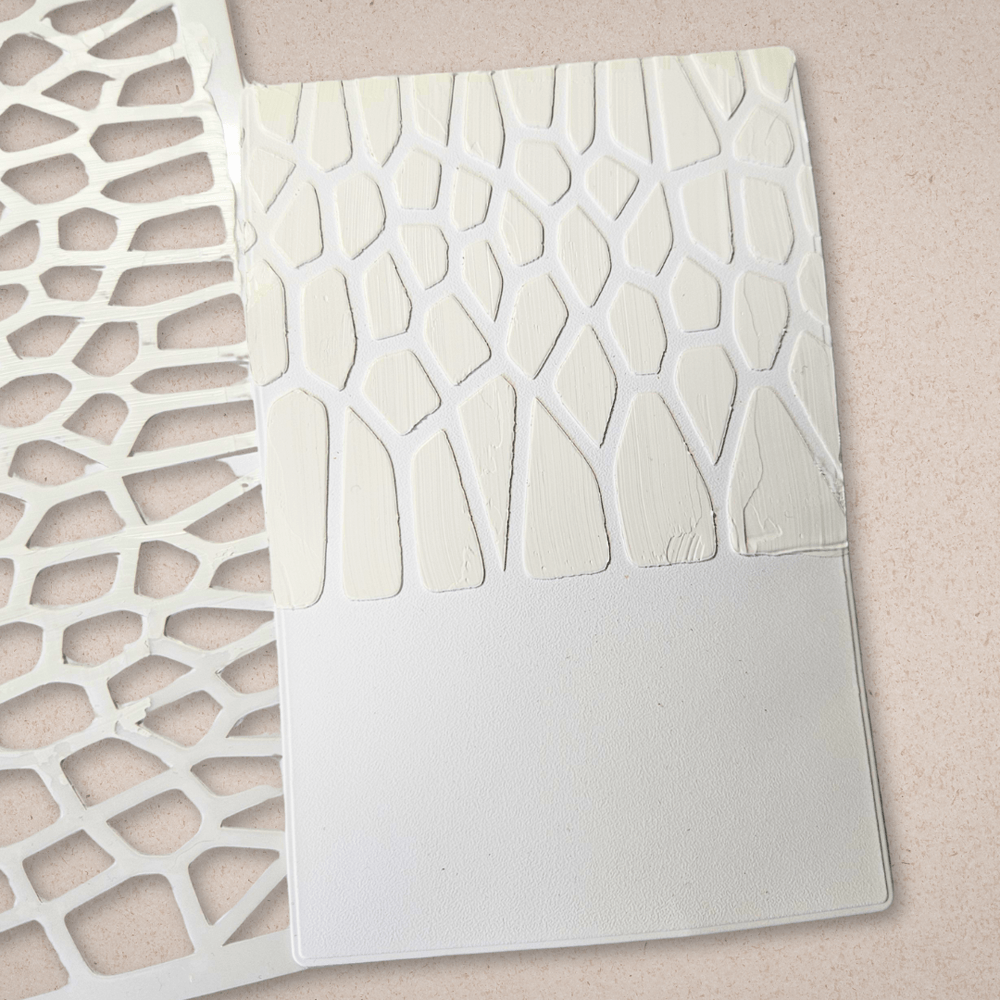
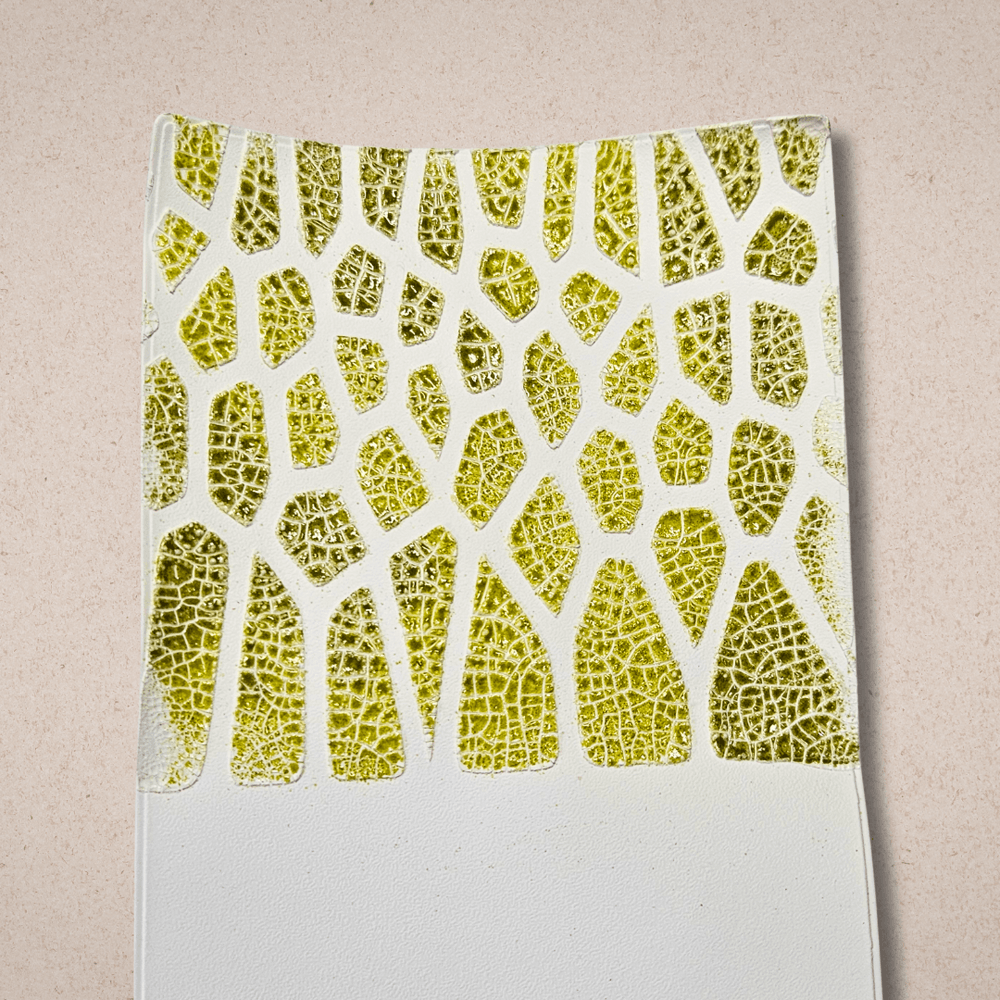
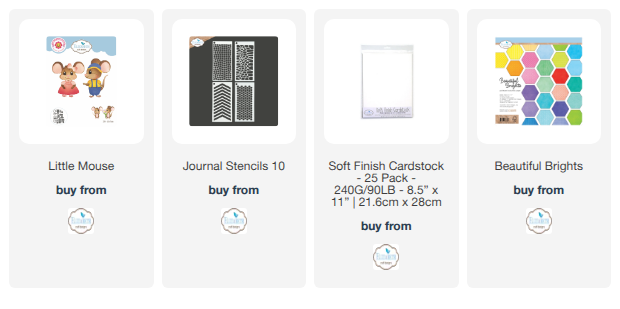
Step 1: Start by die-cutting the base card from Soft Finish Cardstock. I used the inner part of the suitcase as a base. Then, using one of the stencils from Journal Stencils 10, I applied opaque Distress Crackle Paste to the top half only.
Step 2: Immediately sprinkle Distress Embossing Glaze powder over the wet crackle paste.
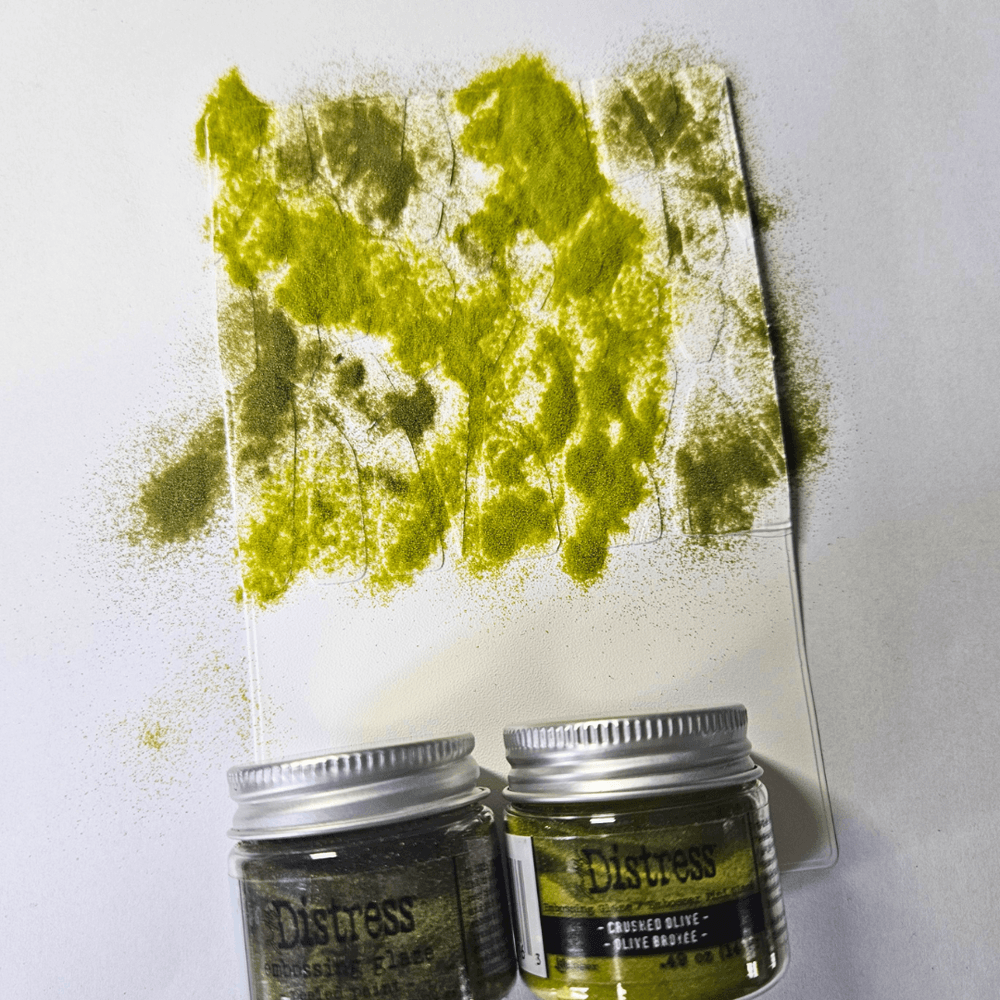
Step 3: I gently tapped the bottom of the paper to spread the powder.
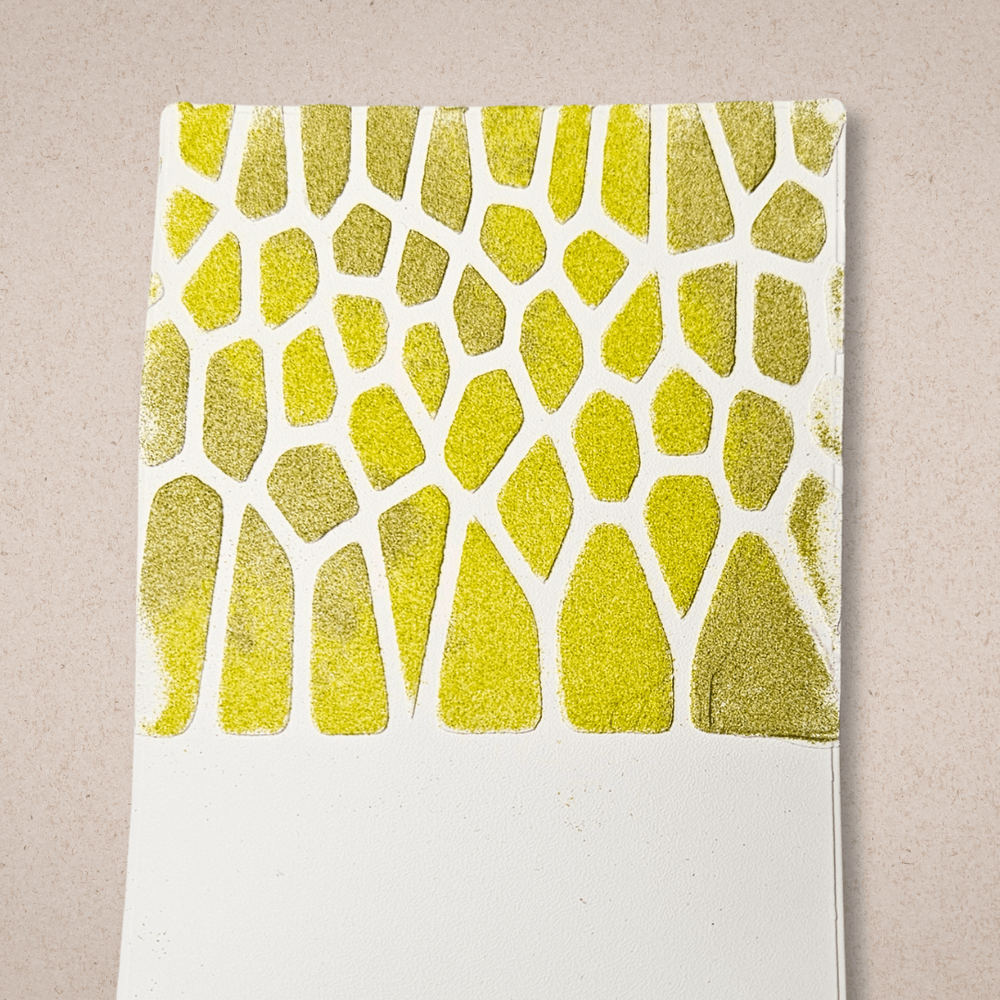
Step 4: Put the piece of paper aside so the paste can do its work, crack! While it’s drying, die-cut all the other elements needed for the card.
Step 5: After the paste has done its job, it is time to heat the embossing powder. I really love how this worked out.
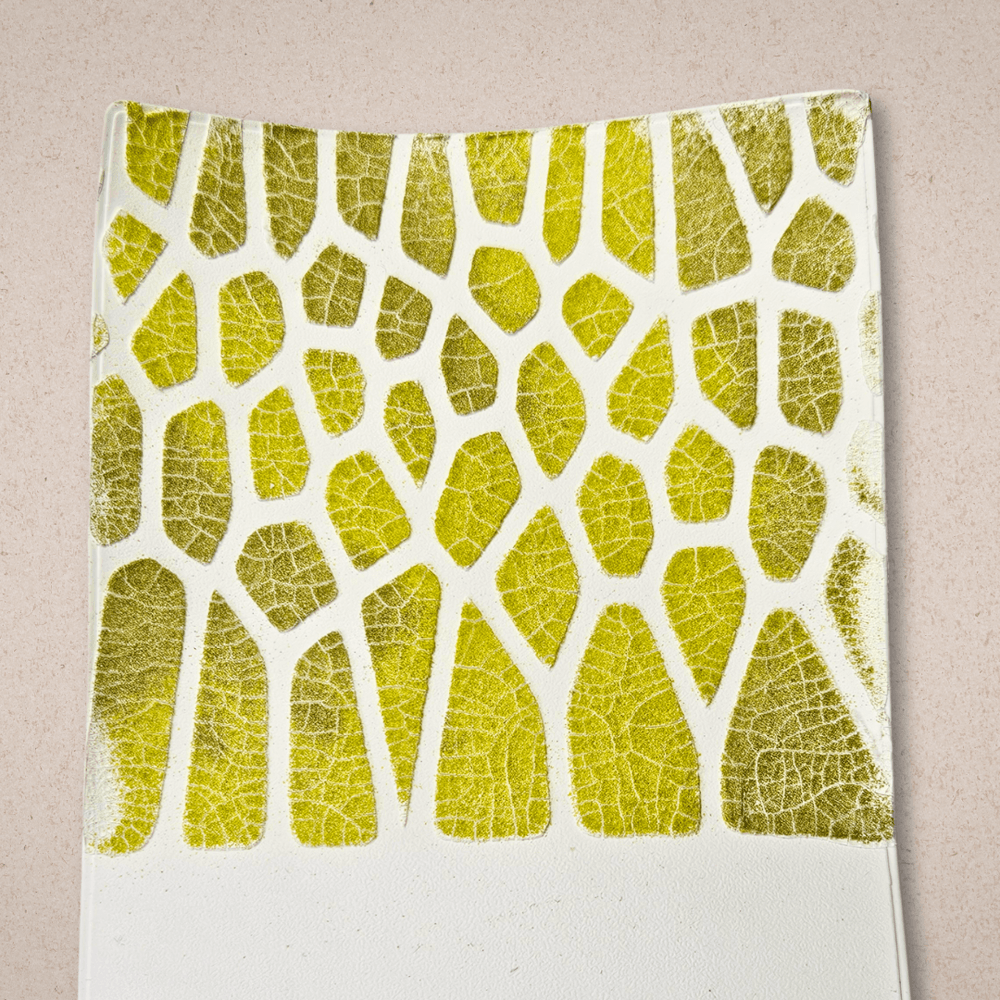
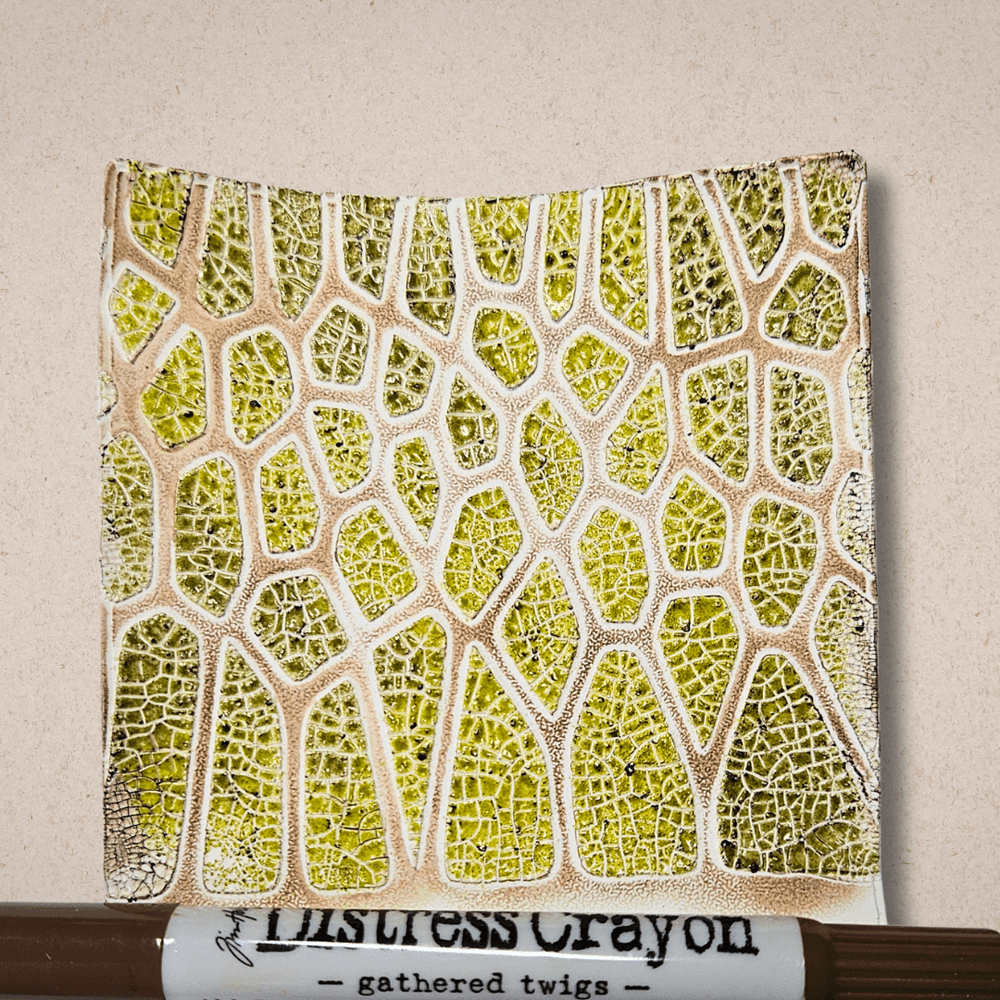
Step 6: The background is almost done, you can use it as it is, but I like to make it more vintage. I go directly in with my Distress Crayon on top of the paste and spread it out with a wet finger.
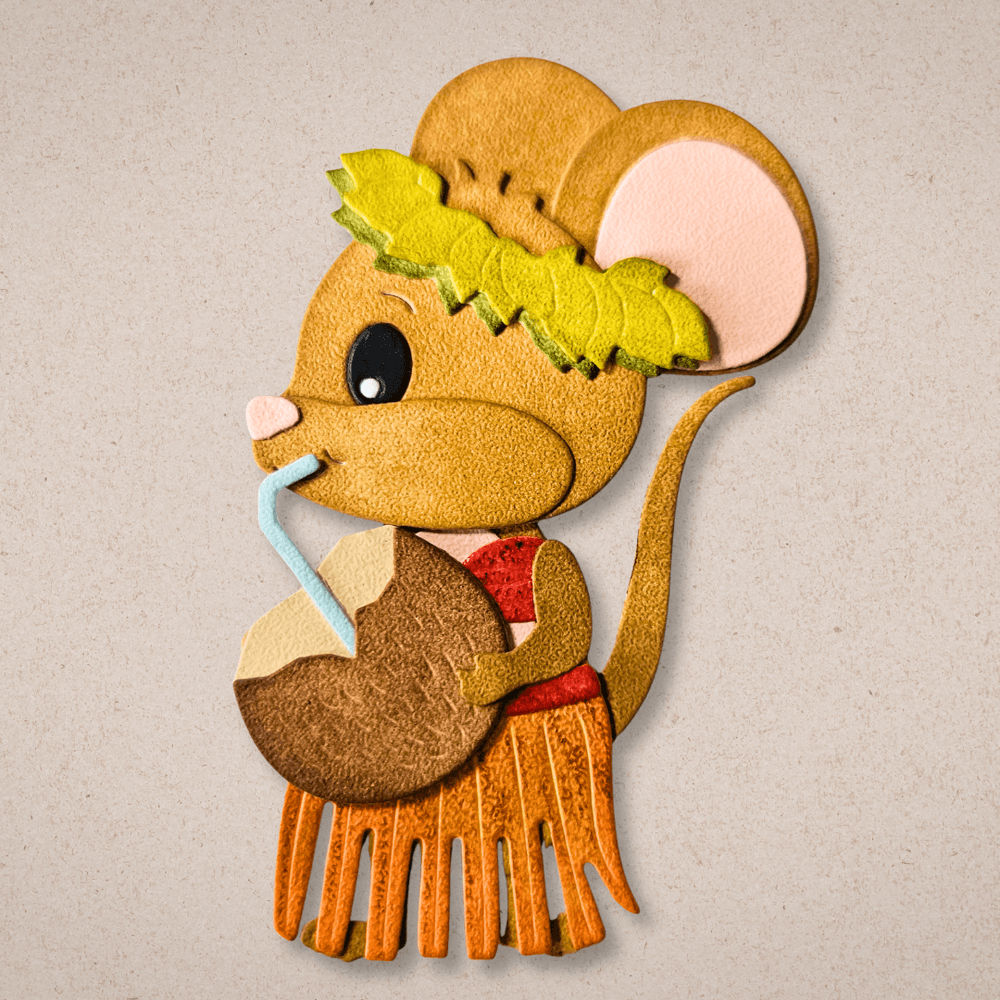
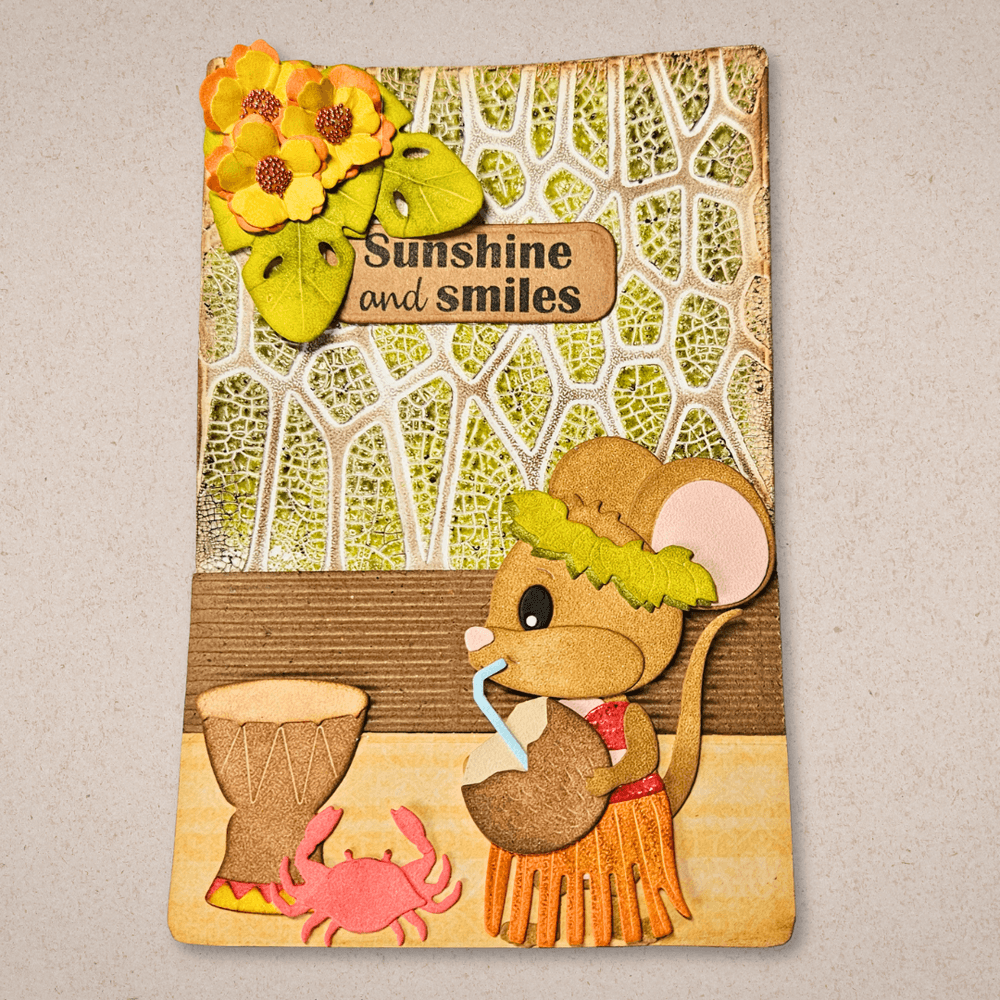
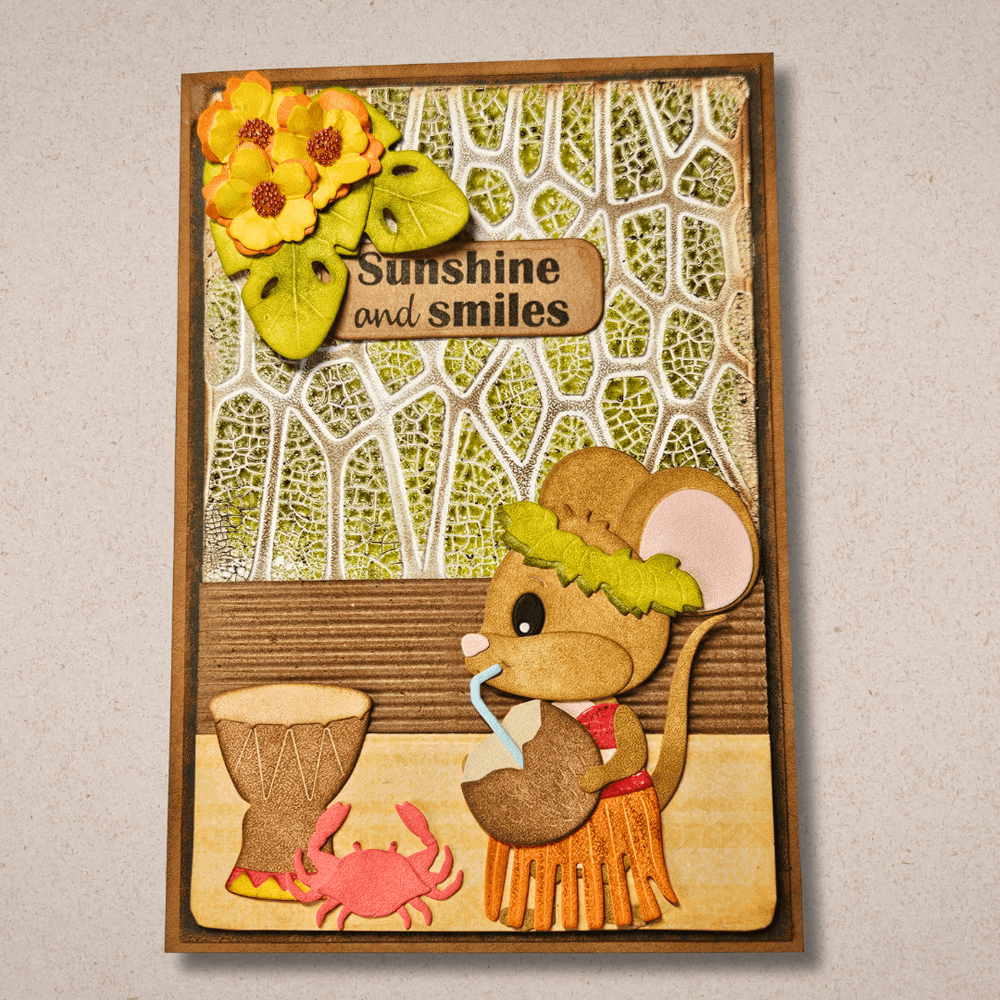
Step seven: Next, get your little mouse dressed in her beautiful outfit and coconut drink. The outfit and drink are from the newest dies ‘ Destination Fun’. I colored her with various Distress Ink colors.
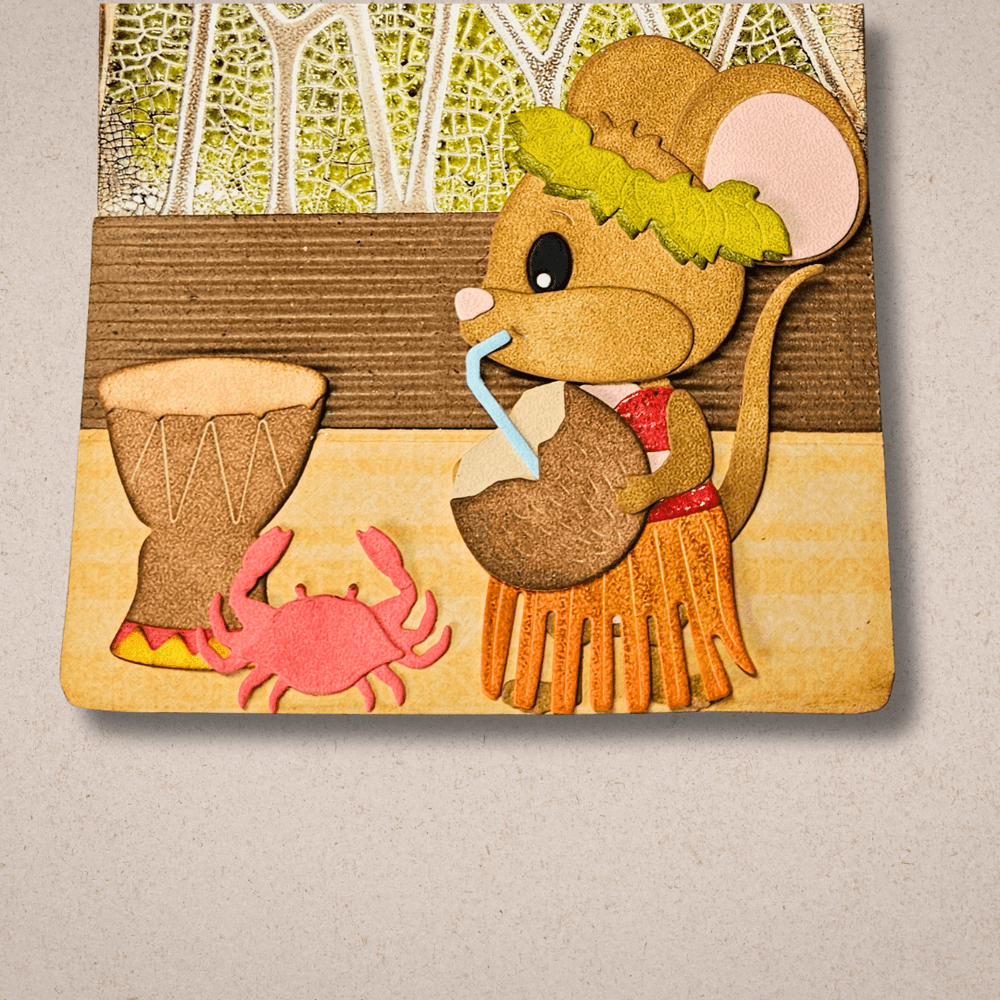
Step eight: Adhere a piece of corrugated cardboard and a piece of Patterned paper from the Beautiful Brights paper pad to the lower half of your card. This completes the scene, giving the card a beachy, holiday feel. Glue your mouse and any other decorative elements in place.
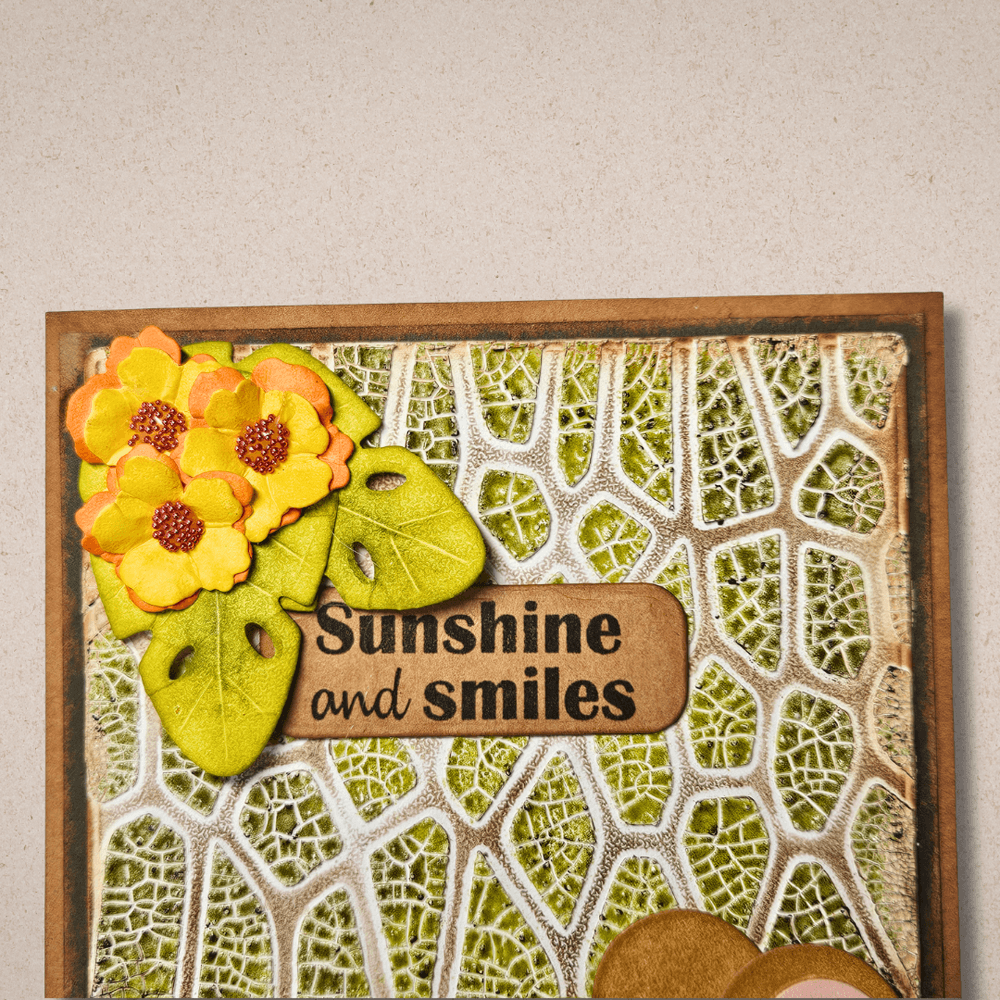
Step nine: Create three flowers. Also colored with Distress Ink and some tiny beads to the centers.
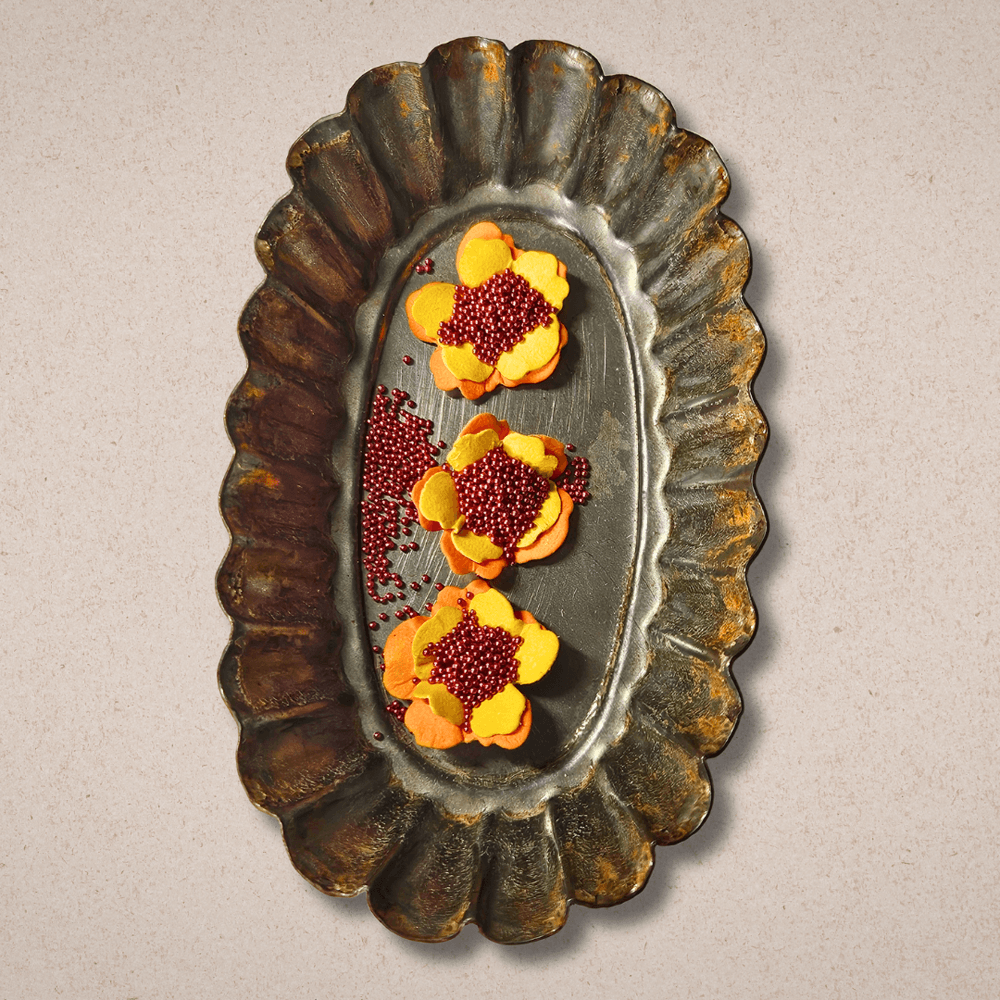
Step ten: The flowers are adhered to the top corner with the sentiment ‘ sunshine and smiles’.
Step eleven: To finish, I trimmed a piece of green paper for the back and a piece of kraft cardstock for the card. base.
Thank you so much for joining me for this tutorial. I hope you’ve been inspired by this project and by the Destination Fun Collection.
Other Products Used: Distress Crackle paste Opaque, Distress Embossing Glaze: Abandoned Coral, Peeled Paint and Crushed Olive, Distress Ink: Brushed Corduroy, Tattered Rose, Tea Dye, Peeled Paint, Abandoned Coral, Mustard Seed, Spiced Marmalade, Crushed Olive, Vintage Photo, Tumbled Glass, Distress Crayon Gathered Twigs.