
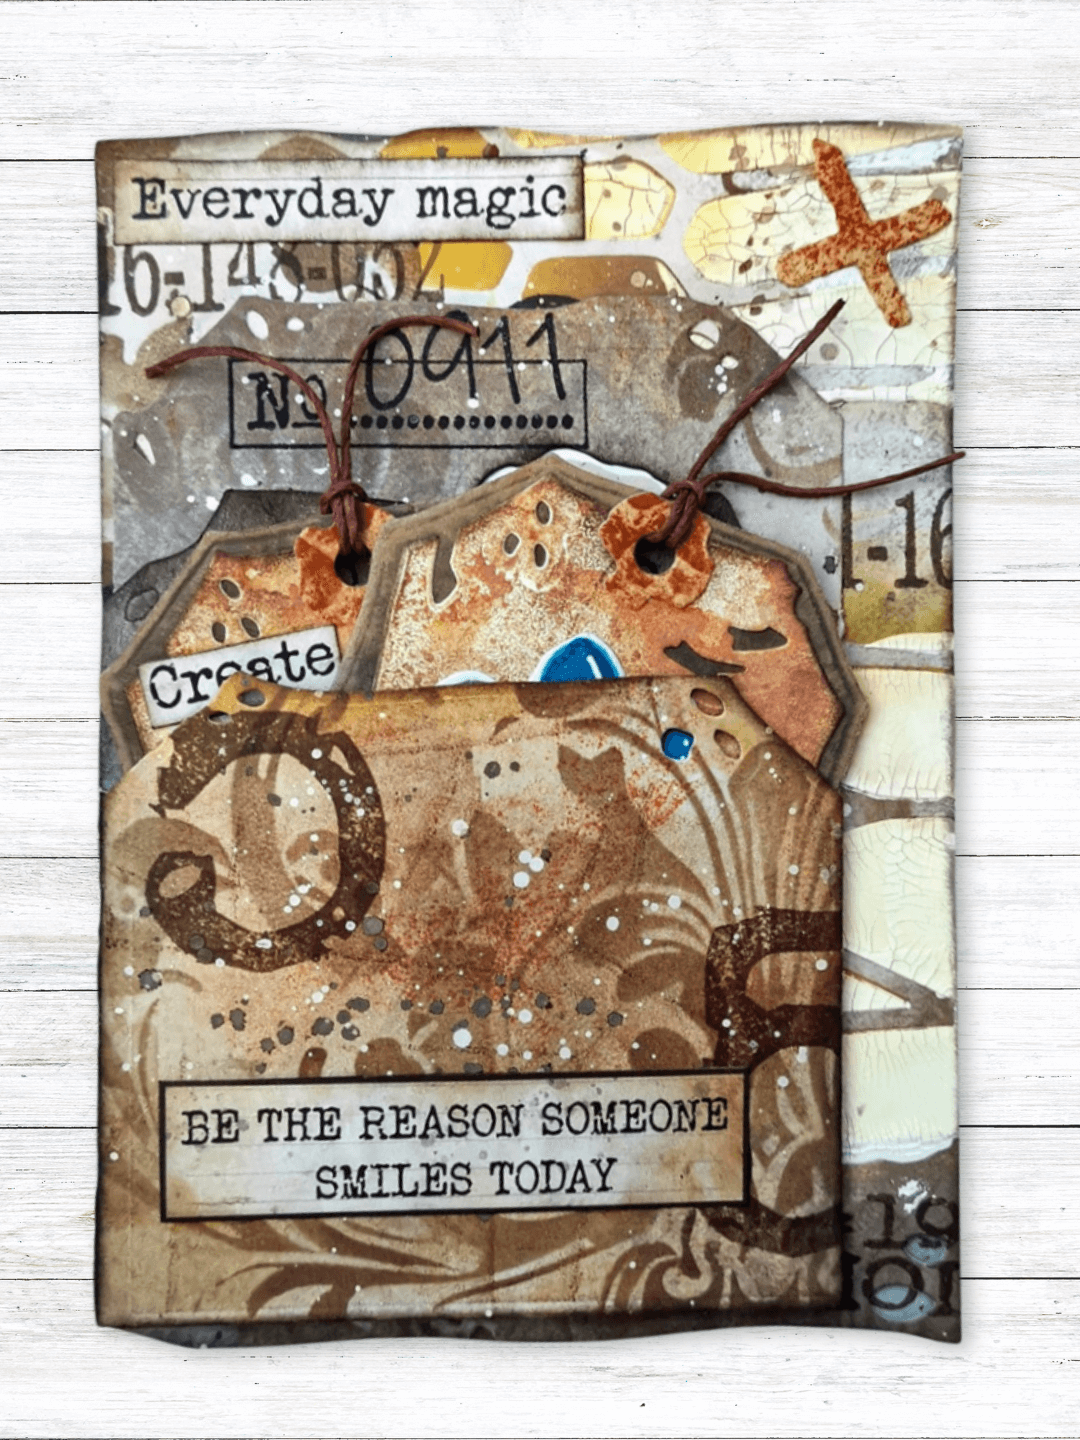
Tag Folding Trio Art Journal Page
Are you an art journaler who loves to create your own journal pages with pockets and tags? Or maybe you’re looking for more ideas and techniques for creating backgrounds? In this tutorial, you’ll learn how to create a mixed media journal page with an inked background, pockets, and beautiful floral images, that you can use again and again in all your art journals.
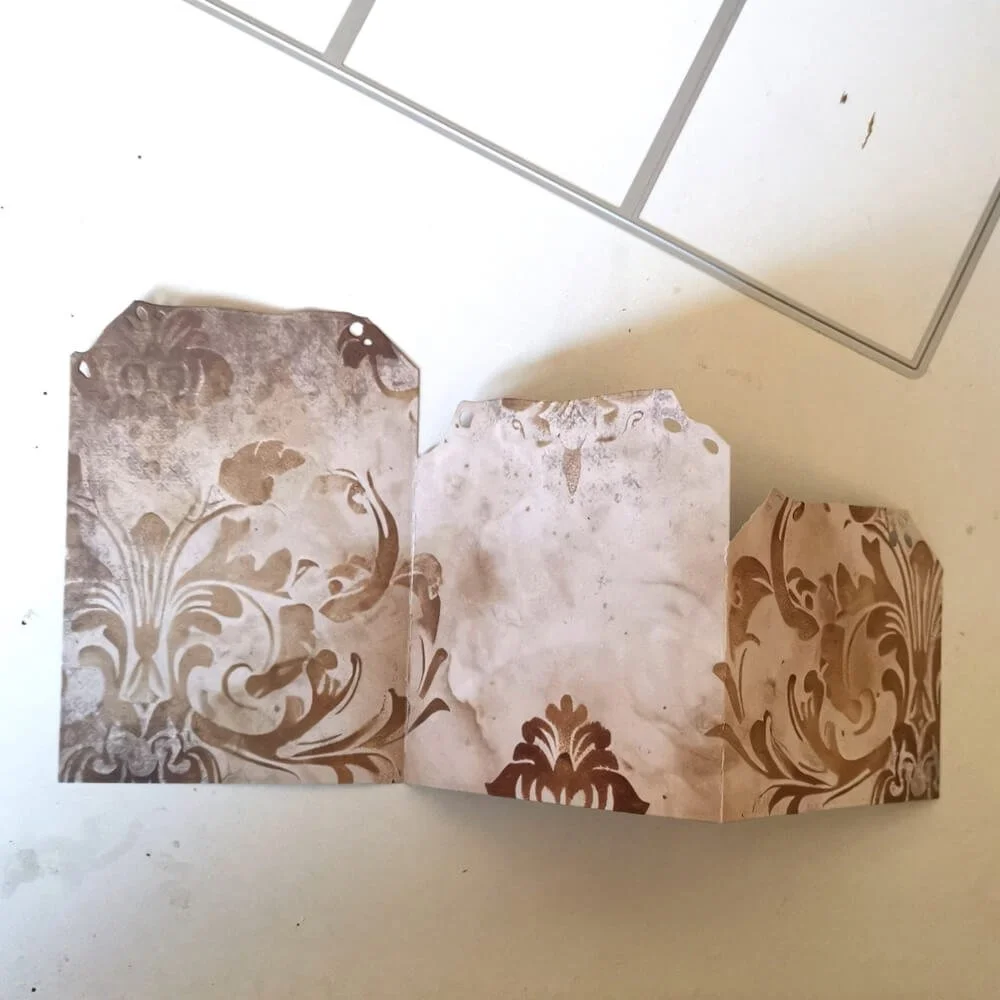
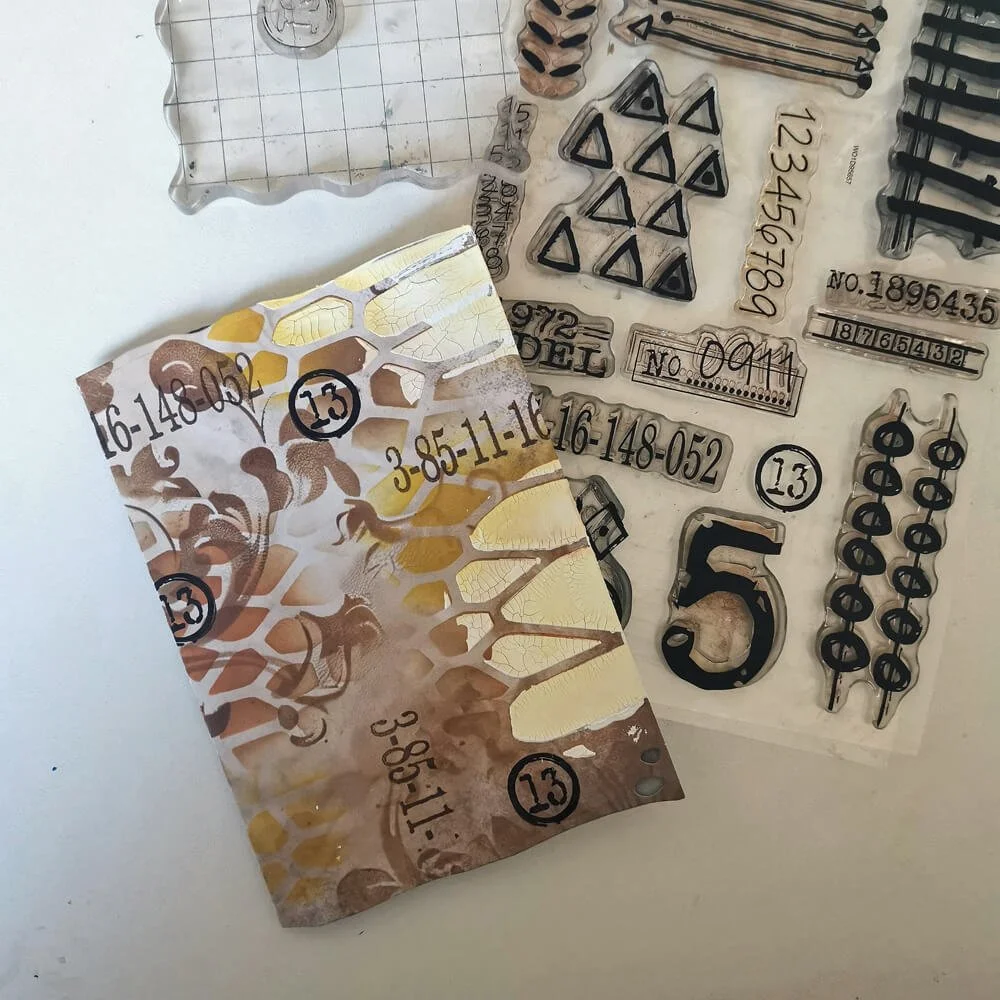
Hi everyone, this is José. In this tutorial, I'll show you how to create an art journal page using the Tag Folding Trio set (2321), which can be folded and used in various ways. I'd love to show you how I like to create with it! Let's get started!
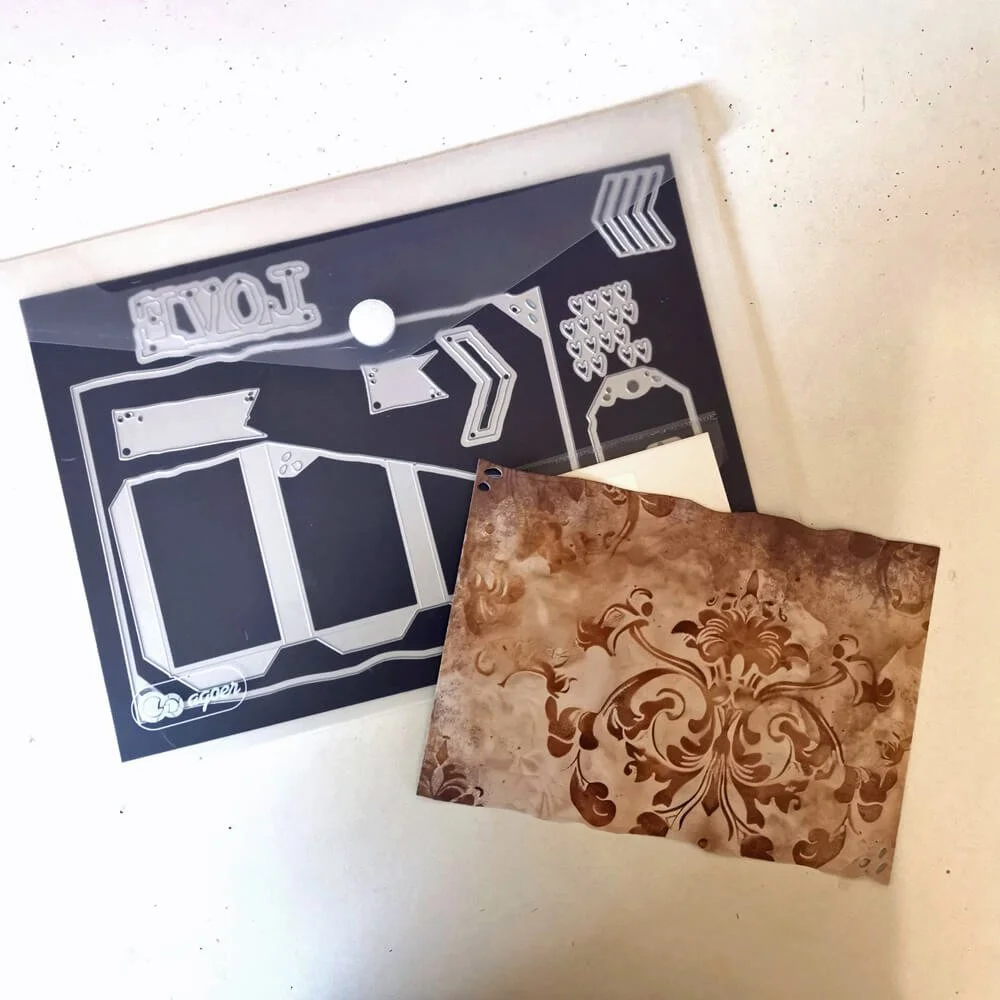
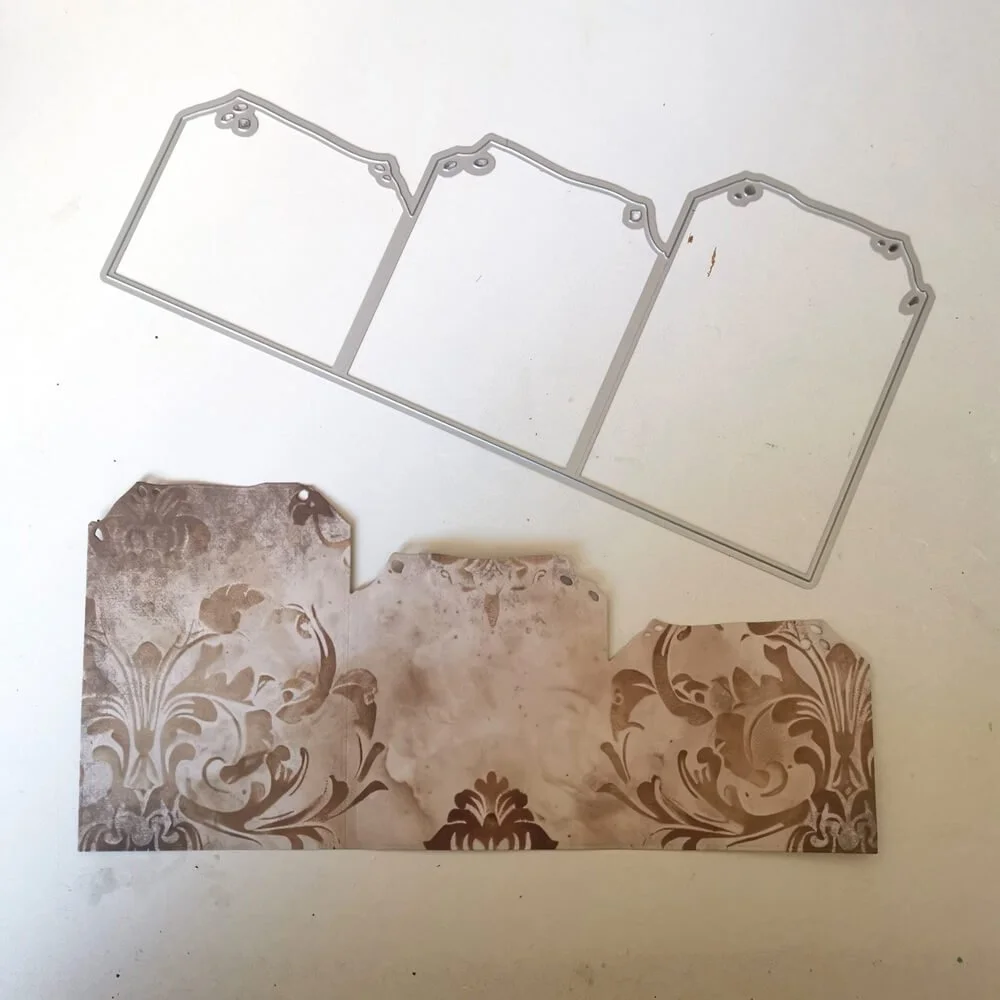
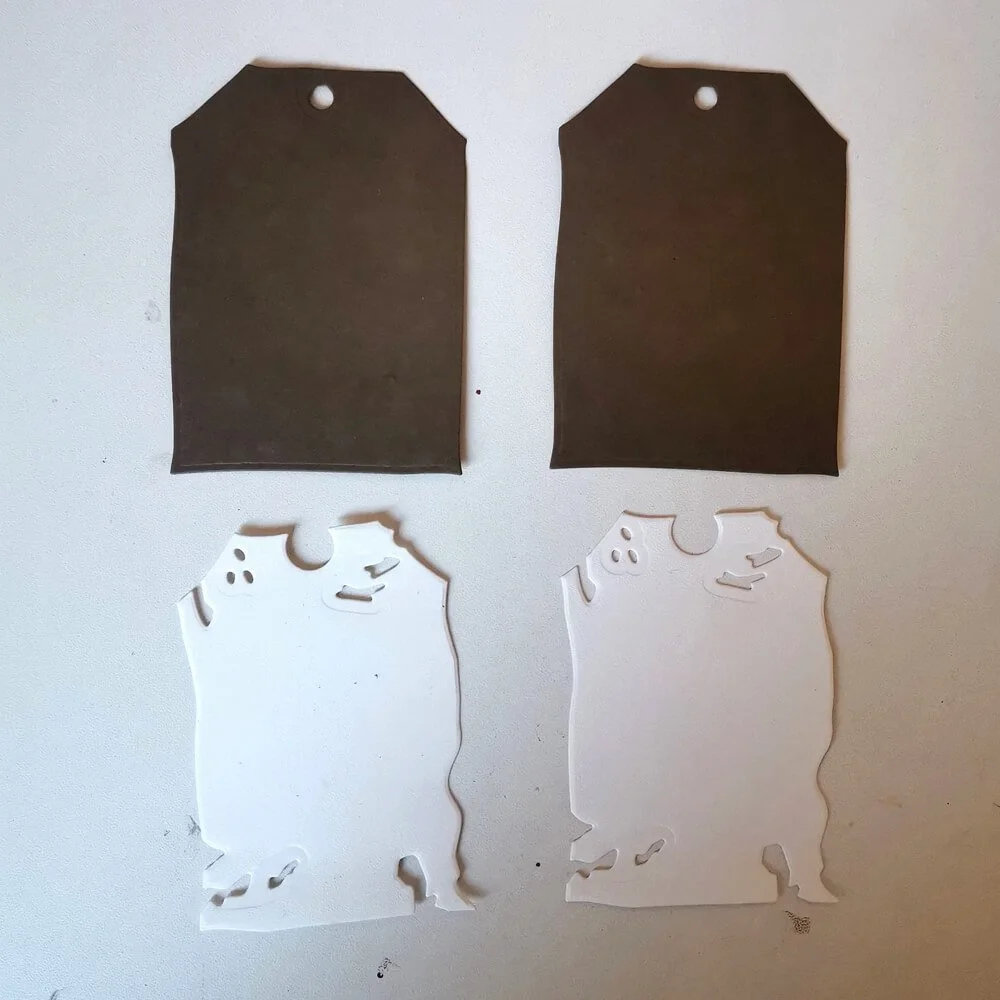
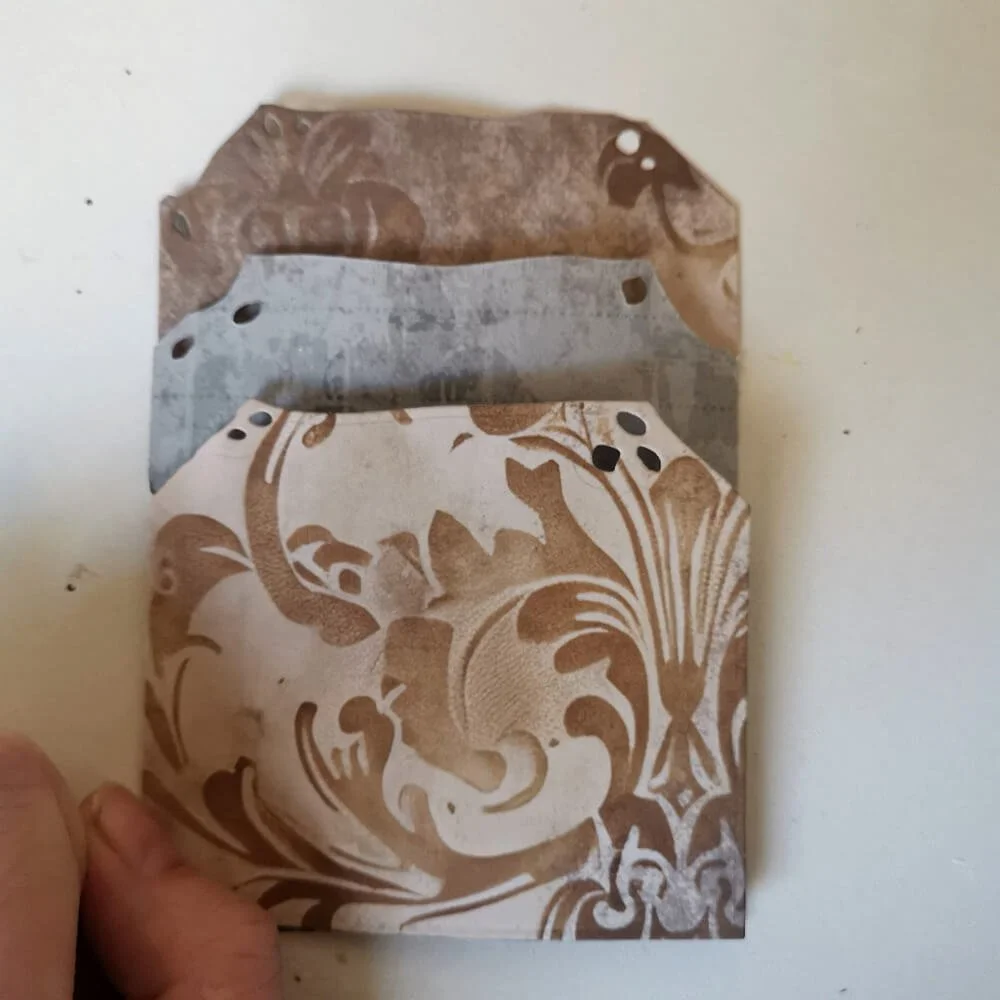
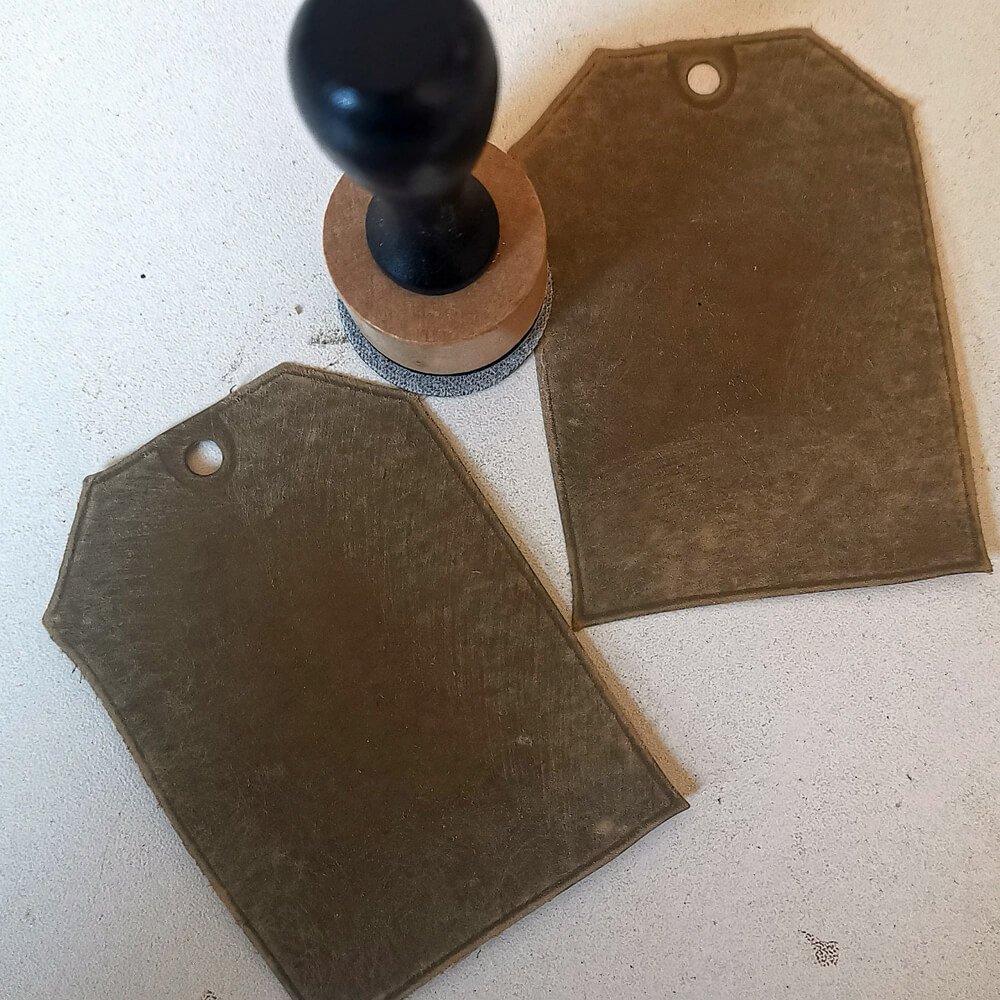
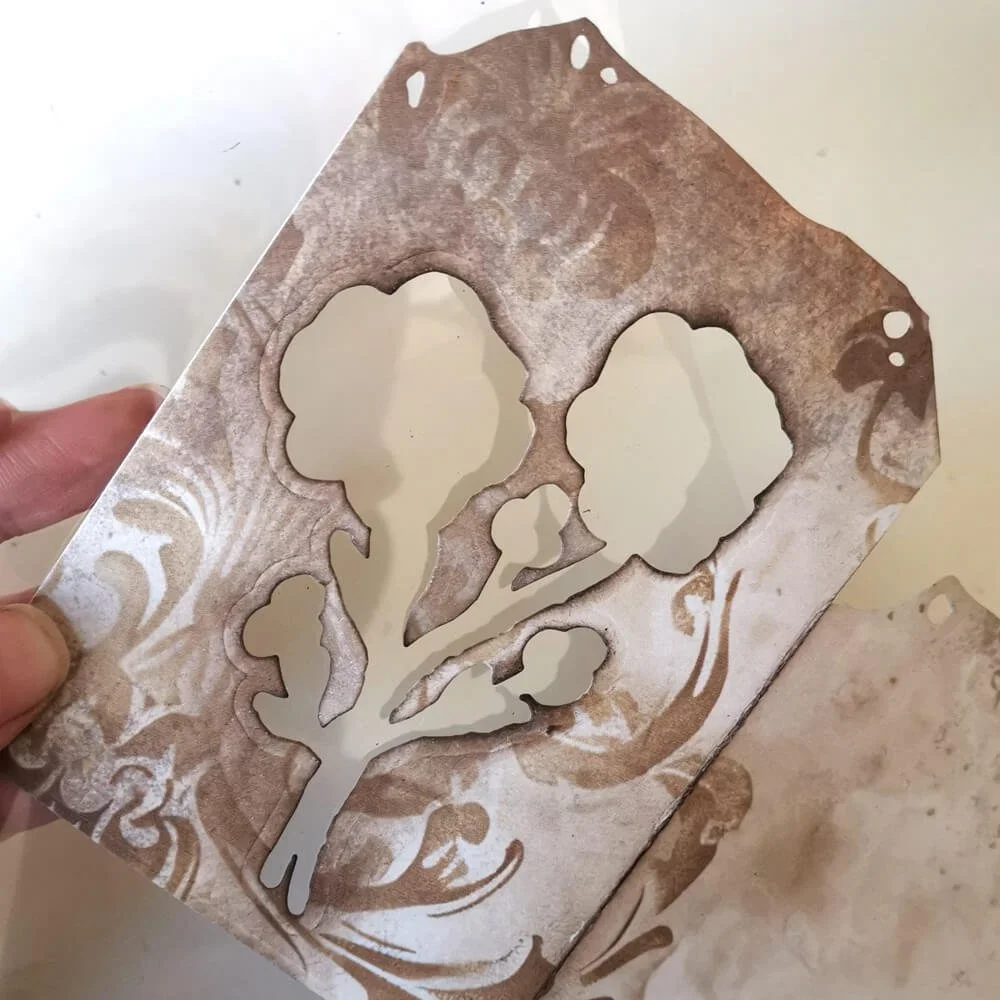
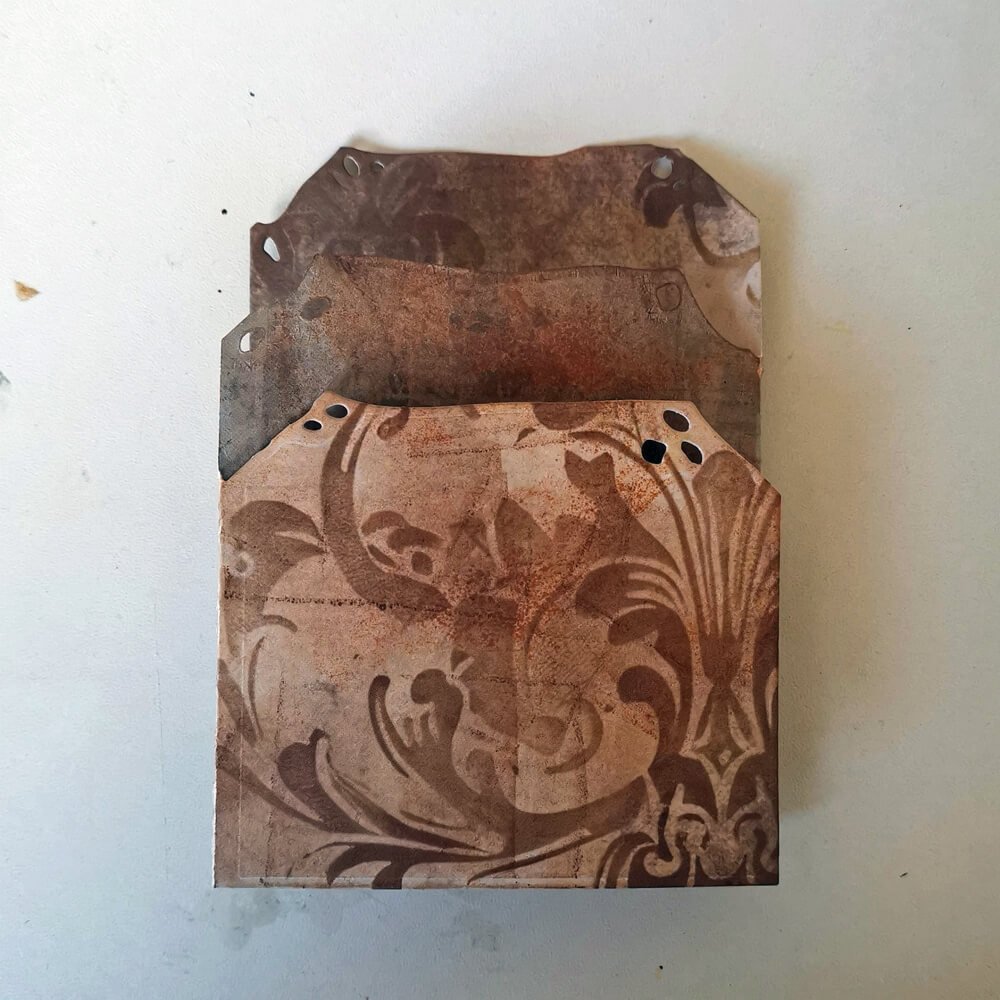
Step 1: Start by die-cutting your base page. I'm using the page die from the Tri-fold Slider Pocket set (2320) and paper from the new Backgrounds Volume 4 Paperpack (C039). This page fits in the Passport XL Journal. I'm also die-cutting the tag pockets from the Tag Folding Trio set (2321), from the same sheet of paper that I used for my base page. The tags are also from this set, so I cut them as well. The tag bases are cut from Kraft-Stock cardstock, and the two tag layers are cut from Soft Finish Cardstock.
Step 2: I decided to fold my Tag Folding Trio so that it ultimately opens to the right. I'll then create a pocket for the tags on the front and add flowers inside, like a folding card. I will later glue the entire pocket directly onto the base page.
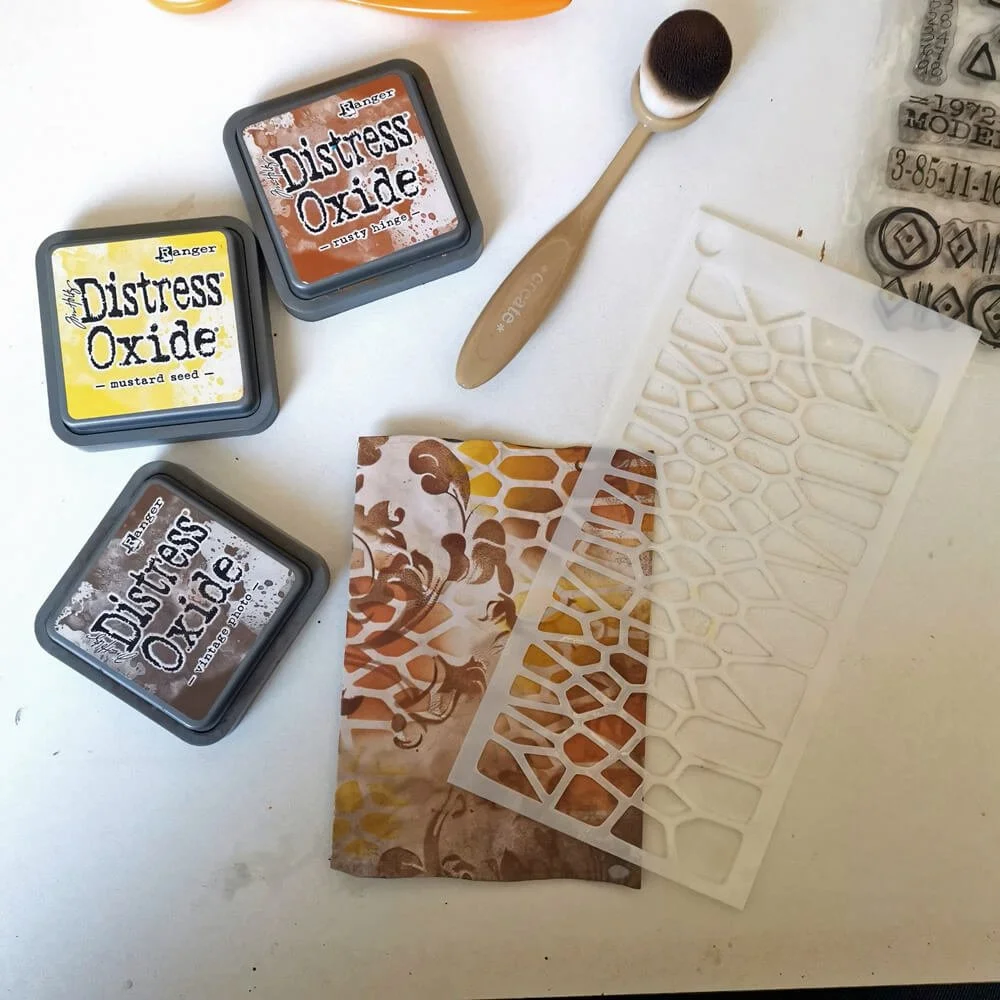
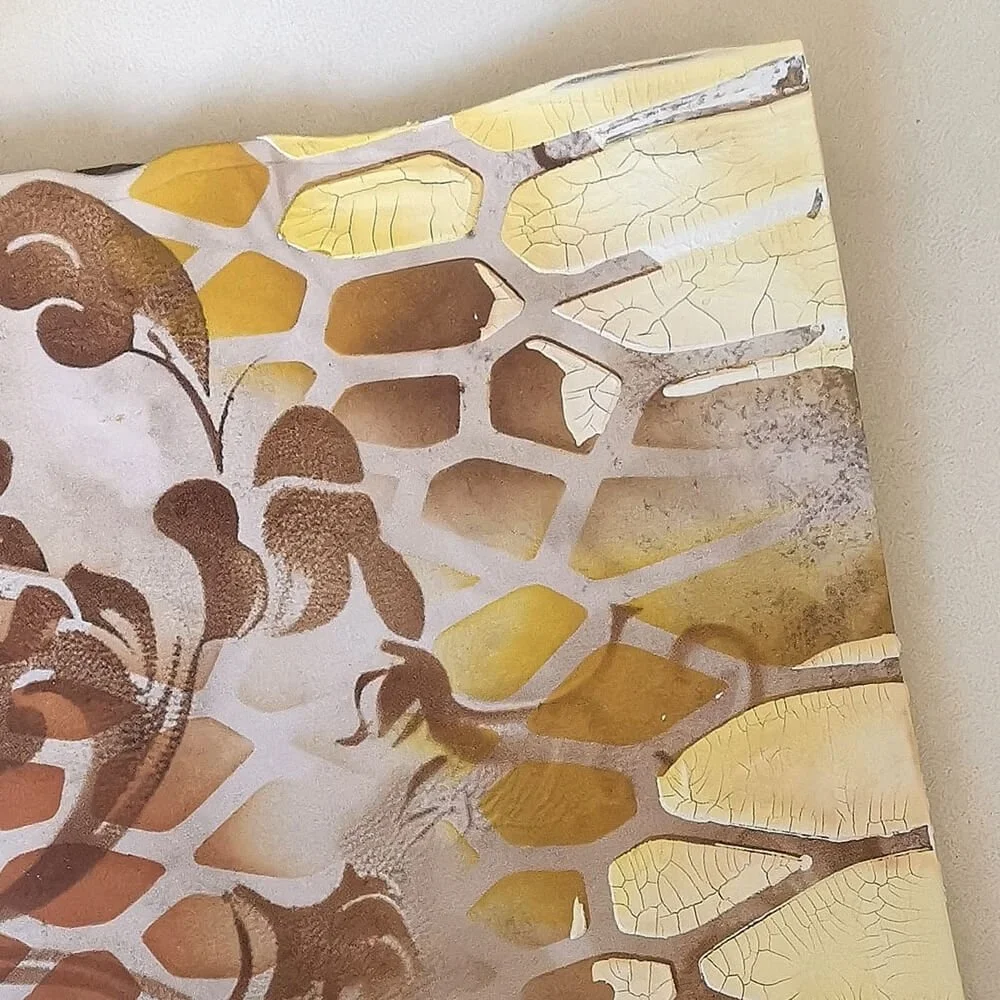
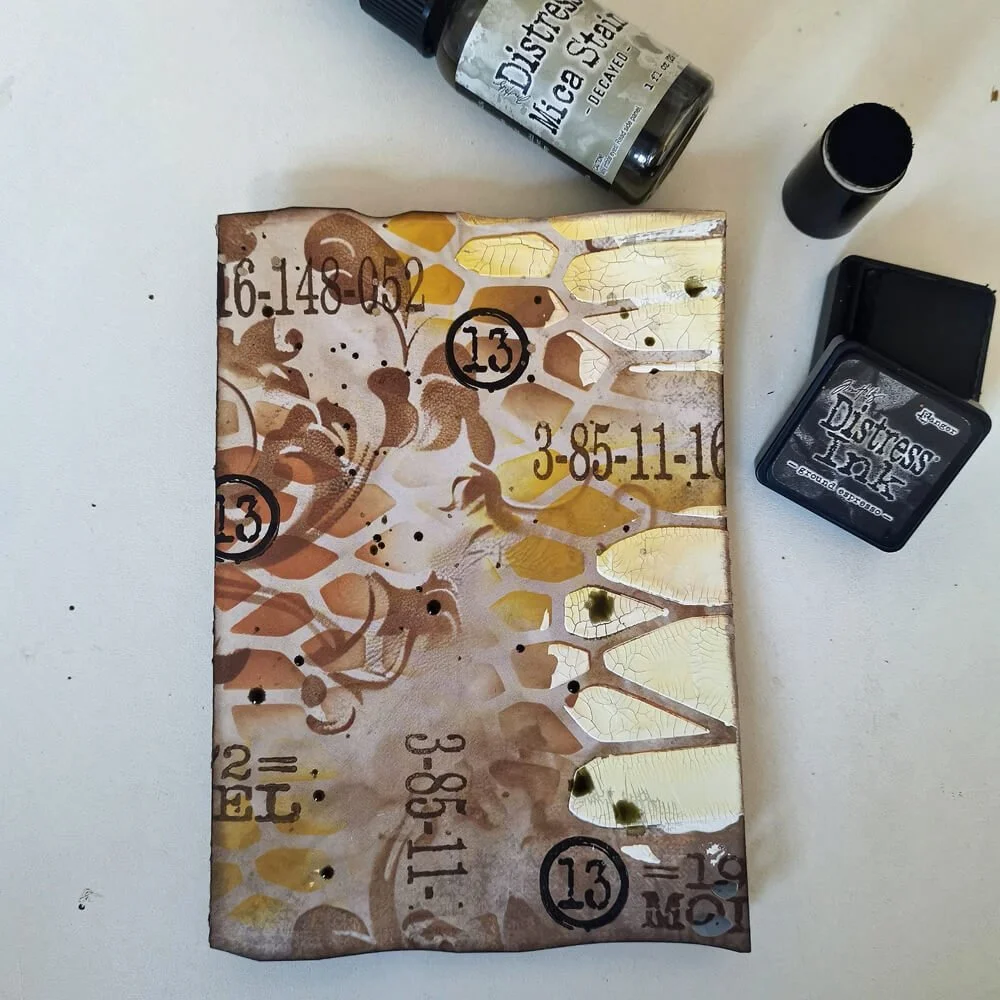
Step 3: First lets create the background on the base page with Oxide Inks, crackle paste, Stencils (S059), and stamps (CS440). Choose three or four colors that you like, that complement each other. I wanted this project to have a vintage feel, but with a pop of color, so I added in some Mustard seed. Apply ink through the stencil in different areas of your project, then apply crackle paste in a couple of places over the top. This will absorb some of the Oxide Ink. Once it's dry, I stamped on the background with Black Ink and Vintage Sepia, and splattered a little with Distress Mica Stain.
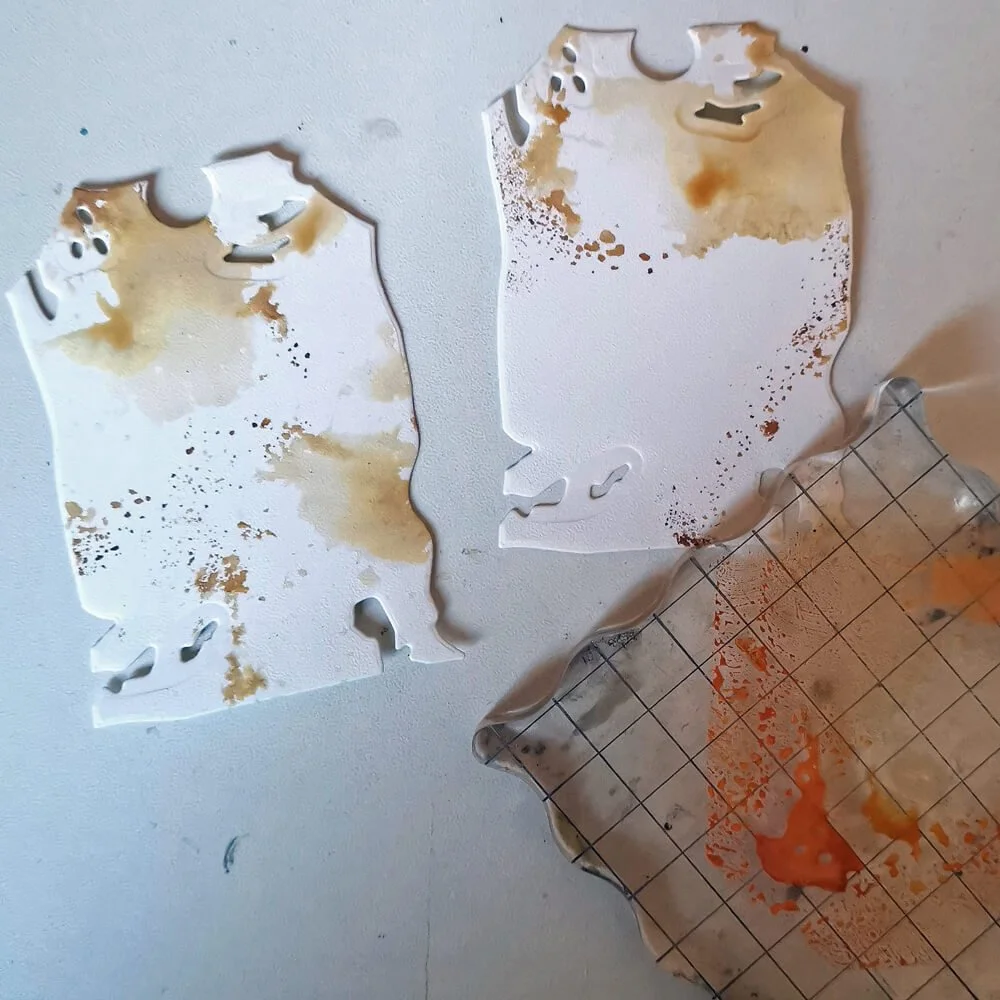
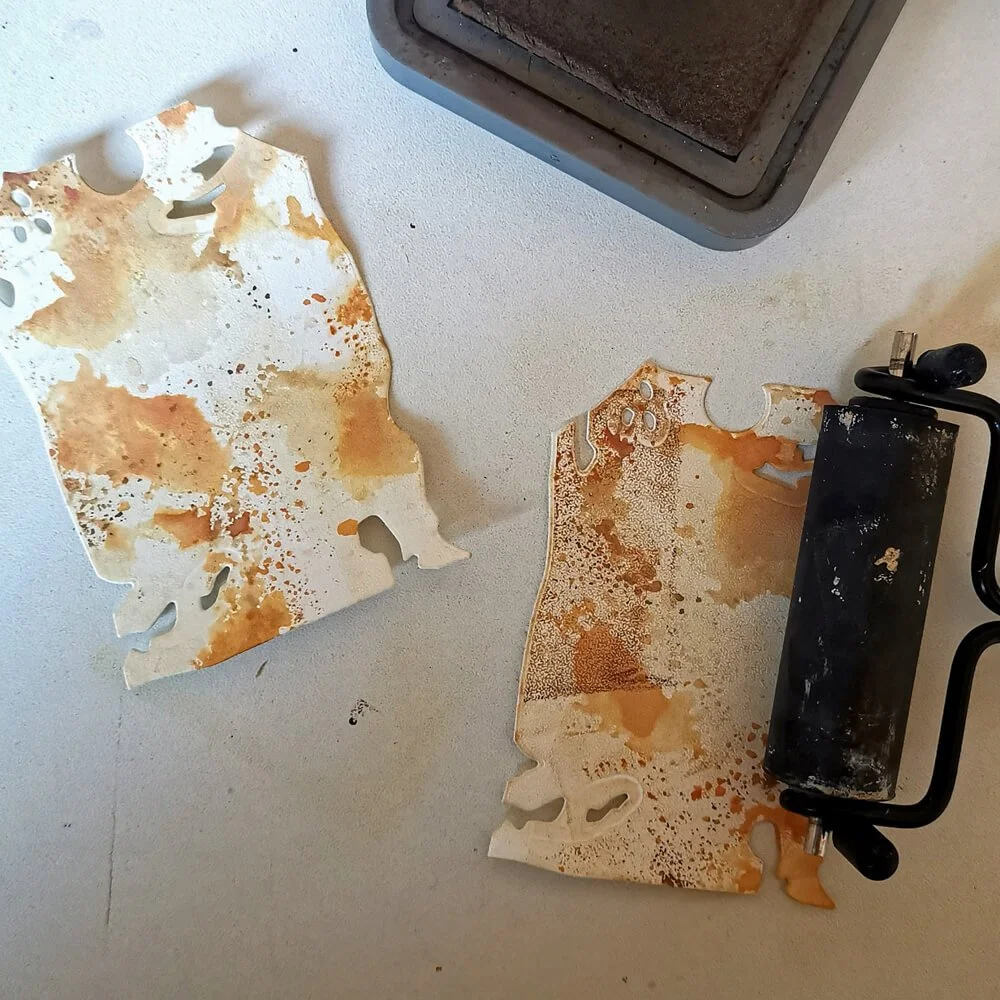
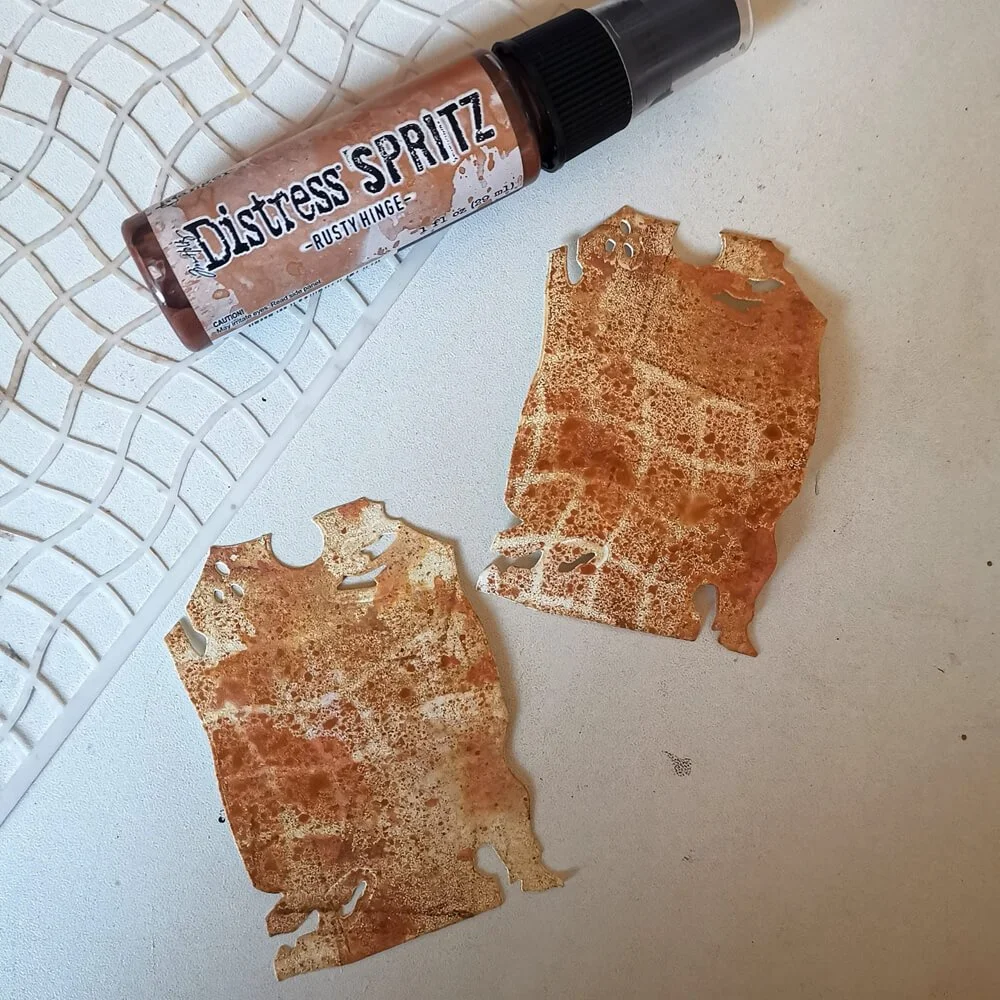
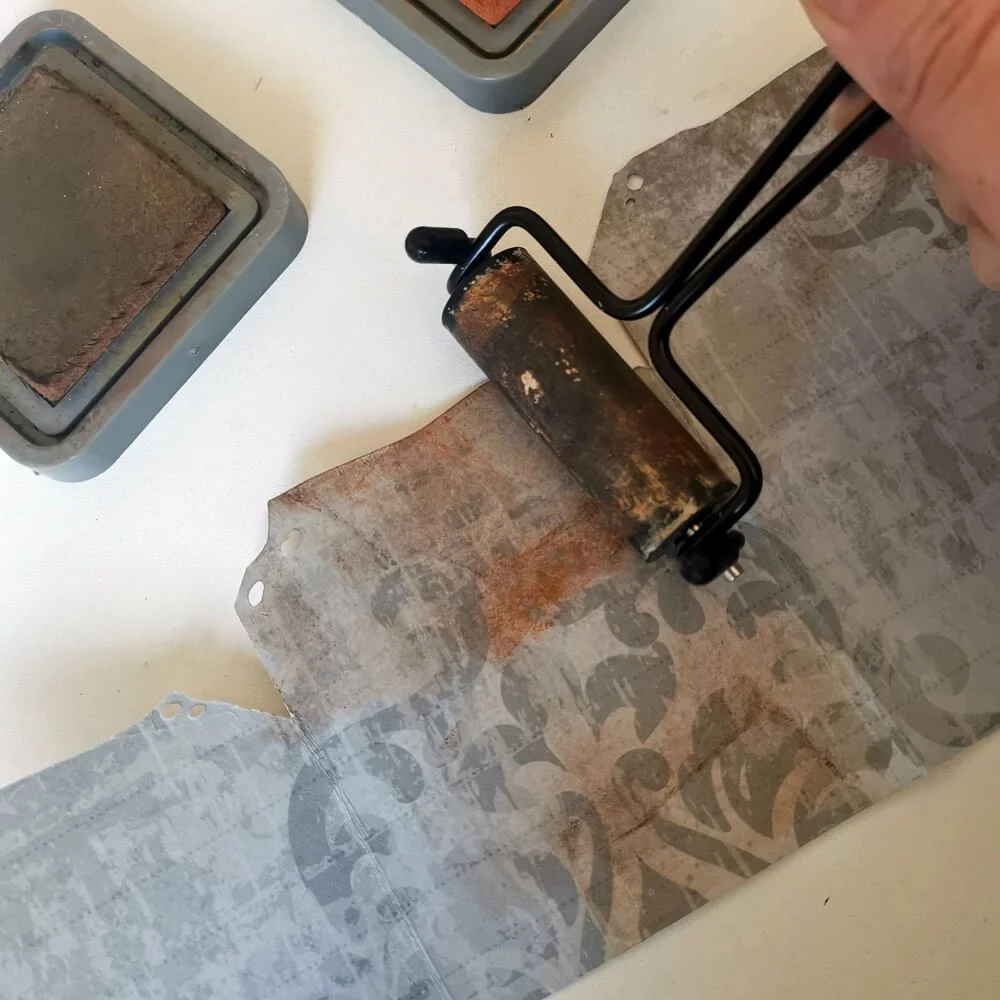
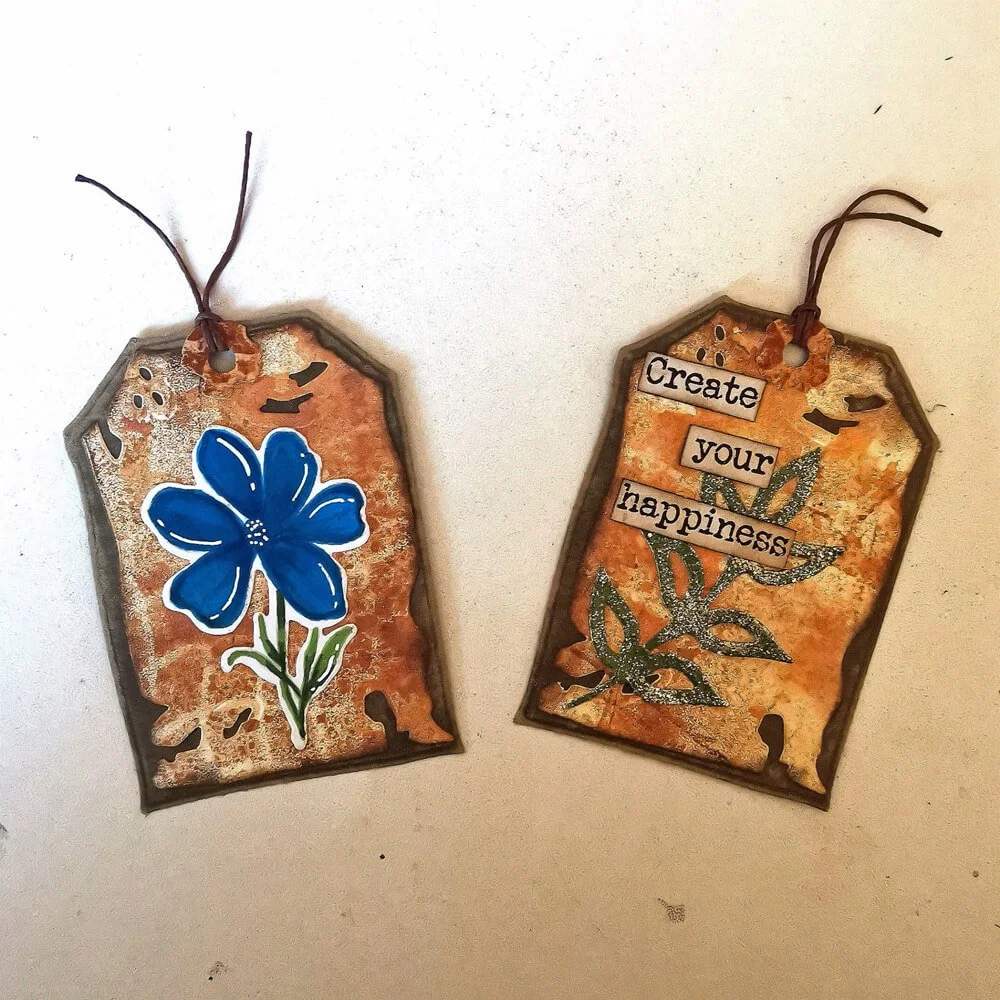
Step 4: For the two tags, I applied some oxide Ink to a stamping block, spritzed it with water, and then stamped the color onto the tags. Once it's dry, I take a brayer and carefully roll a little (dry) distress oxide onto the tag. I think this gives it a nice texture. Once this is dry, I grab another stencil (S059) and spray over it with Distress Spritz. Using a blending tool with a sandpaper attachment, I carefully sand over the kraft stock tags before gluing the layers together.
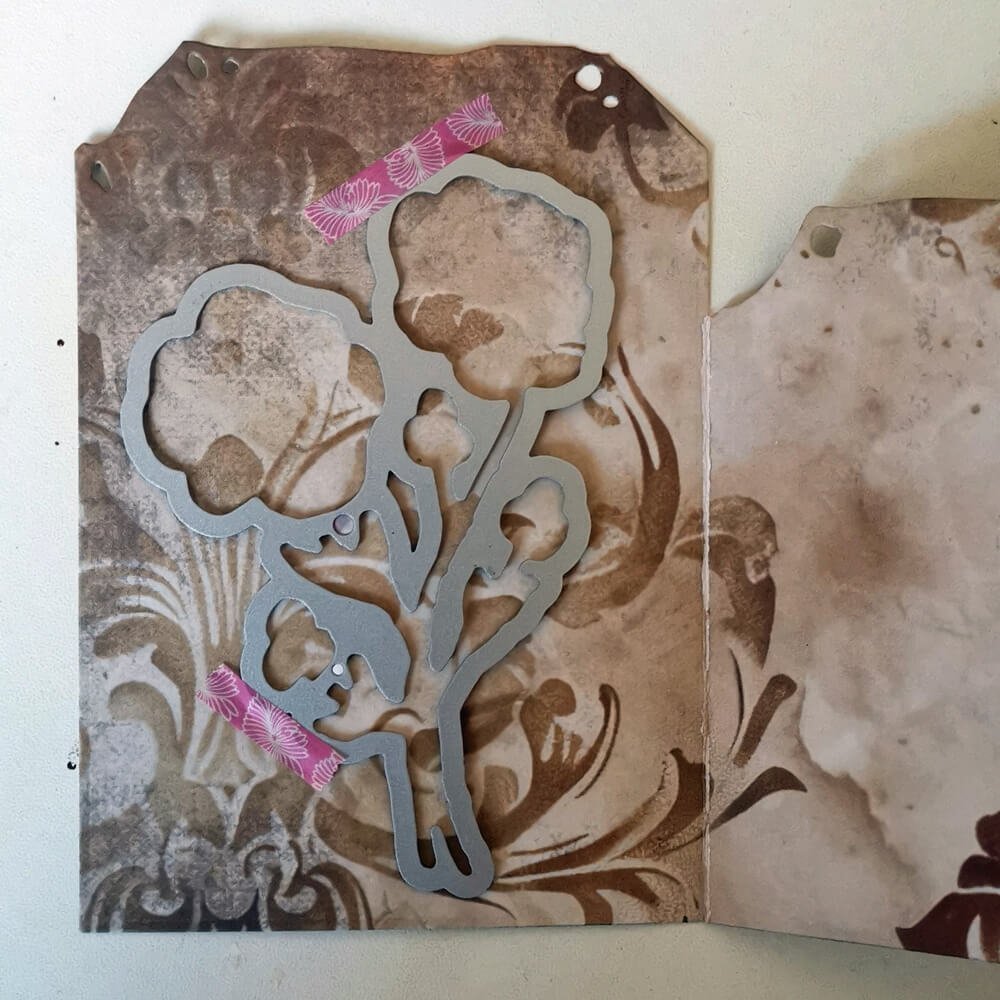
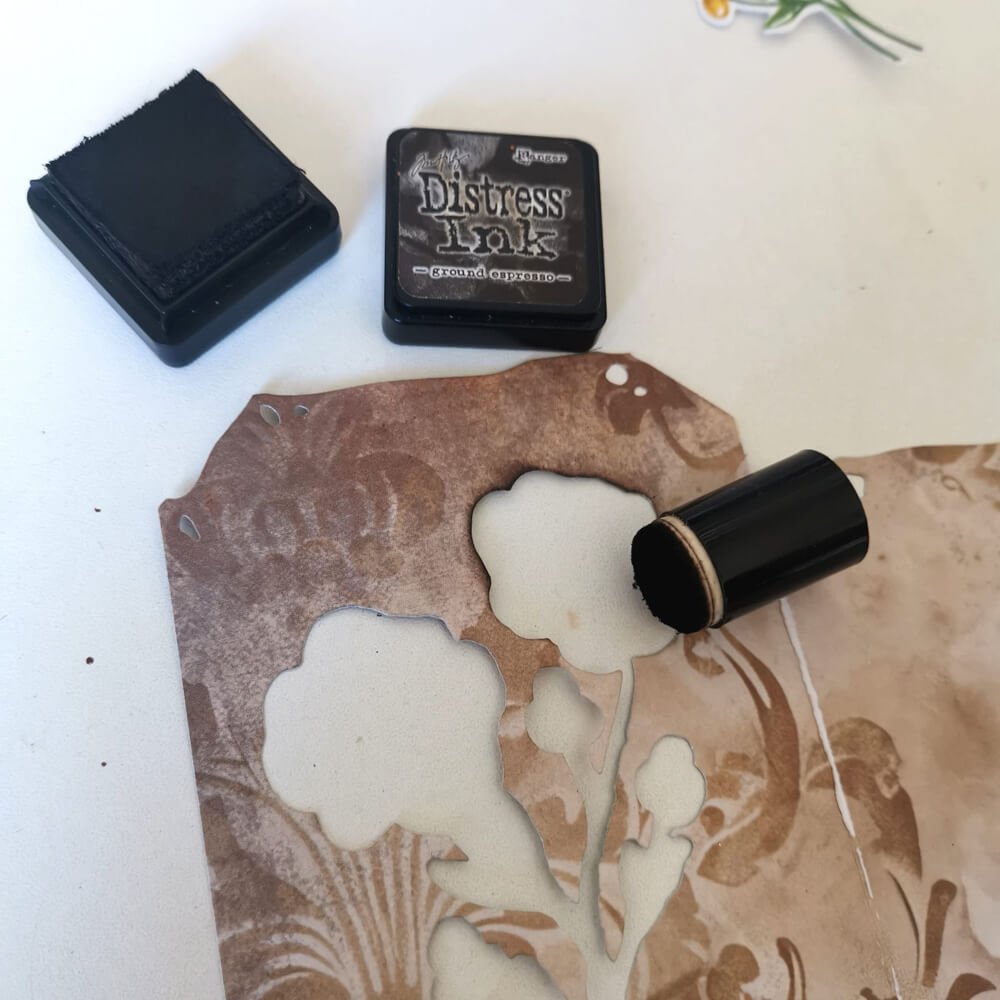
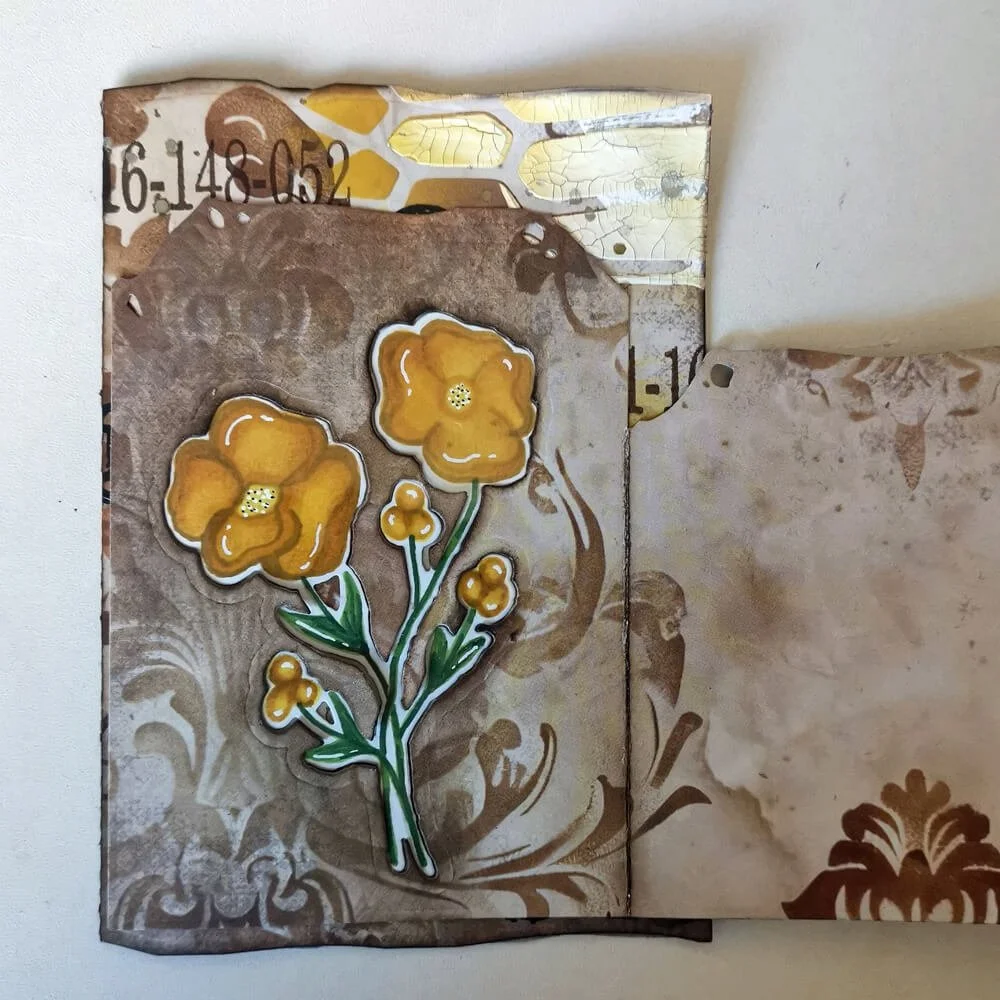
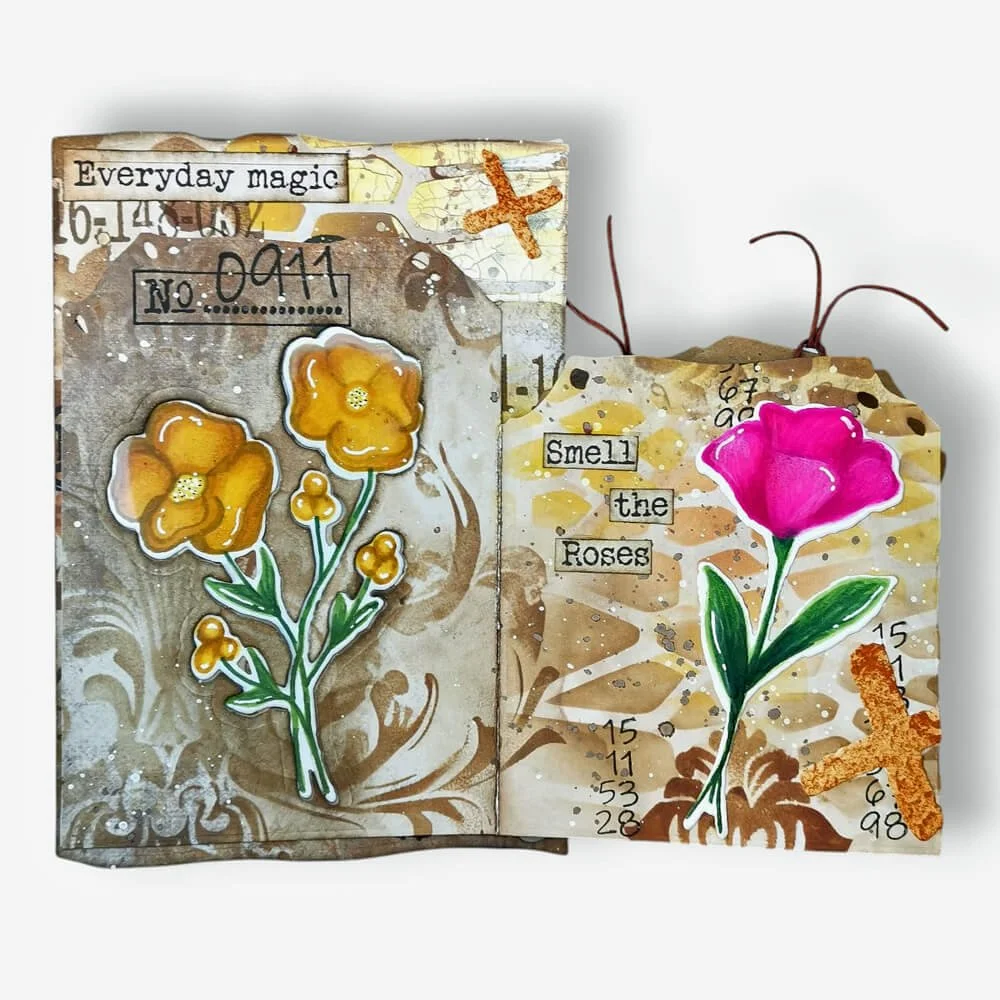
Step 5: Now, let's move on to the pockets. I want to make a flower on the large section using the Flower Scribbles Stamp and Die Set (CSD441). Because the set includes dies and matching stamps, I like the idea of cutting out the flower shape first and then adding the flower behind it. I'm going to do this first before I continue with the rest. I secure the die with Washi tape so it doesn't shift in the die-cutting machine. Once it's cut out, I darken the edges a bit with Distress Ink so the flower will pop out nicely. I now cover the cutout section with acetate, giving the flower a beautiful sheen, as if it were behind glass. It's probably hard to see in the photo, but the idea is to cover the part of the flower; the rest doesn't need to be covered.
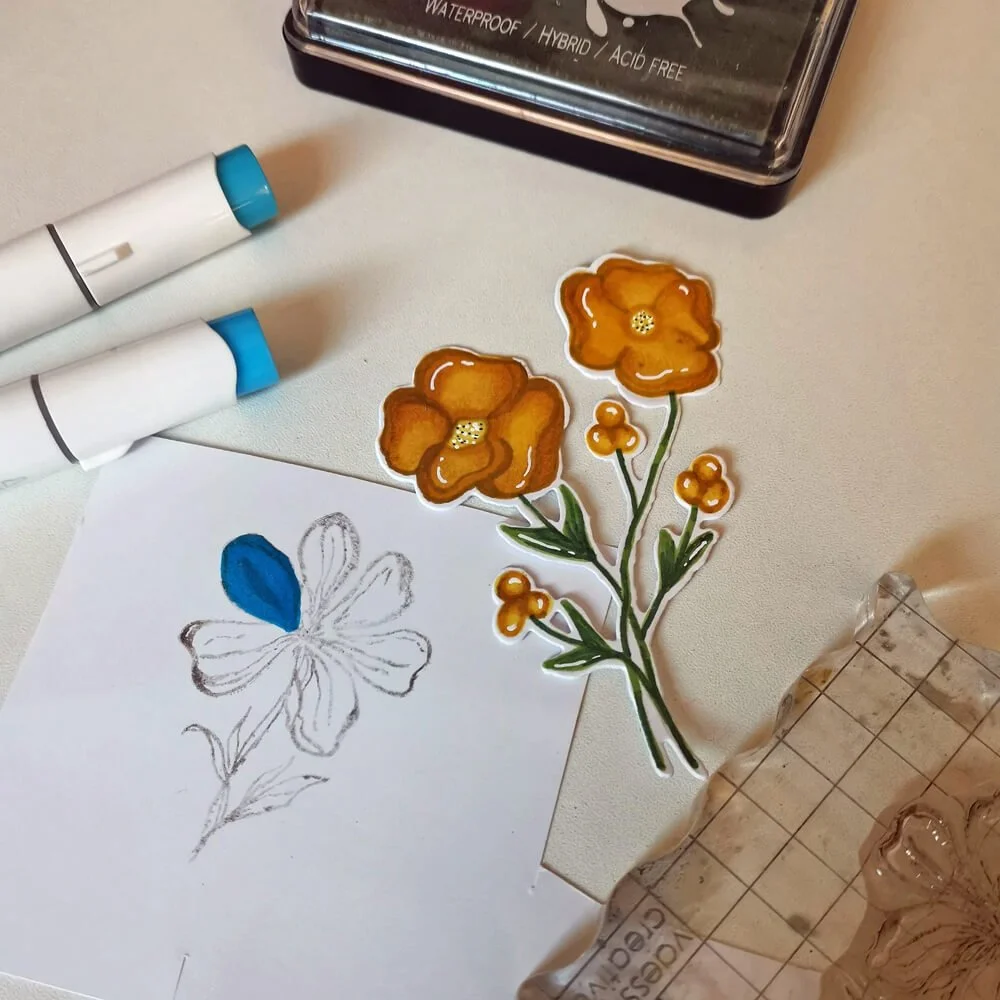
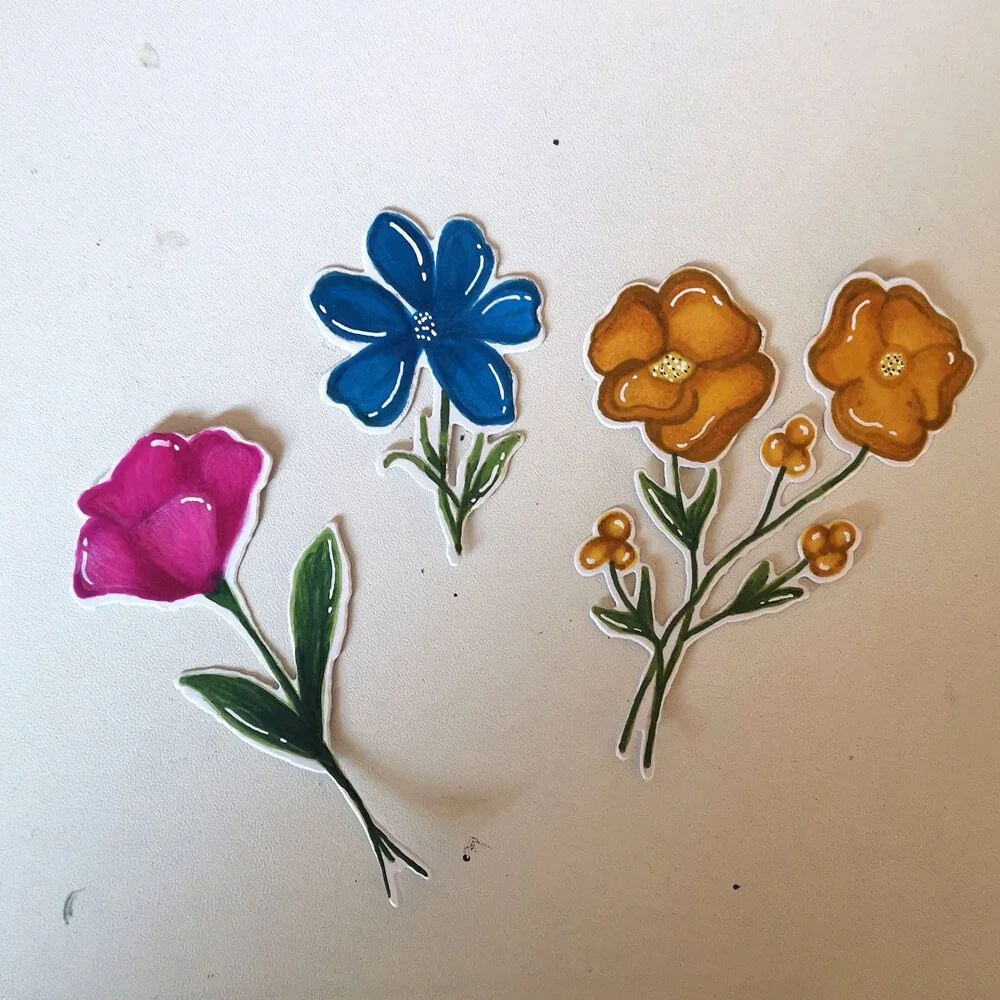
Step 6: Now, I stamped three flowers from the Flower Scribbles Stamp and Die Set(CSD441) with No Line Coloring ink. With this ink, you won't see any lines after the image is colored with alcohol markers. I chose beautiful, bright colors. Then I die-cut the flowers with the corresponding dies.
Step 7: I place the large yellow flower on my acetate and lightly secure it with Washi tape to keep it from shifting and to check if it's in the right place. Once I’m happy with its position, I apply glue, turn it over, and secure it to my base page.
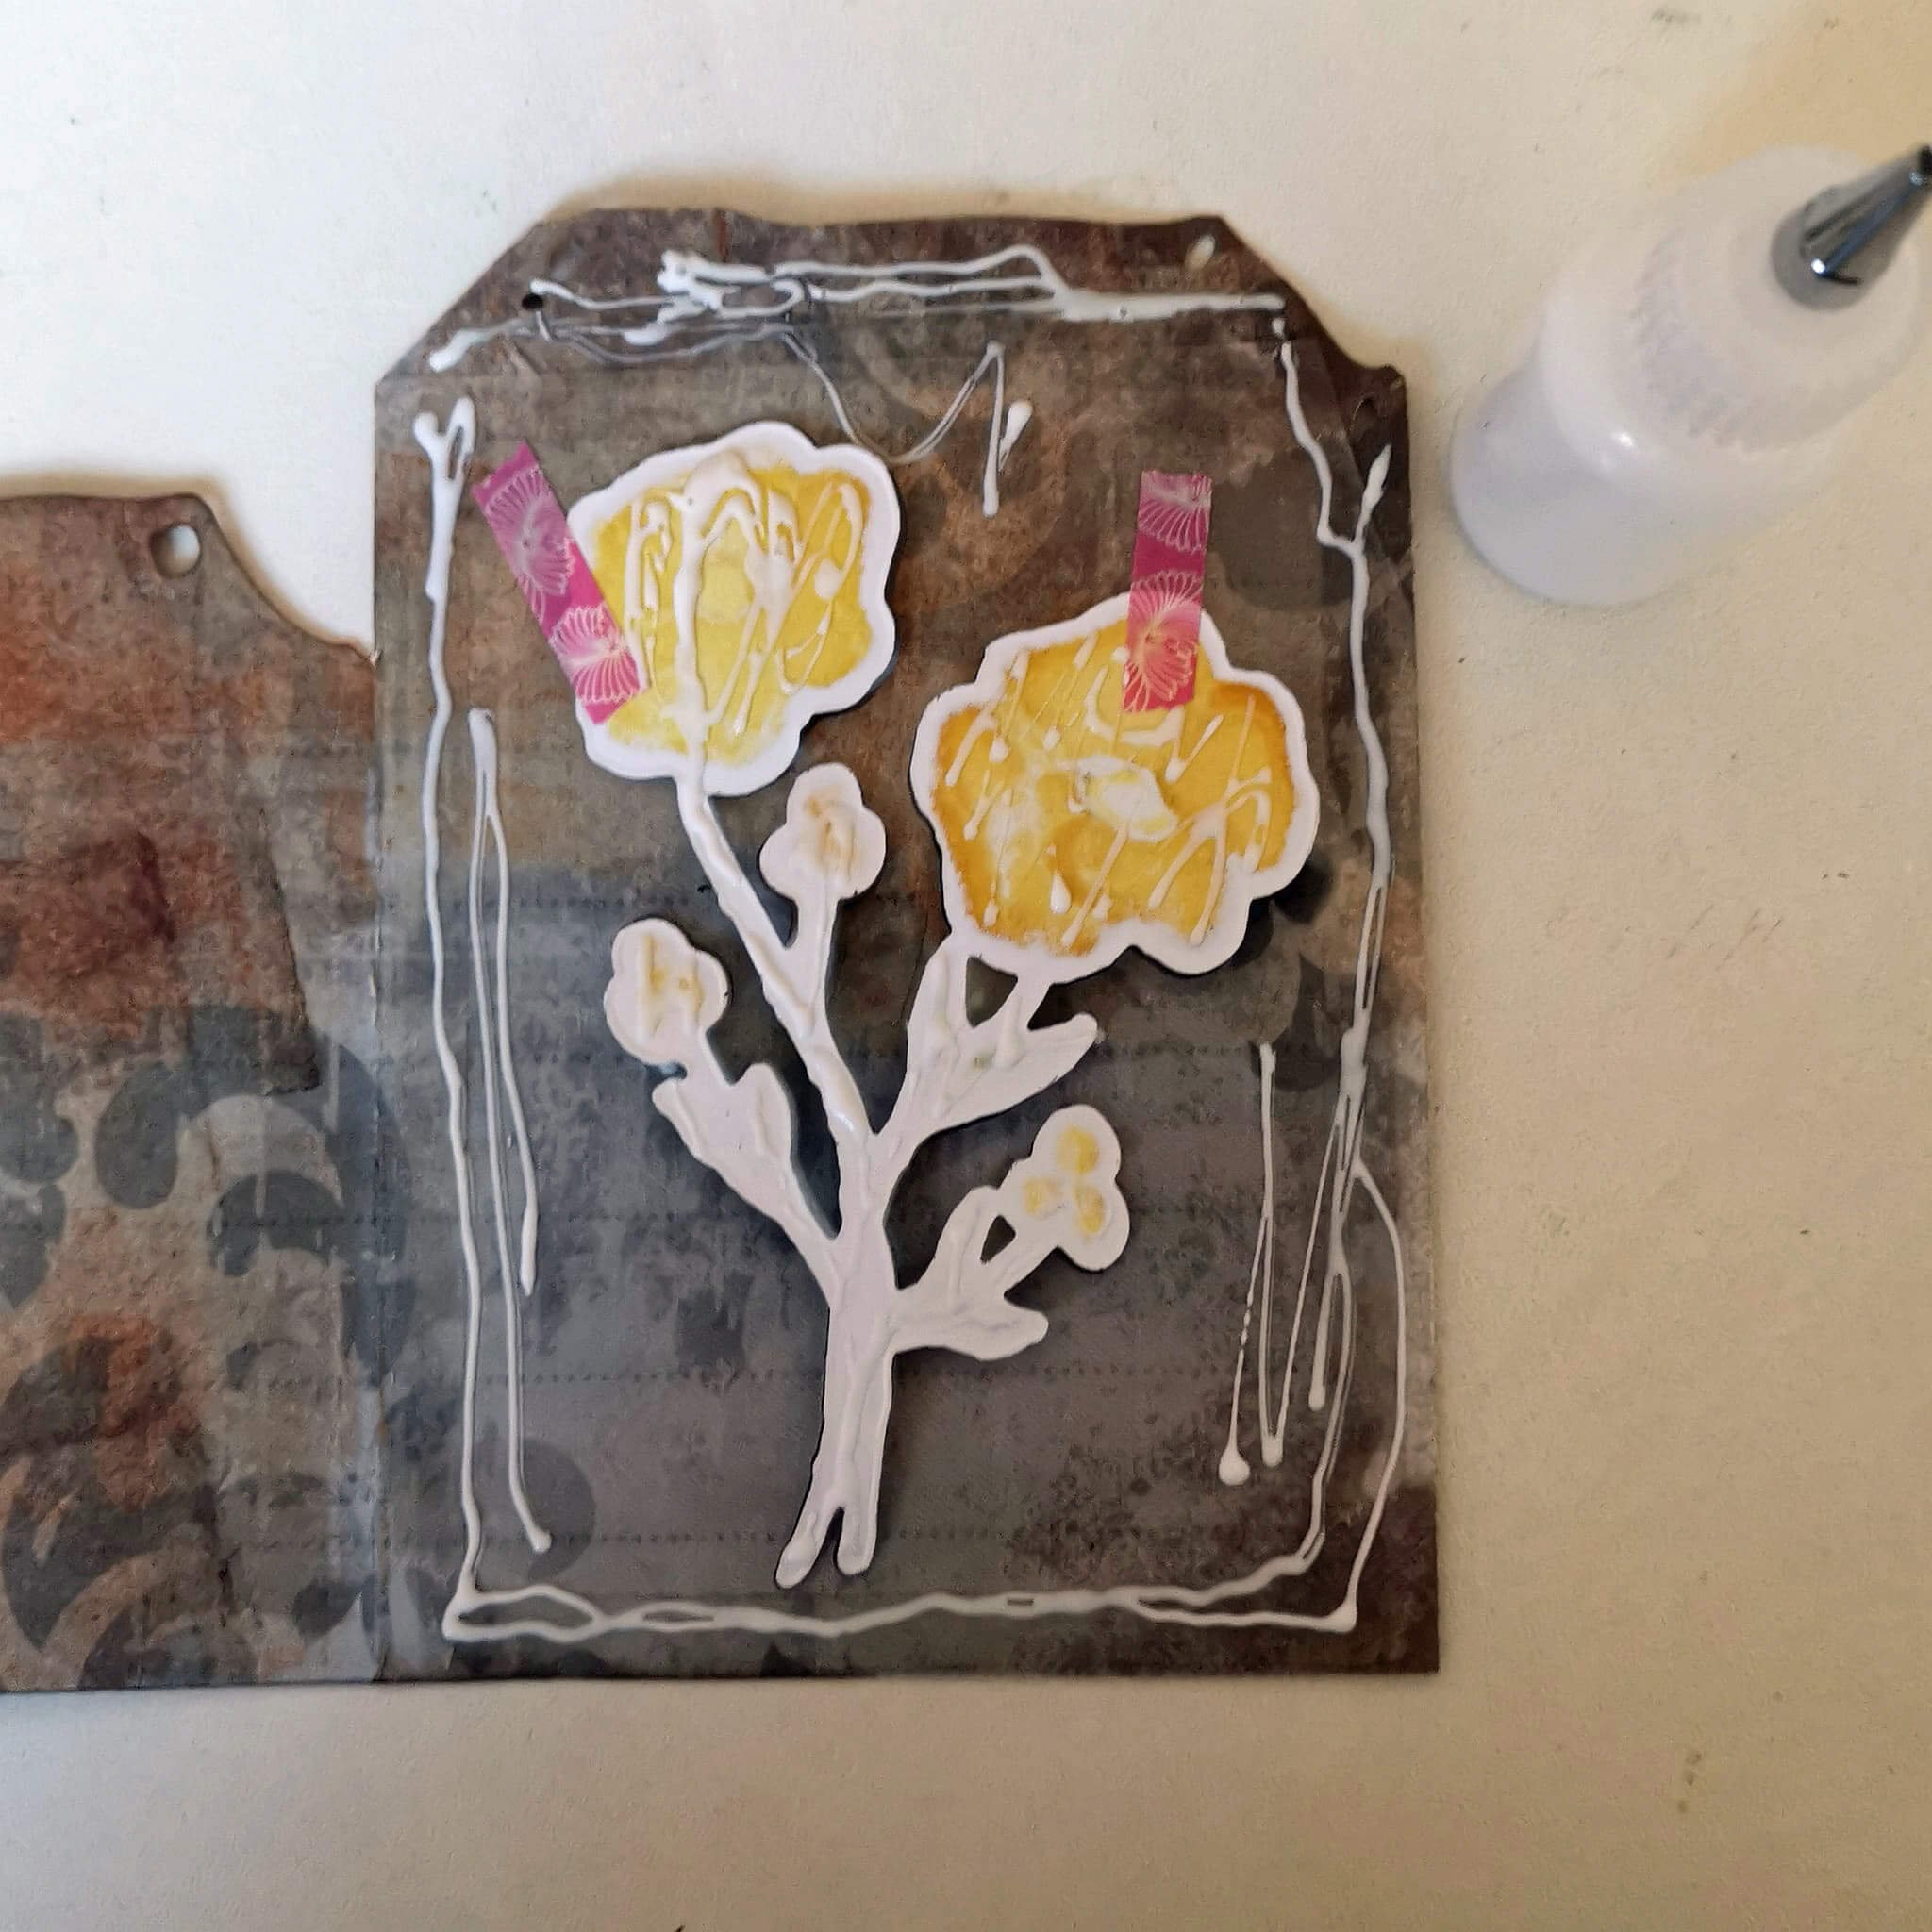
Step 8: I'm adding a bit more to the background on other parts of the pocket, using the same Distress Oxides, stencils, and stamps as before. I'm darkening the middle flap (where the pocket will go) a bit with a brayer and Distress Oxide. I think it blends in a bit better than the paper's original blueish color. When that's done, I'm attaching the small flap to make a pocket. The 2320 Tri-fold Slider Pocket set includes a small die that you can use for the side to create a pocket. I glued the bottom with just a little bit of glue.

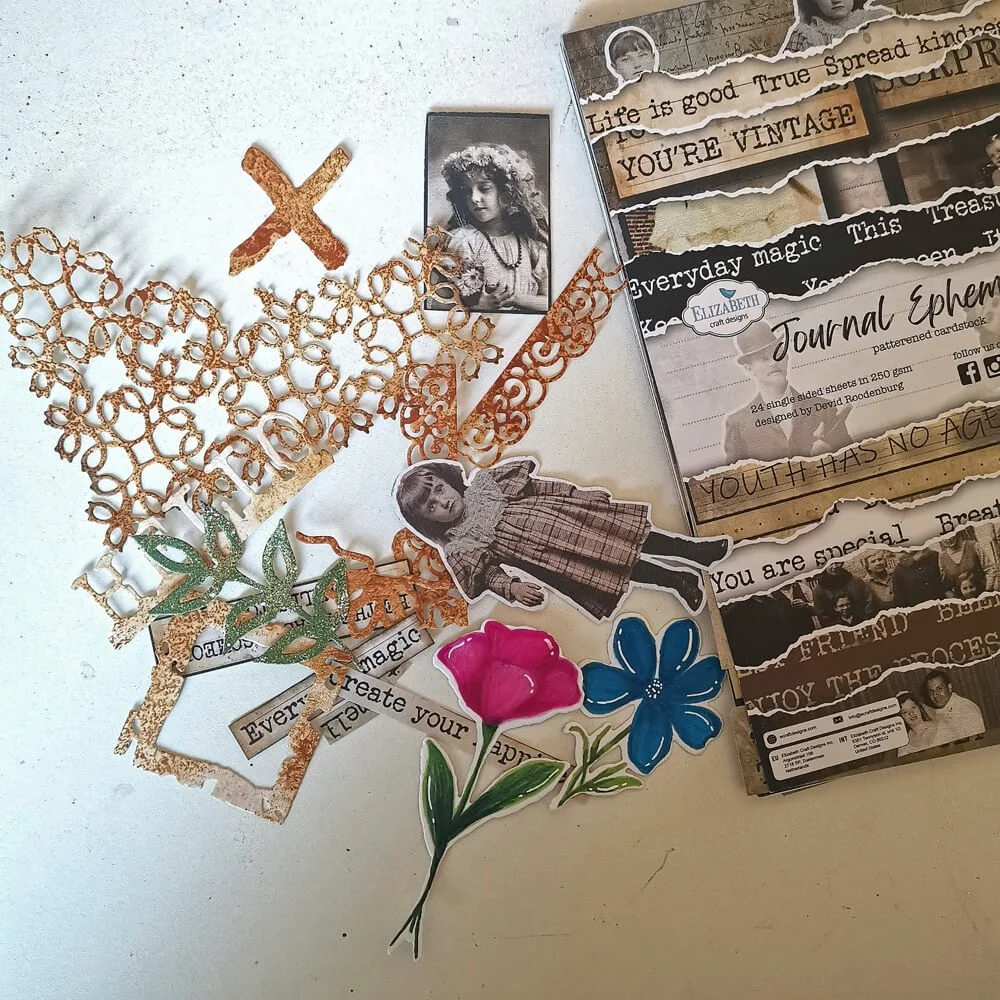
Step 9: Now it's just a matter of decorating with cut-out elements, pictures, and sentiments from the Journal Ephemera book. Whatever you like to use! I'll also glue the colored flowers onto my Folding Trio, and I'll glue the small blue flower onto a tag. I'll also attach a small thread to both tags.
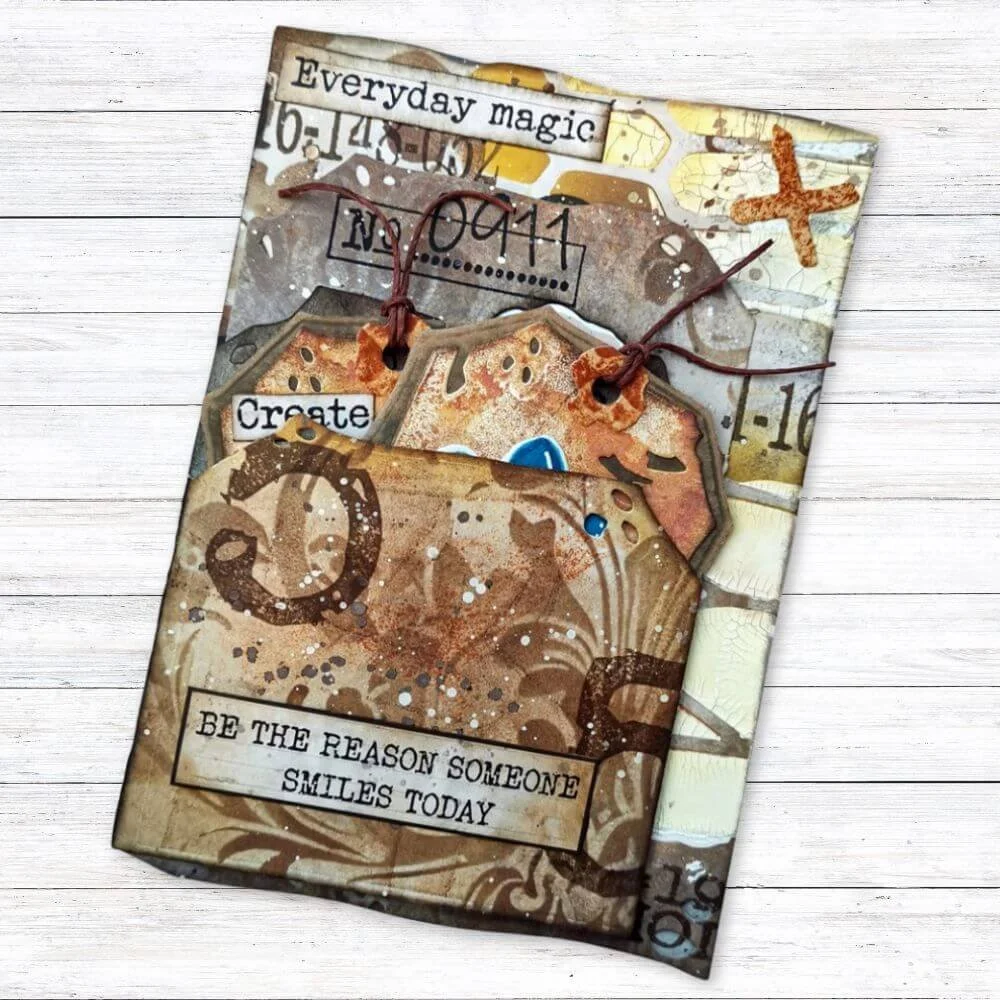
And that's it! Below you'll see the result of my Art Journal page. I hope it inspired you, and perhaps you'll try some of these techniques yourself. Thank you for taking the time to read this tutorial.


Other products used: Distress Oxide Ink: Vintage Photo, Rusty Hinge, Mustard Seed, Antique Linen, Distress Mini Ink: Ground Espresso, Distress Mica Stain: Decayed, Distress Spritz: Rusty Hinge, Distress Oxide Spray: Vintage Photo and White Crackle Paste