How to Make a Customizable Desk Calendar the Easy Way
Are you a crafter who loves making projects that you can use every day? Or maybe you’ve been looking for a creative way to make a desk calendar that you can customize for each month of the year? In this tutorial, you’ll learn how to create a calendar using simple techniques and layered details. This project is so much fun, and you can change the theme, style, and decorations for each month of the year.
Hello crafters! Reanna here with something super fun, the NEW Dates to Remember stamp set from Art Journal Specials! I’m going to show you step-by-step how to make a special desk calendar.
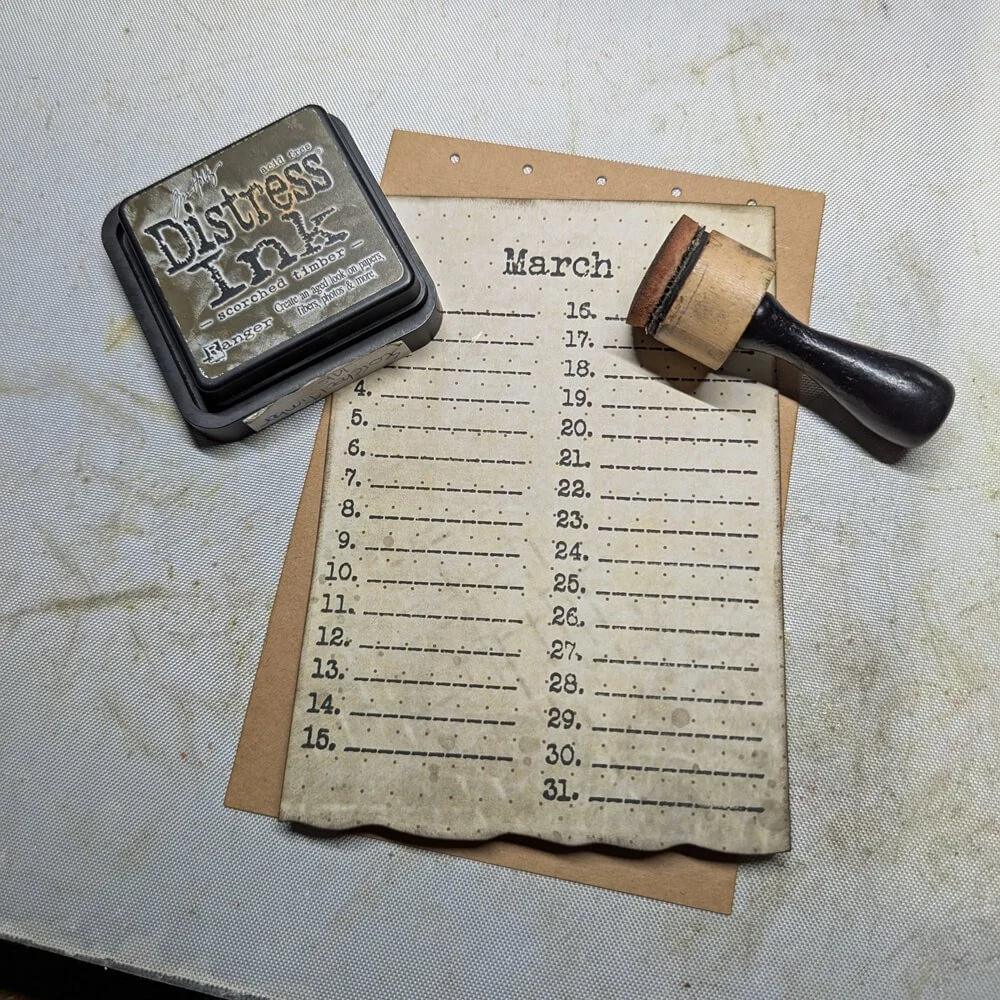
Step 1: The calendar stamp fits perfectly on the Build a Journal die set. I use craft paper for the base page and the Golden Season design paper for the mat layers.
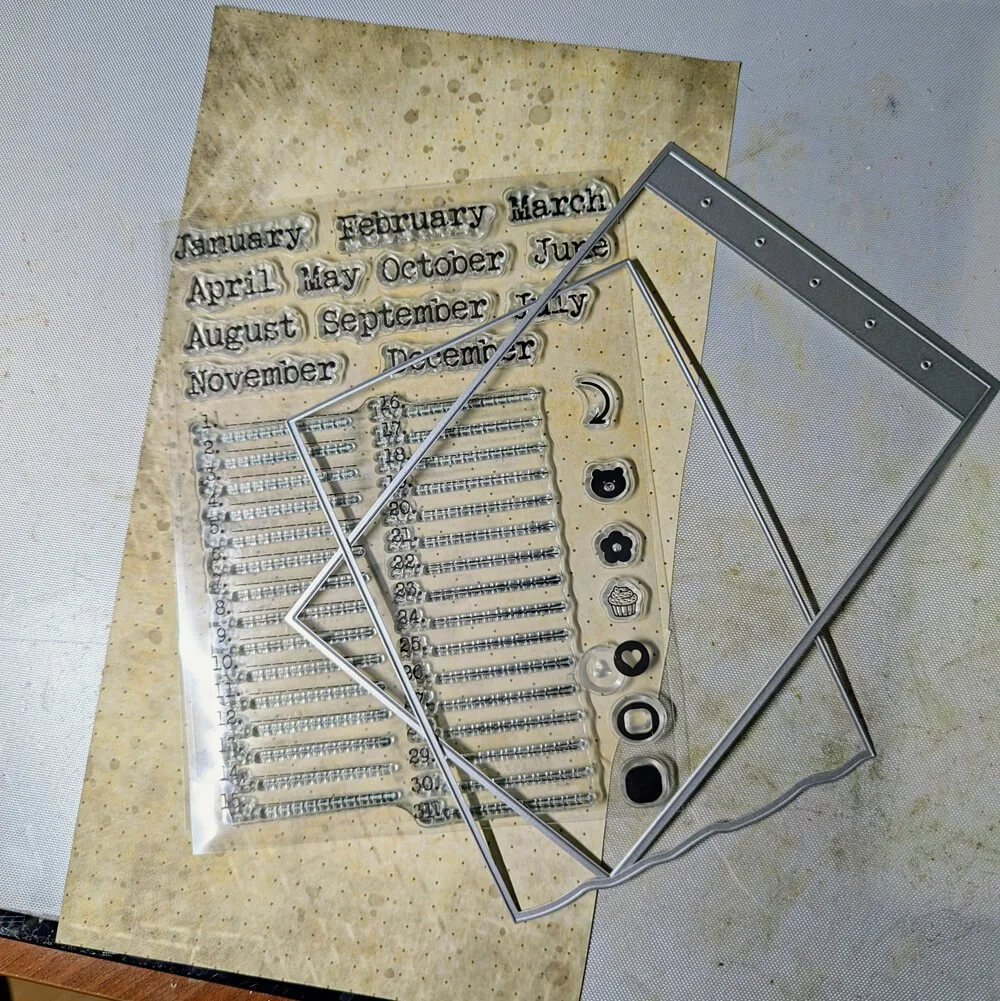
Step 2: It’s helpful to use your stamping tool to stamp the calendar onto the design paper; this way, you can stamp twice and get a perfect print!
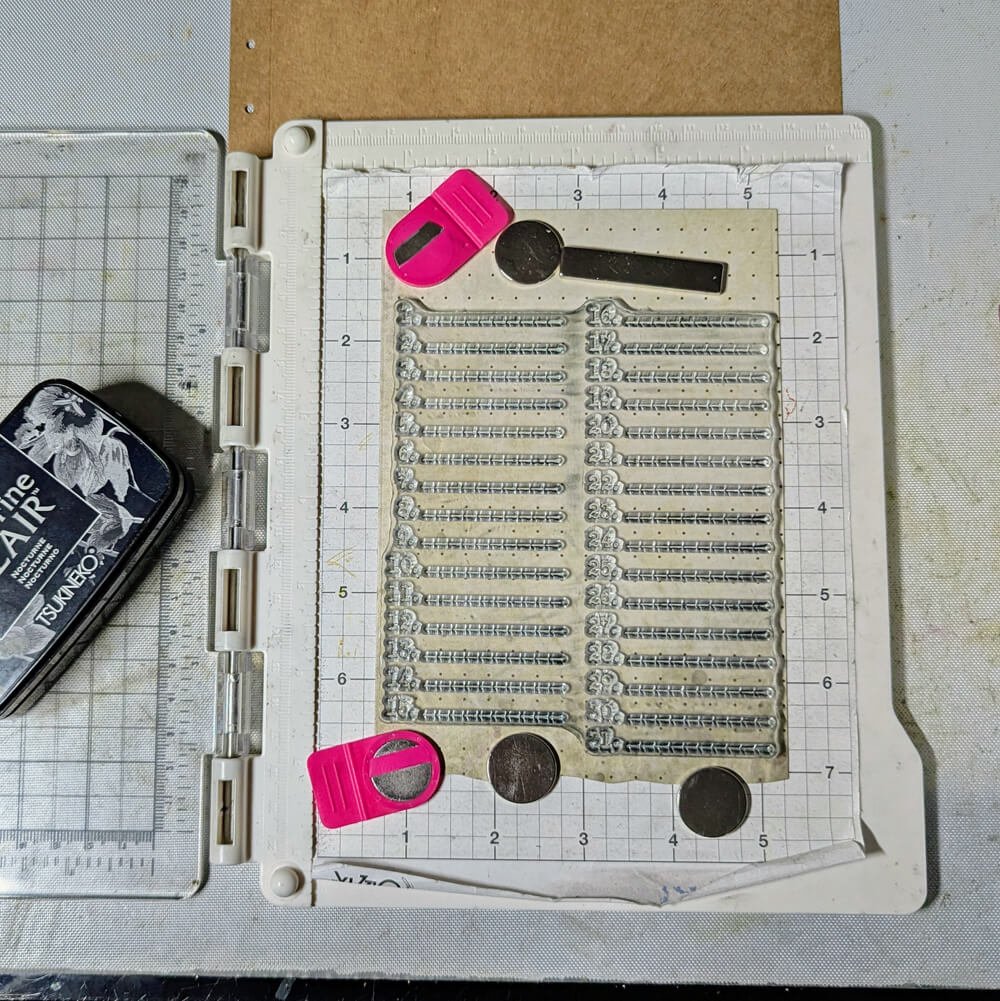
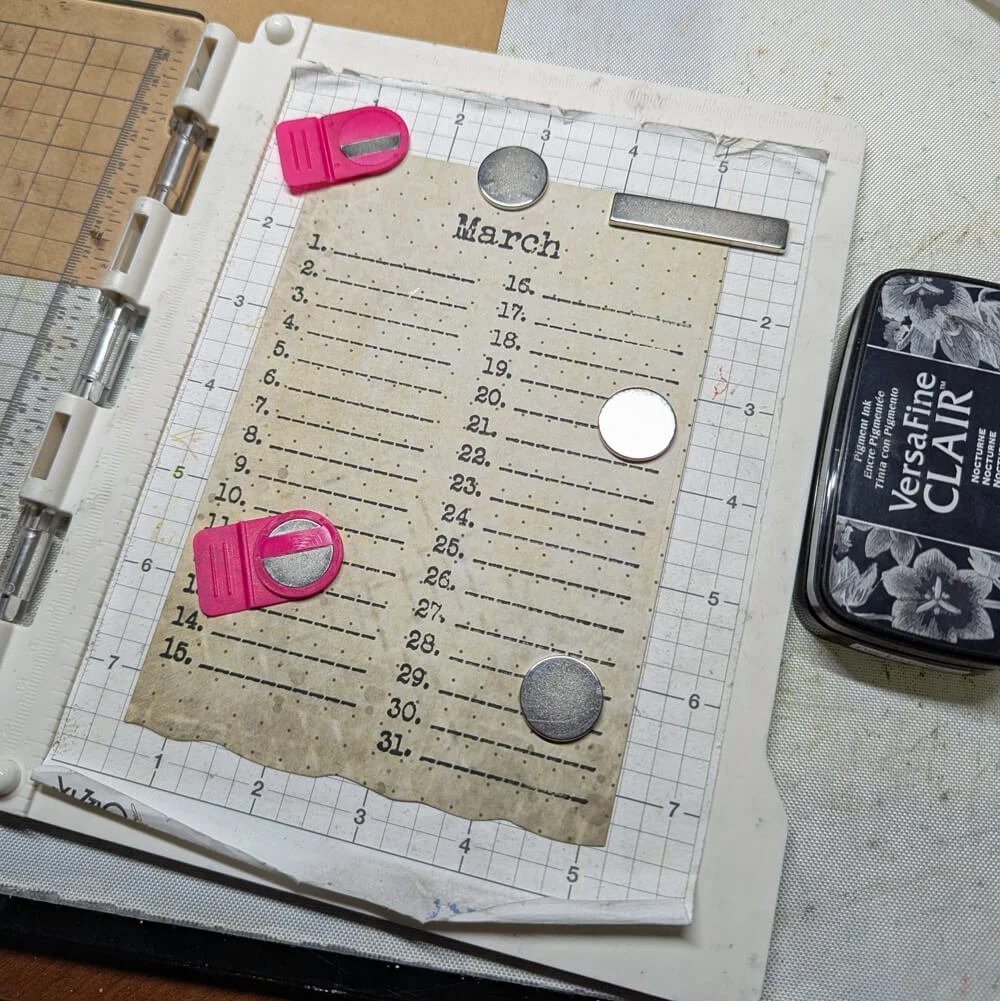
Step 3: I like to ink the edges of my paper, so I did that for this project as well.
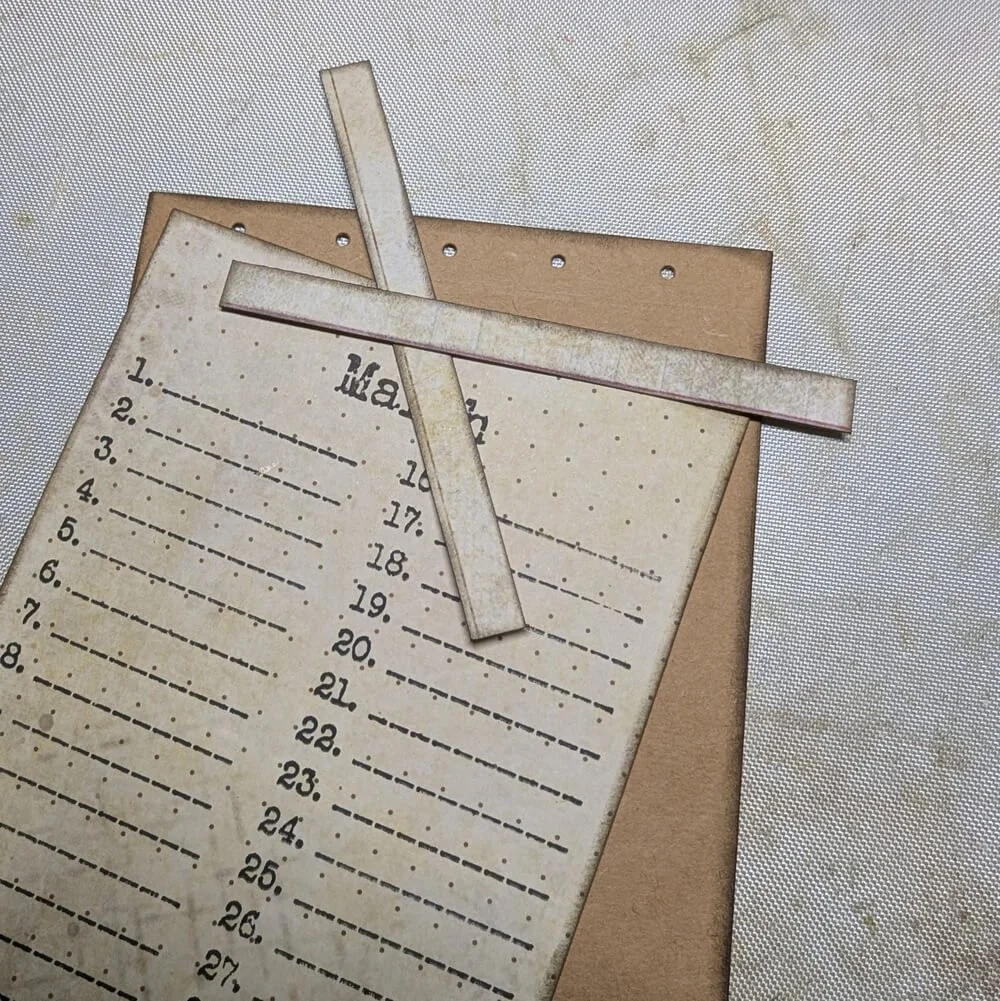
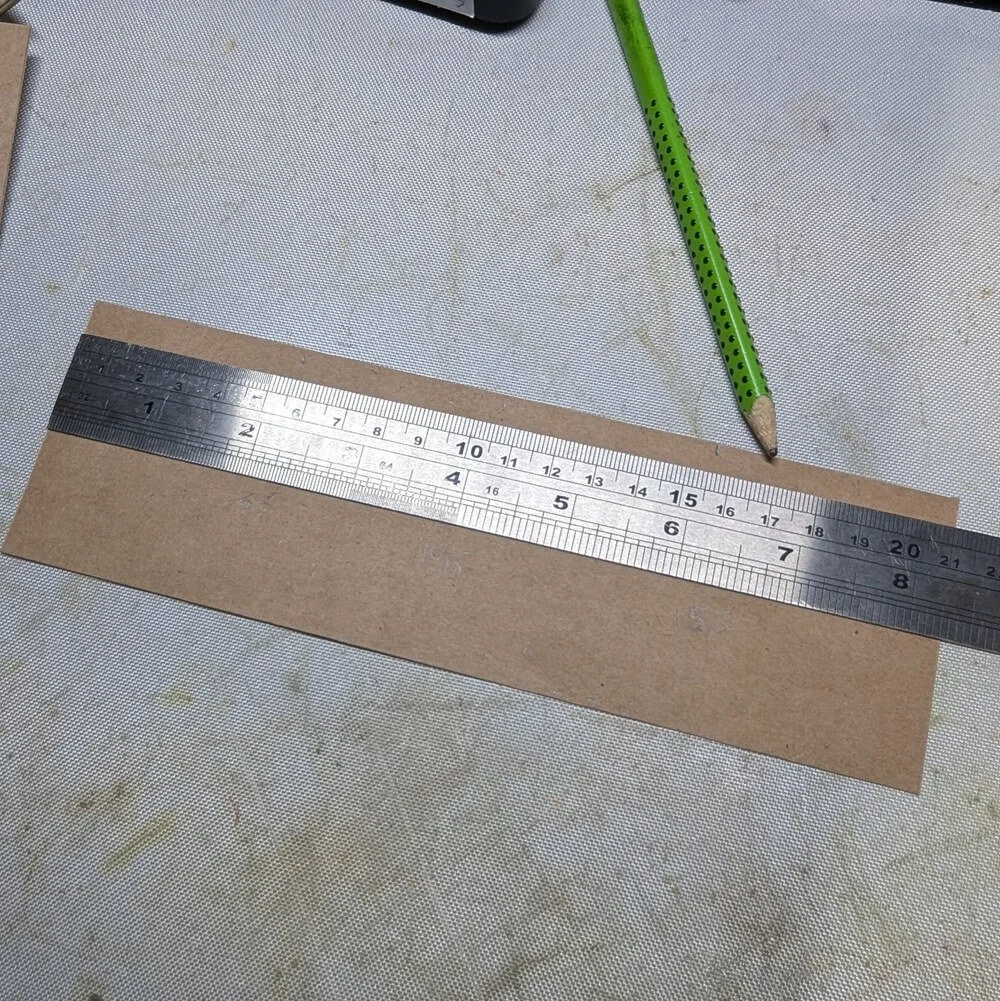
The base page has small holes in it, perfect for binding, but since I am going to do something else, I’m covering them with two strips of paper measuring 12 x 1 cm. After inking the edges, I glue them to the front and back of the page.
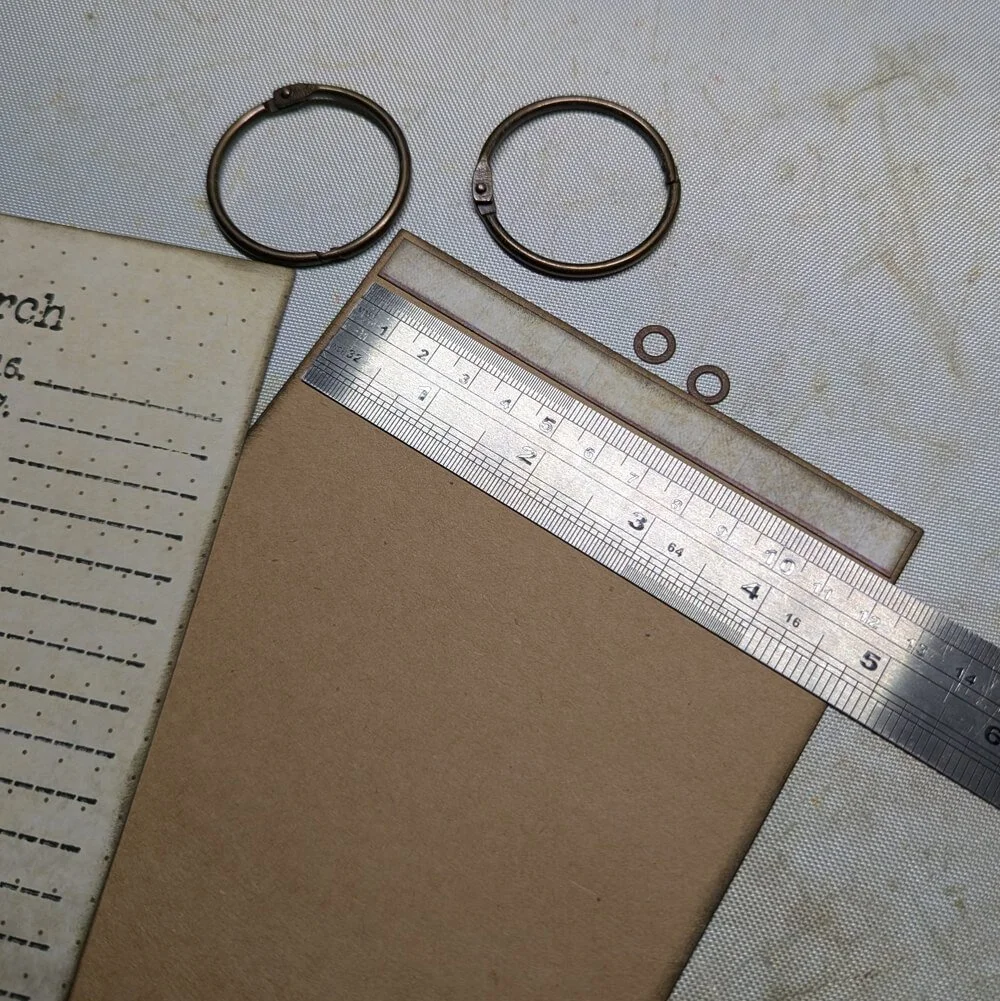
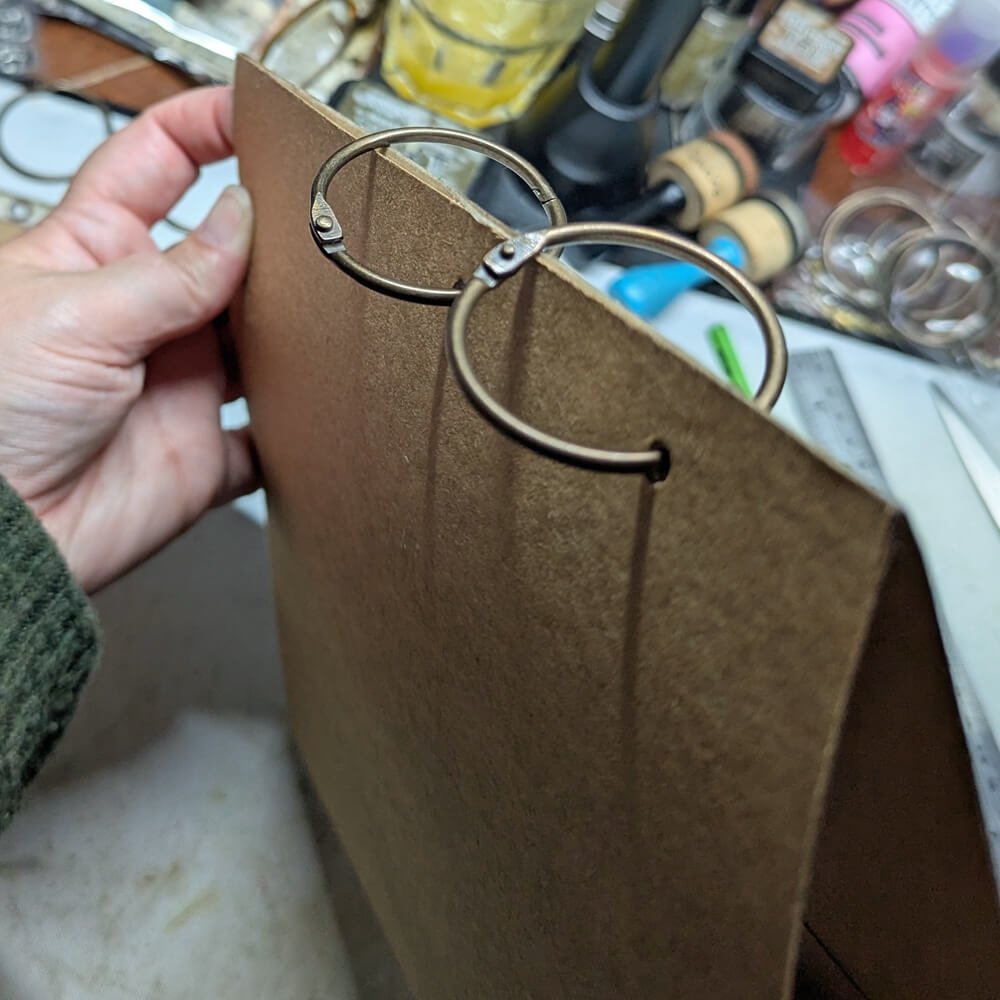
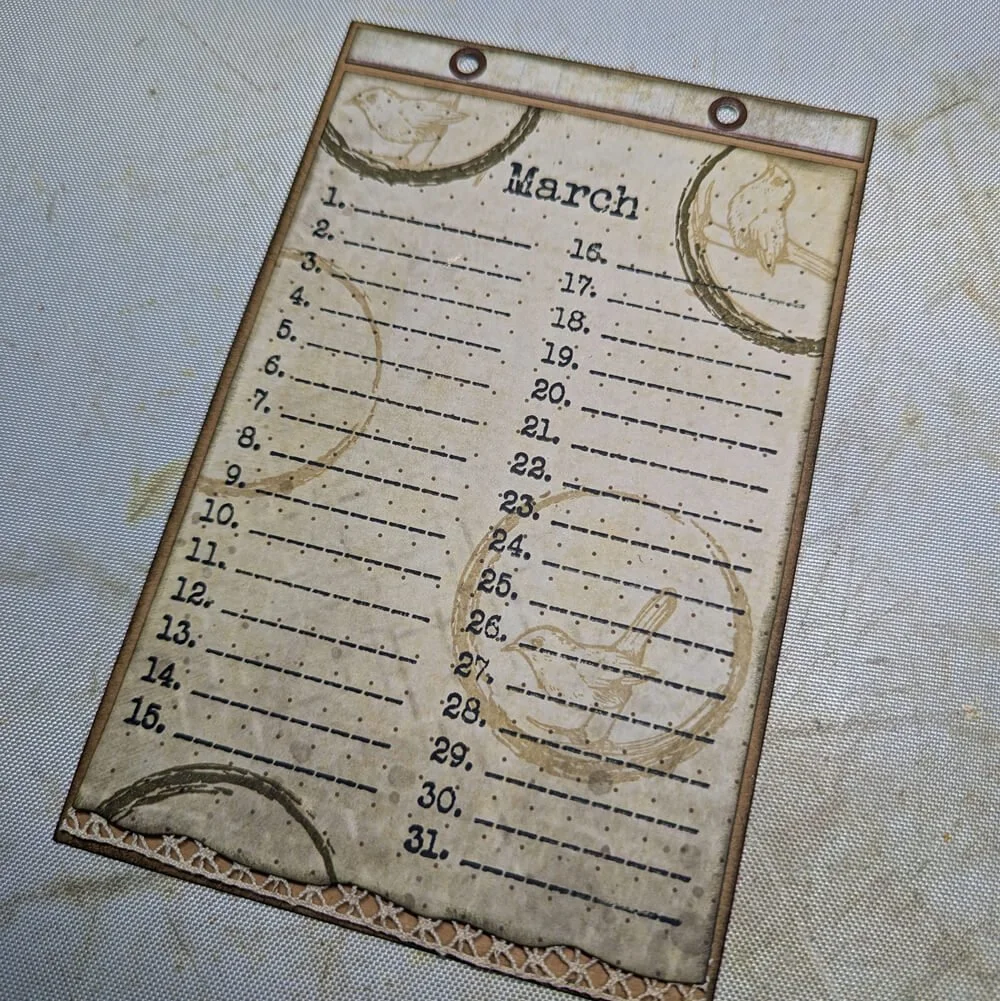
Step 4: I’m going to use book rings on my calendar. To do this, I add two holes and use reinforcers to make them more sturdy.
I added the holes at 3 and 9 cm, measured on the design paper, and used this card as a template for the following month cards, so that every card is the same.
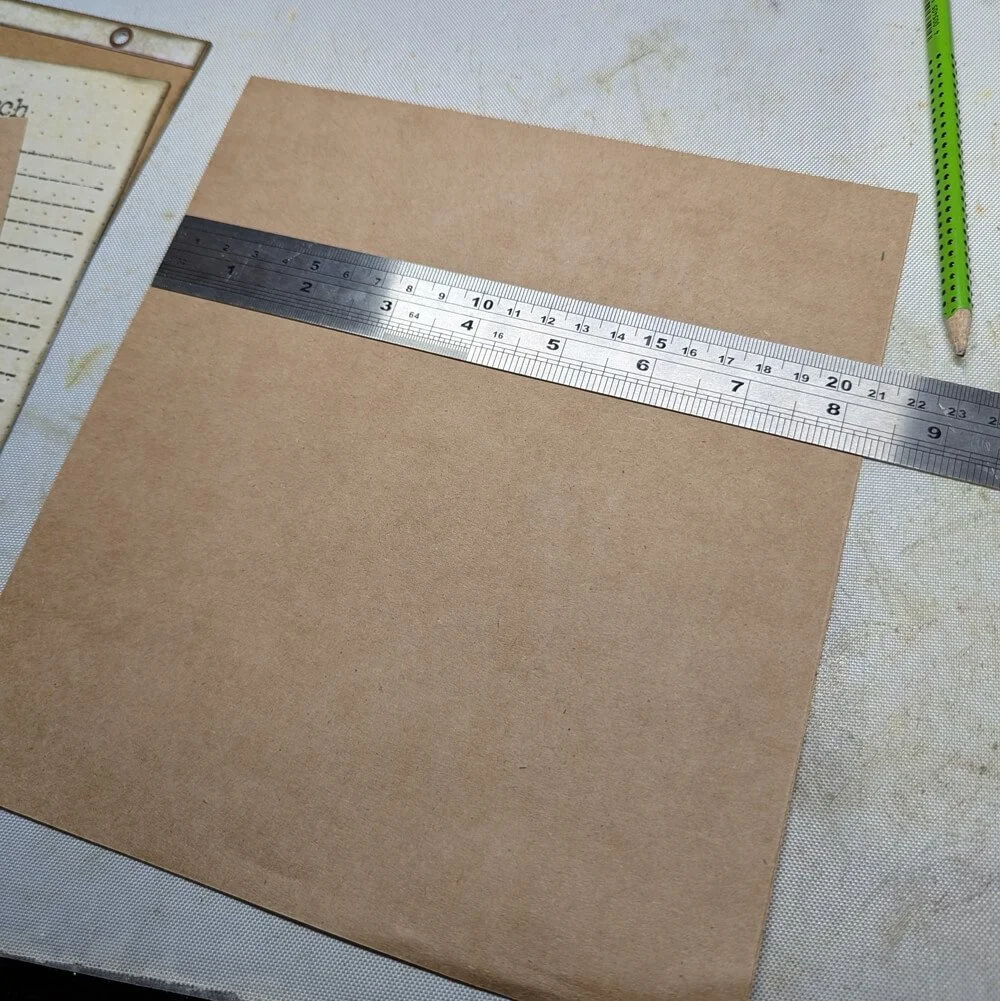
Step 5: For the base of the calendar, I’m cutting several pieces of craft paper and two pieces of design paper. I need two A4 sheets of craft paper for this. The pieces I cut were:
1x, 23 x 20.5 cm in Craft paper
1x, 23 x 21 cm in Craft paper
2x, 21 x 6.5 cm in Craft paper
2x, 22.5 x 20 cm in Design paper
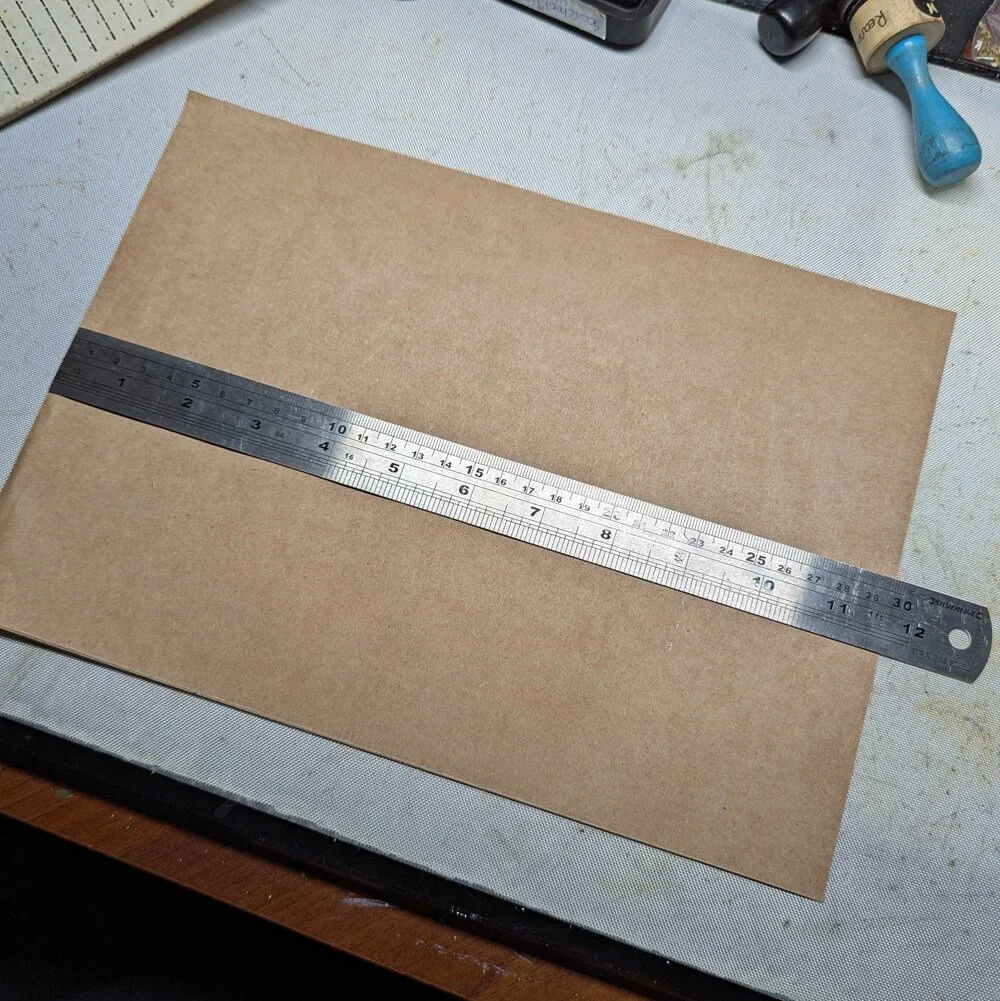
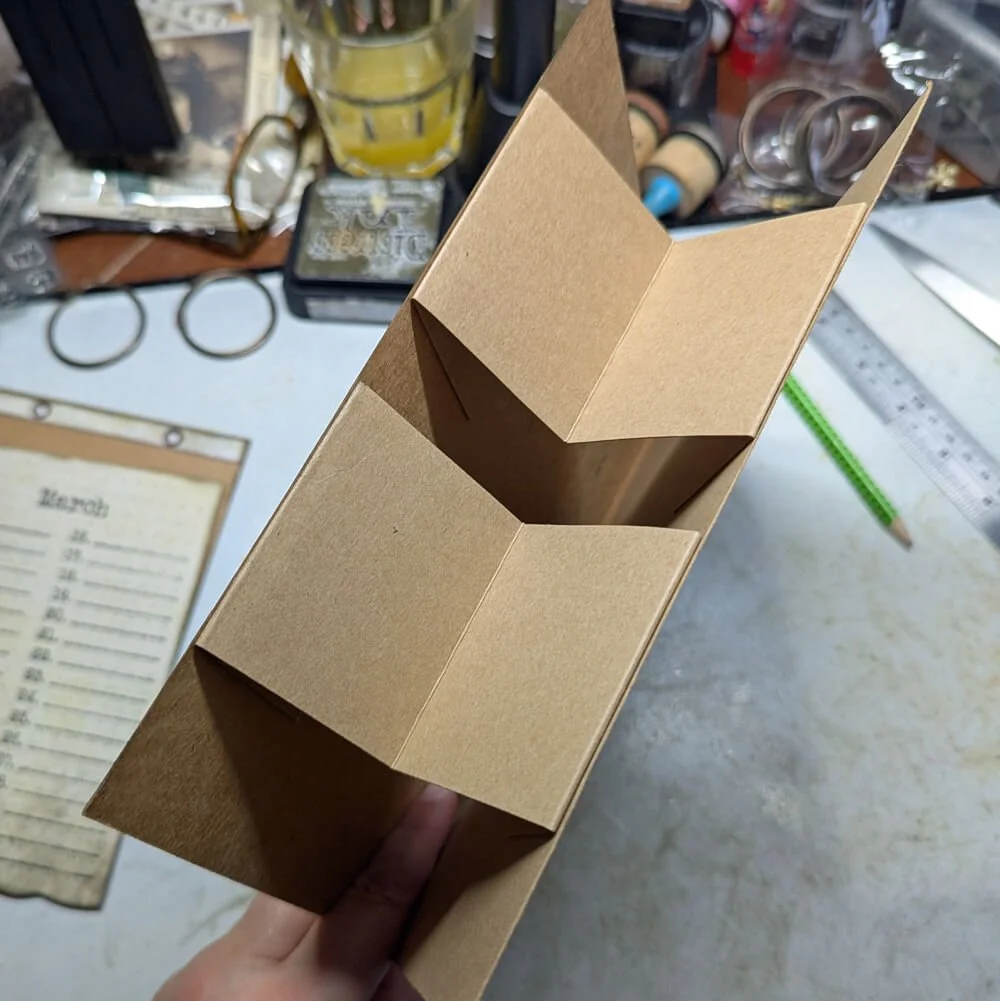
Step 6: Assembling the base is quite easy. Here is how I did it: I took the two smaller strips (21 x 6.5 cm) and scored at 5, 10, 5, and 16 cm (see photo, I scored over the length of the strip).
I took the base (23 x 21 cm) and scored at 20.5 along its length. This way, you have a small strip to glue the two base pages together on the top. On the inside (bottom) of the two base pages, glue the two smaller stripes (see photos!), so your base is ready. Glue down the two mats you cut from designer paper on the base, back, and front.
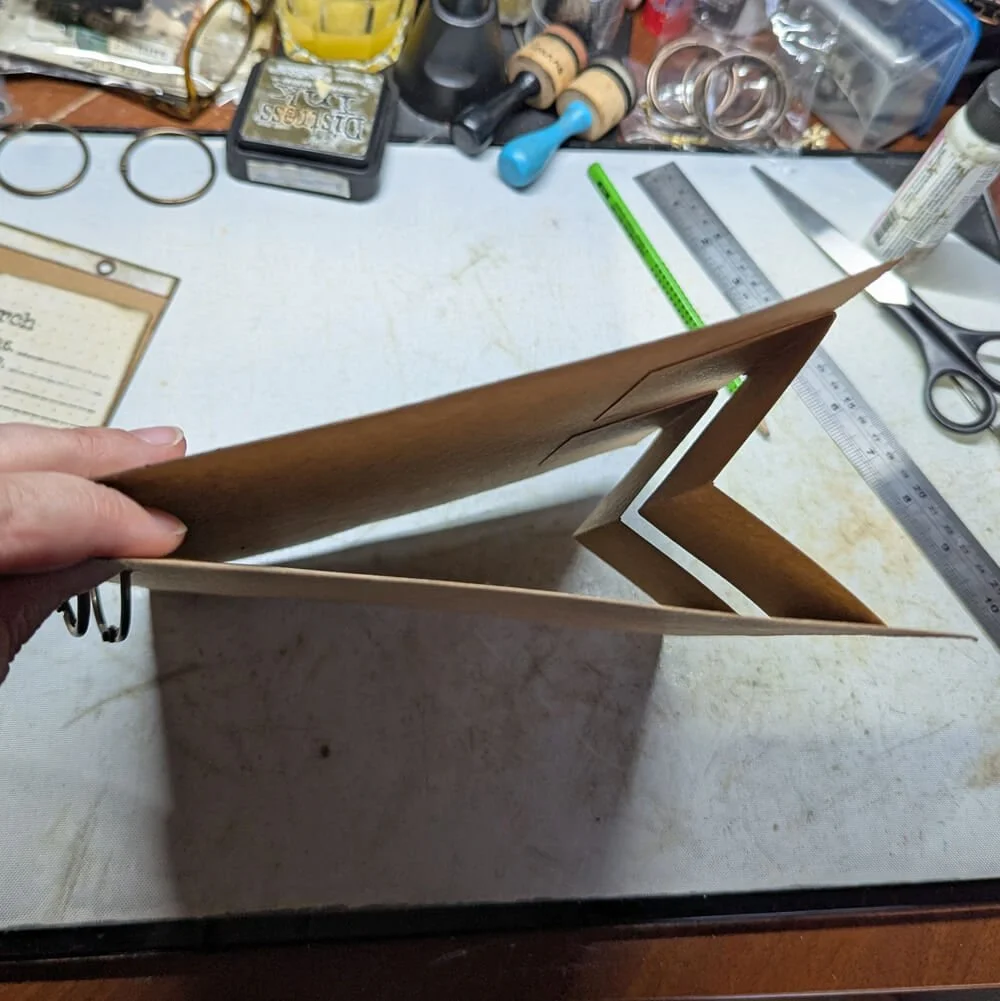
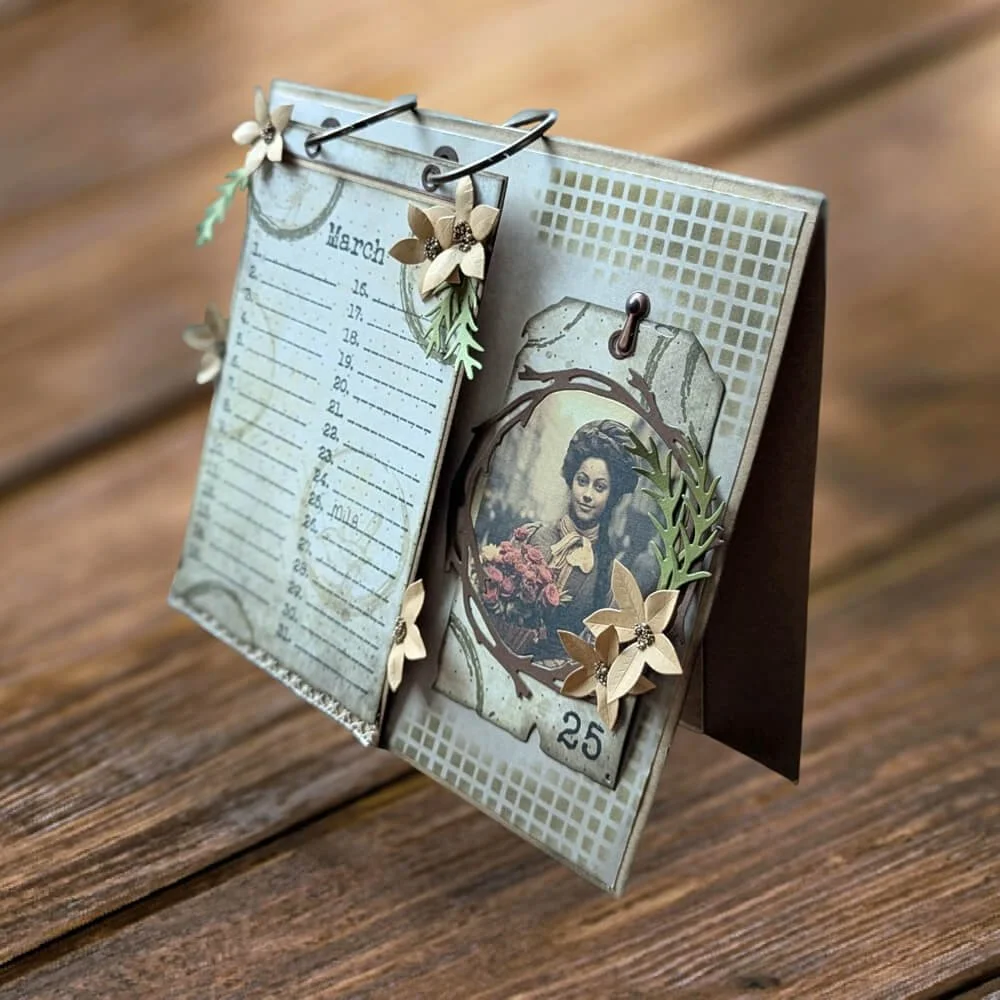
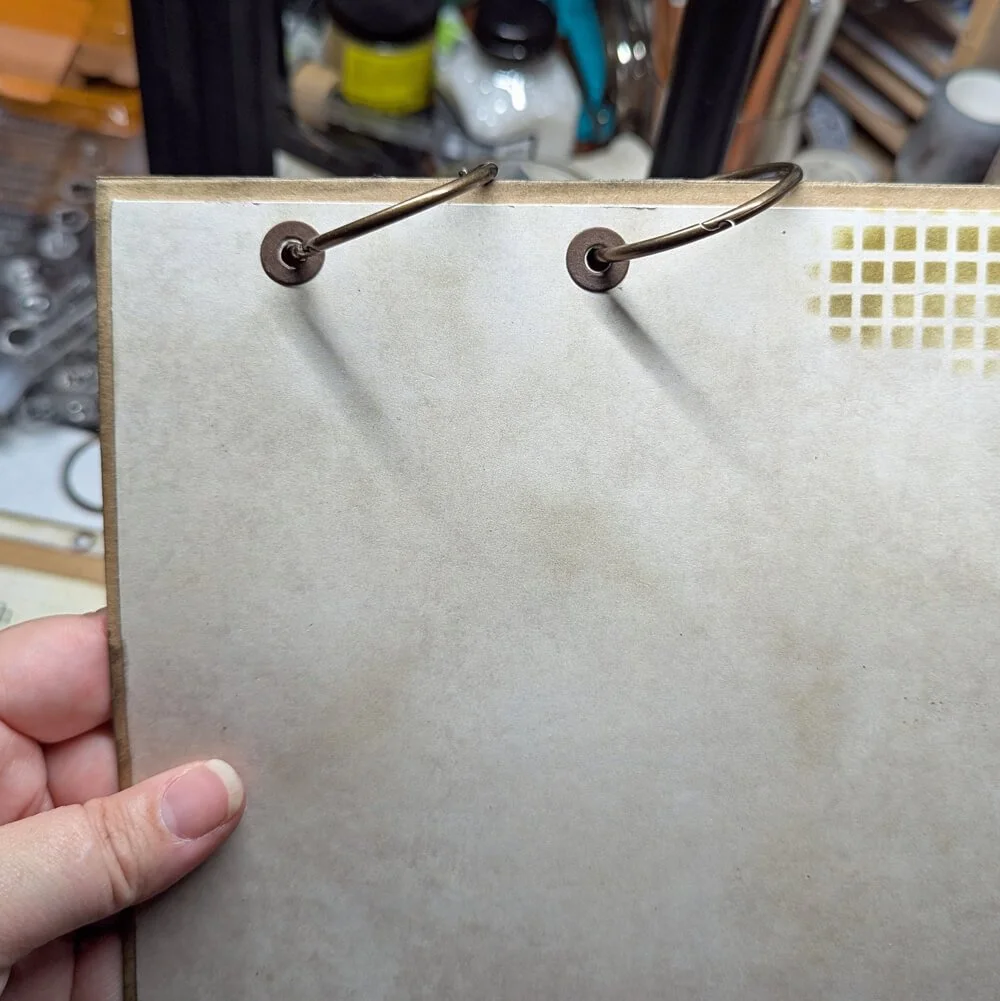
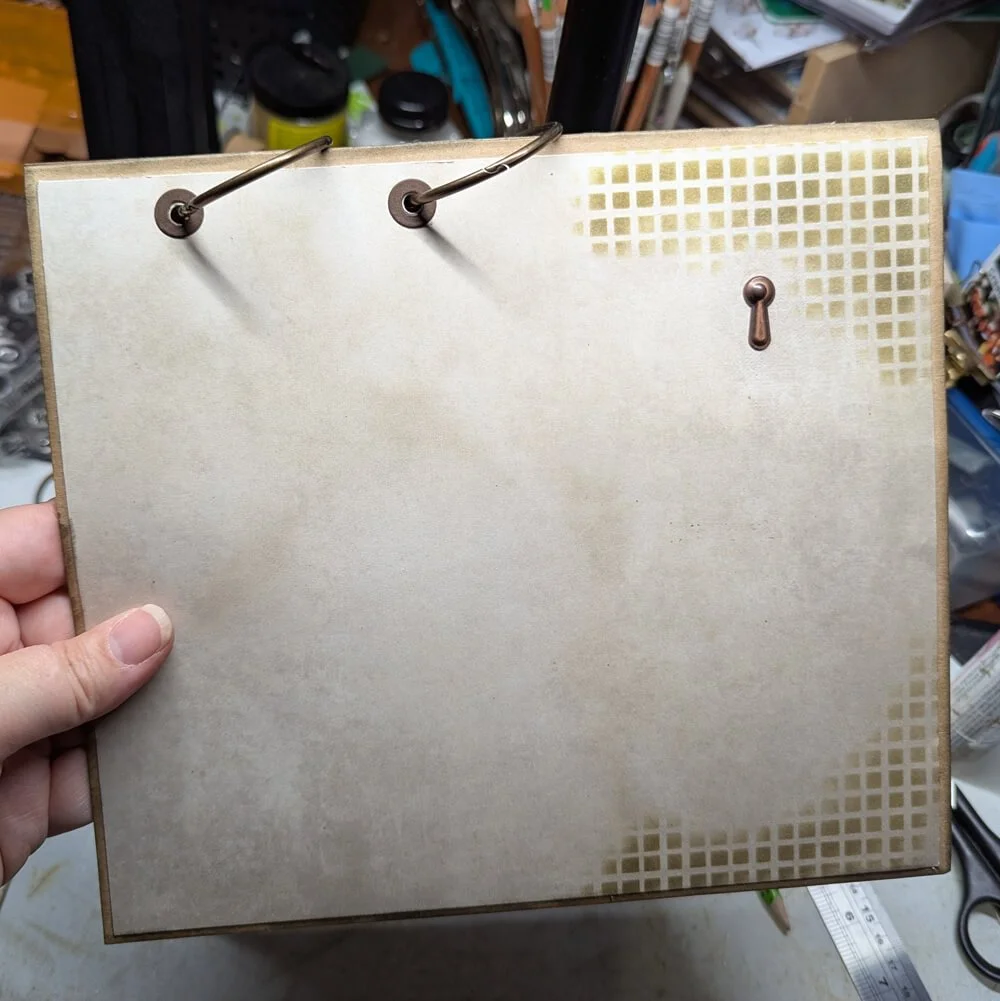
Now it’s time to add the book rings and turn mount.
For the book rings, I added two holes (with reinforcers) and used the calendar card template to ensure the holes were aligned. The first hole is measured (on the design paper) 3 cm from the left and 1 cm from the top, the second one a little over 9 cm from the left and 1 cm from the top as well.
The turn mount is added (measured on the design paper) at 18 cm from the left and 3.5 cm from the top, but its height will depend on which tag or card you use. The turn mount makes sure you can add a different tag or card every month! I also use one of the Journal Stencils to add some texture to the desk calendar background.
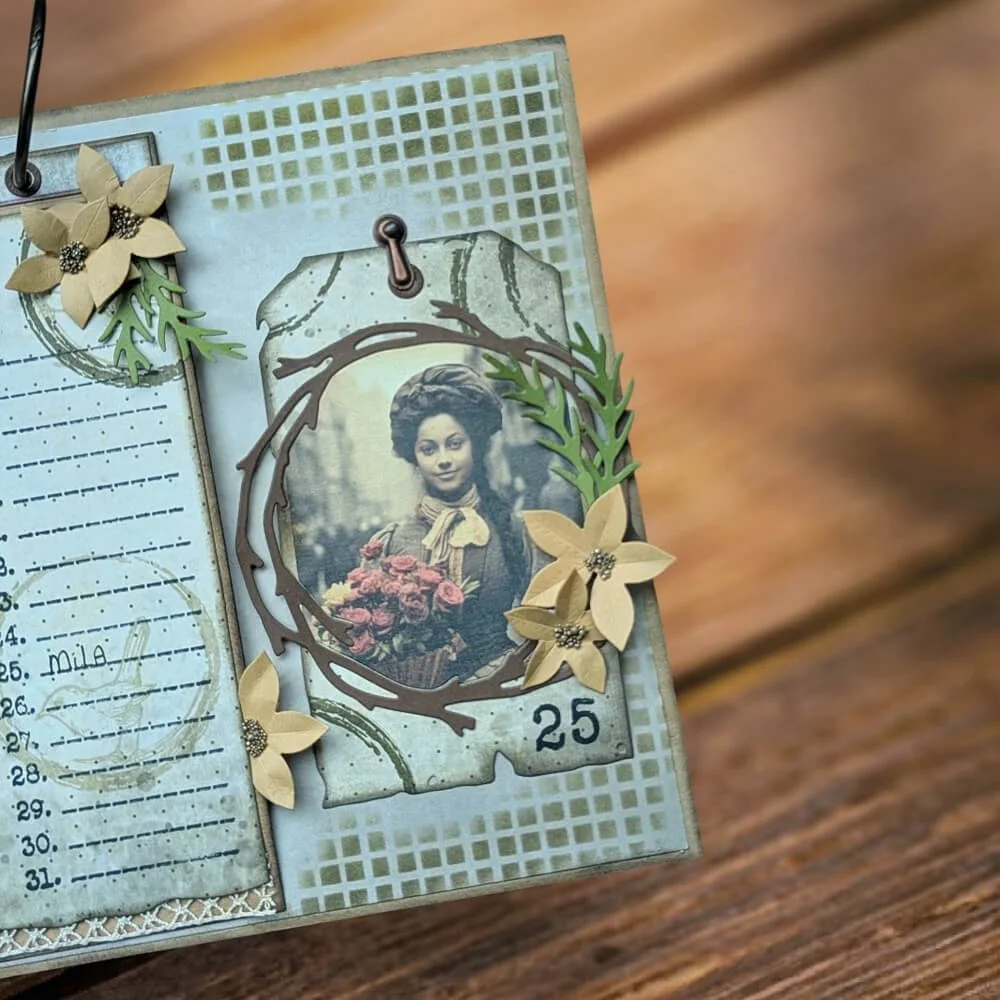
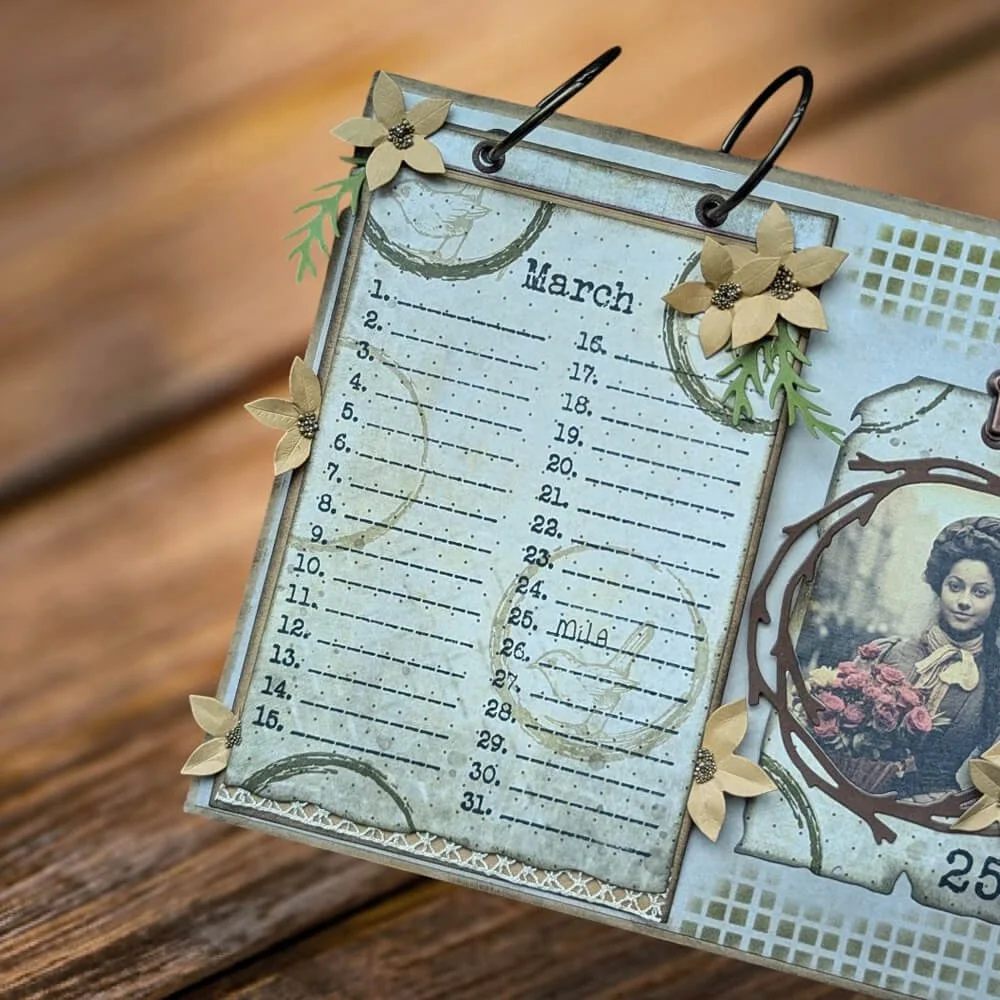
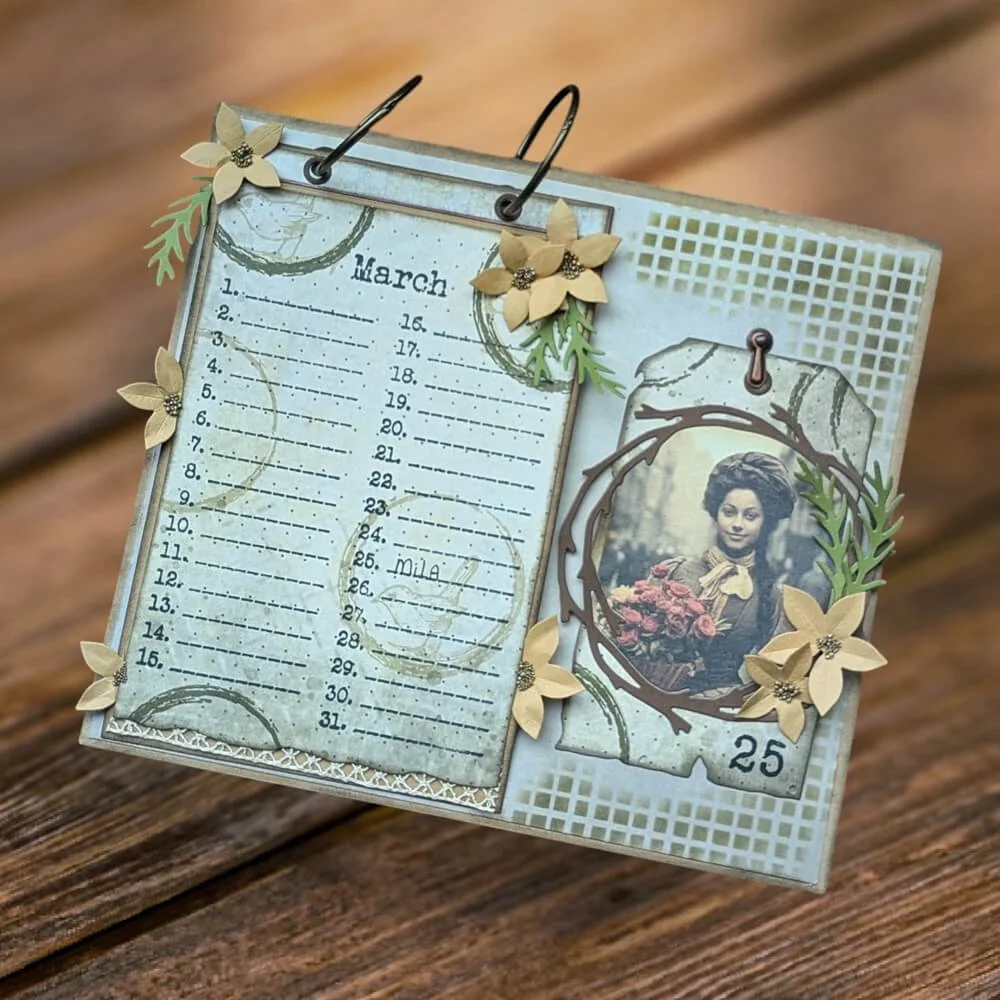
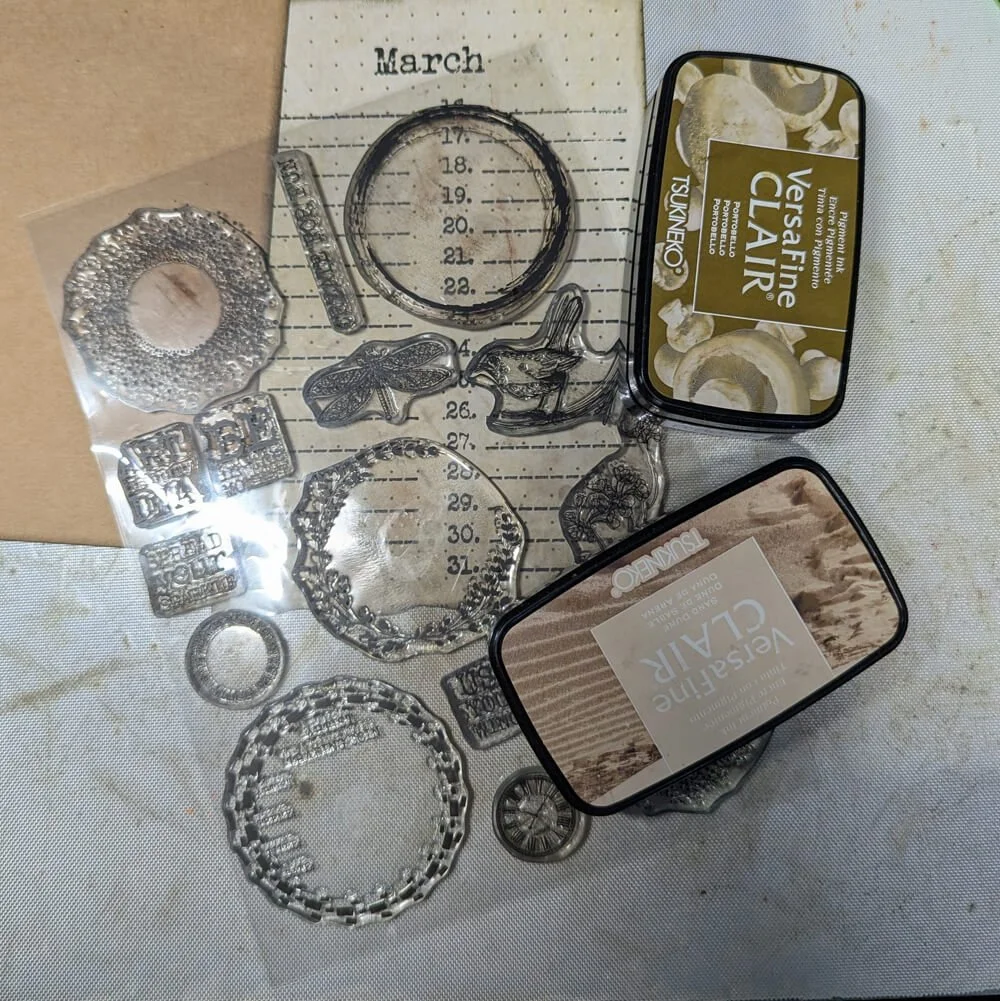
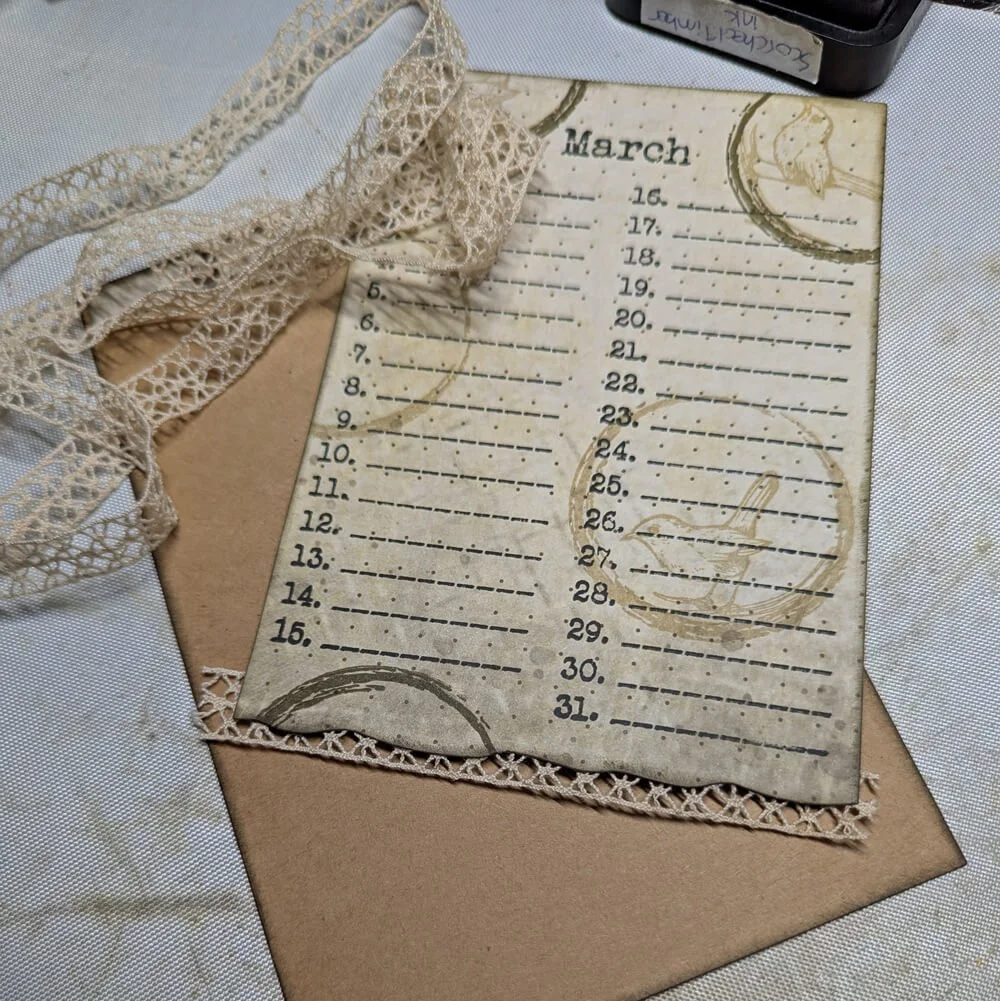
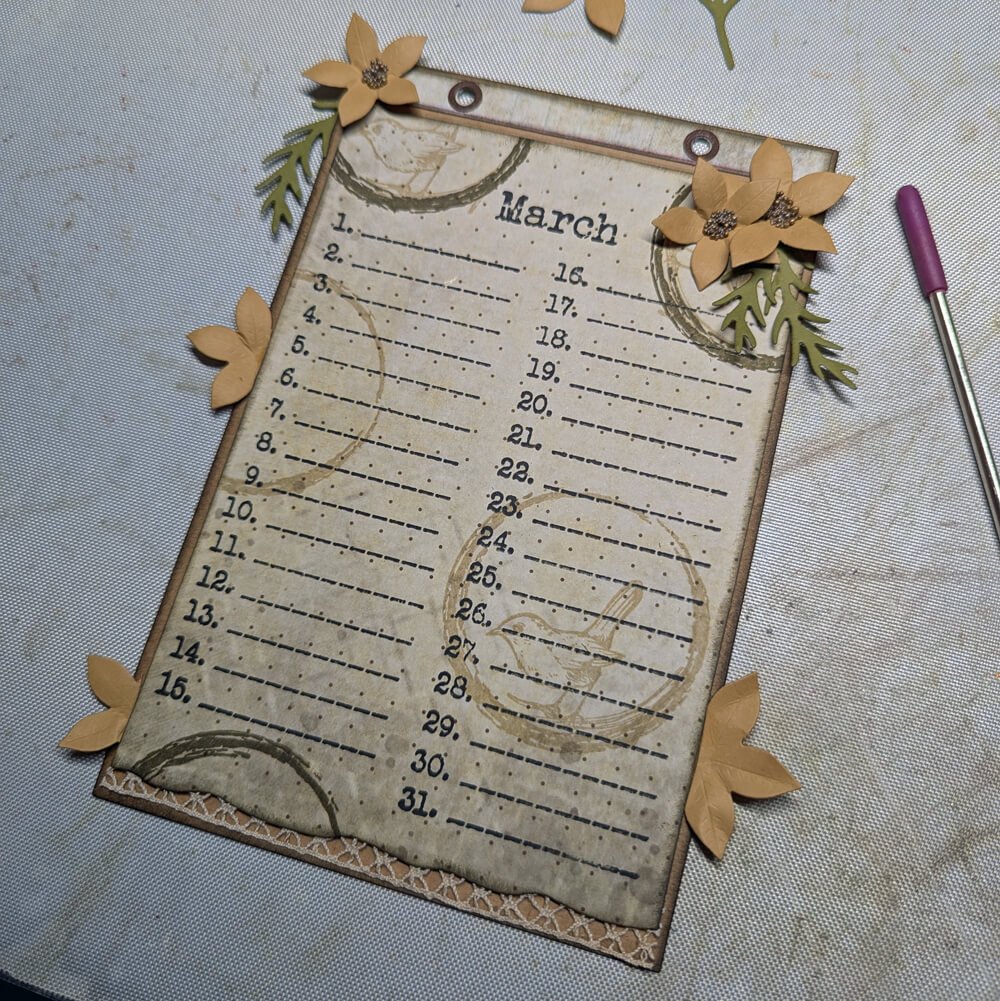
Step 7: It’s time to decorate the calendar sheet! For March, I’m using the Artist Trading Coin stamp set (CS347), the circles look a bit like coffee stains, and there is a little bird I want to use as March is the month of the start of Spring. I use Versafine Clair Sand Dune and Portobello to stamp; it matches the Golden Season design paper perfectly. Before I glue down the mat layer on the base sheet, I add a piece of lace at the bottom for an extra-fun effect.
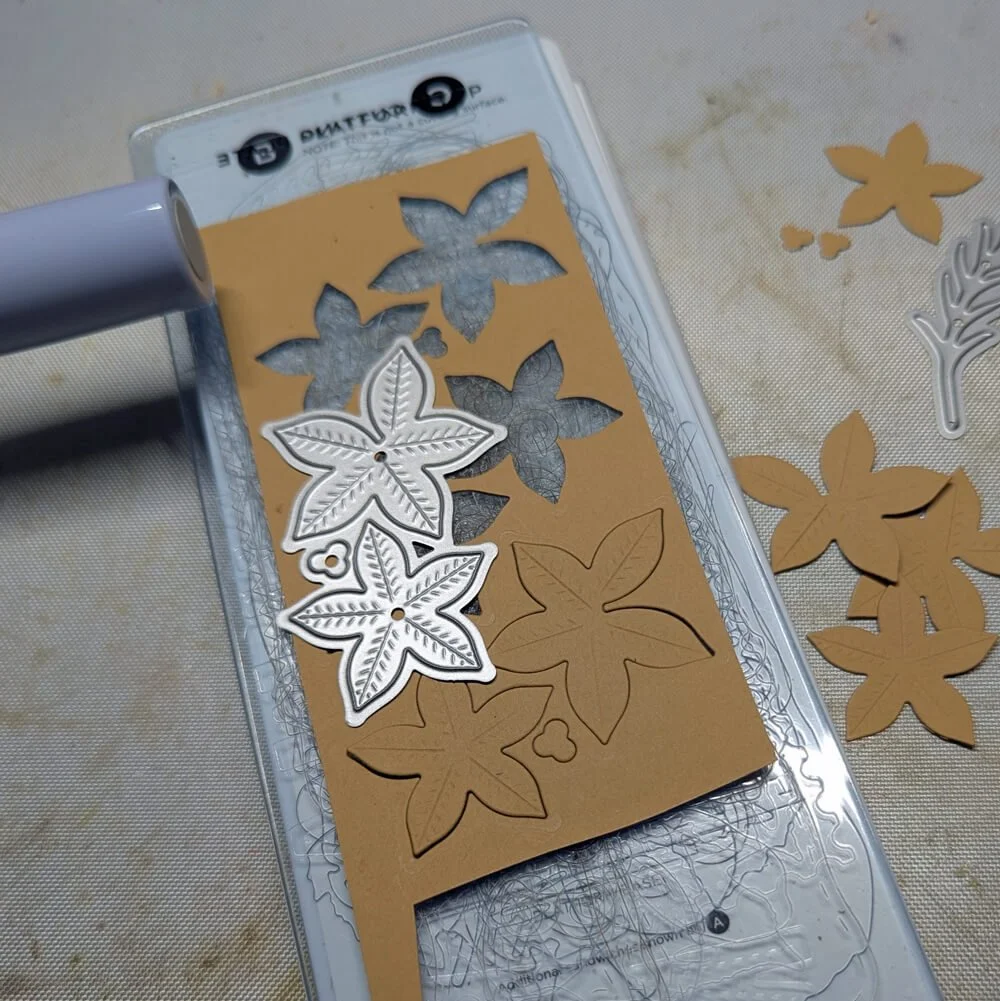
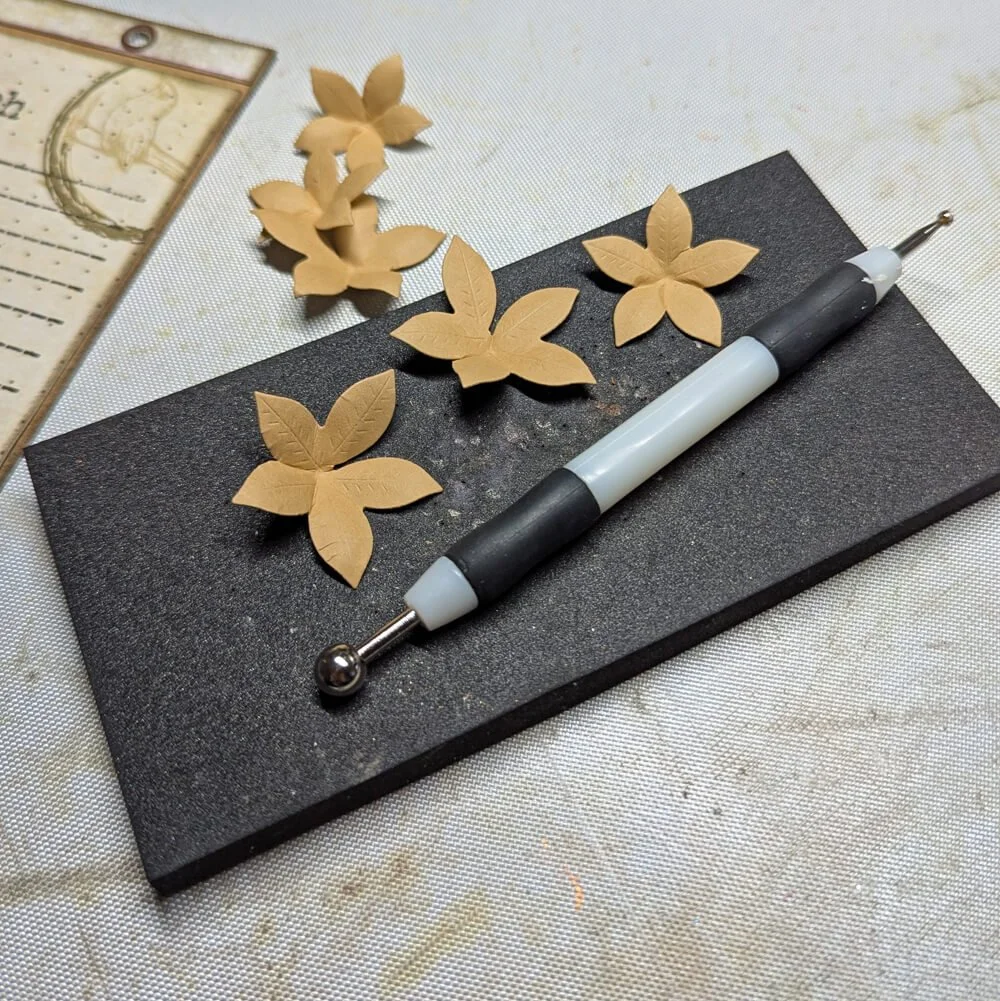
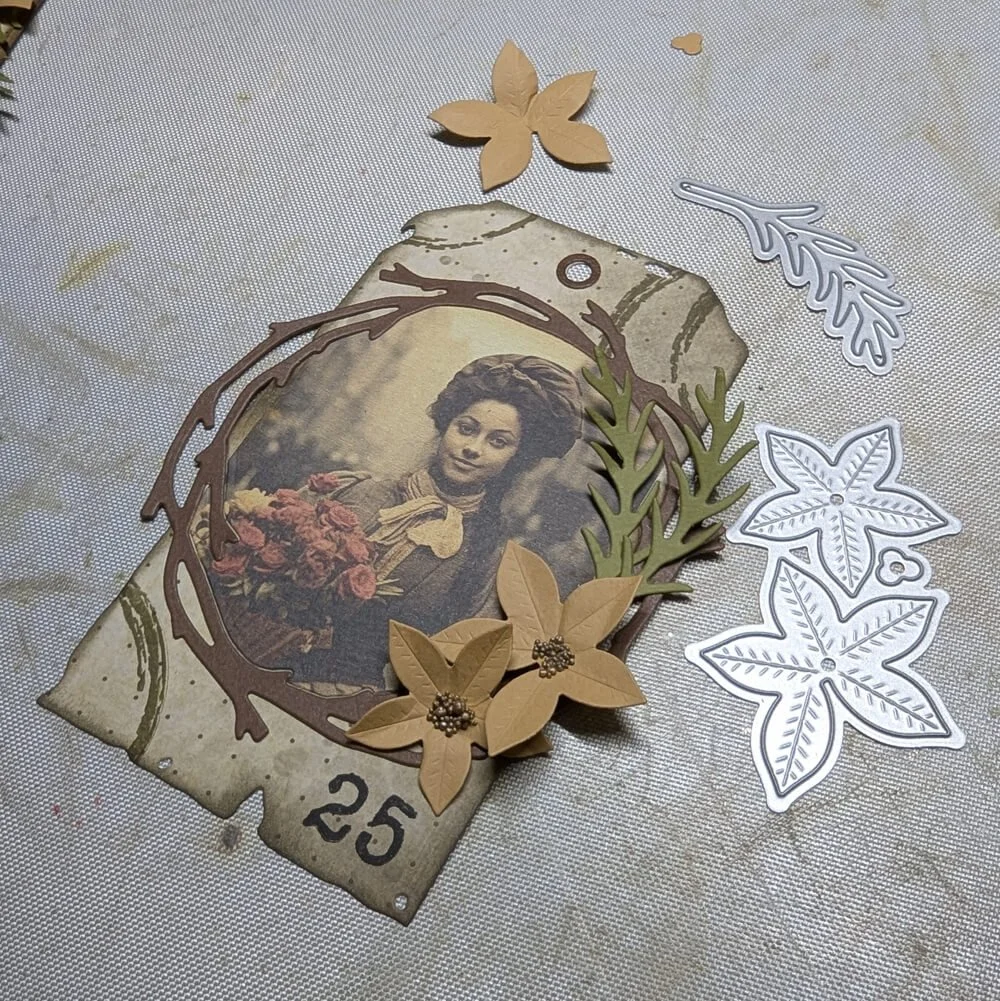
Step 8: The flowers and leaves from the Book of Christmas die set are perfect for March. I die-cut the flowers from gold cardstock and shaped them. For the branch, I use olive green cardstock. I am trying out my composition on the sheet before I glue everything down.
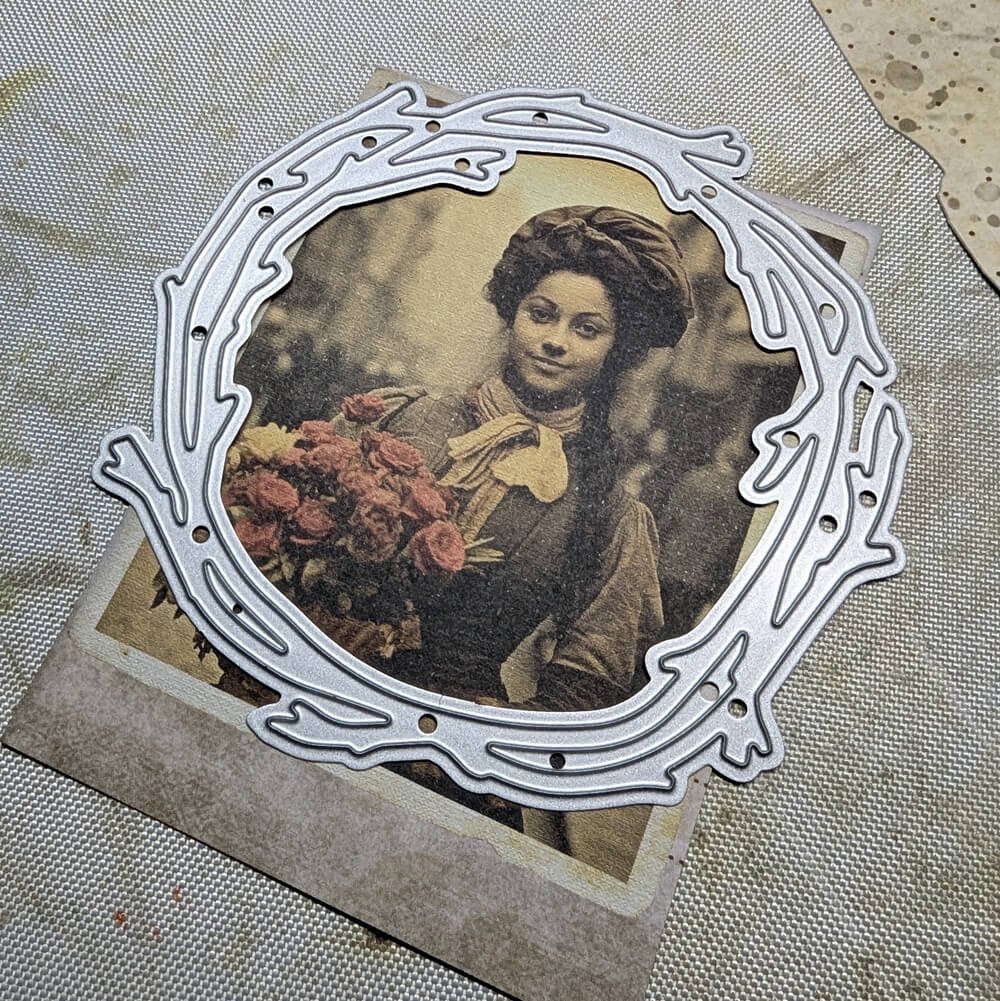
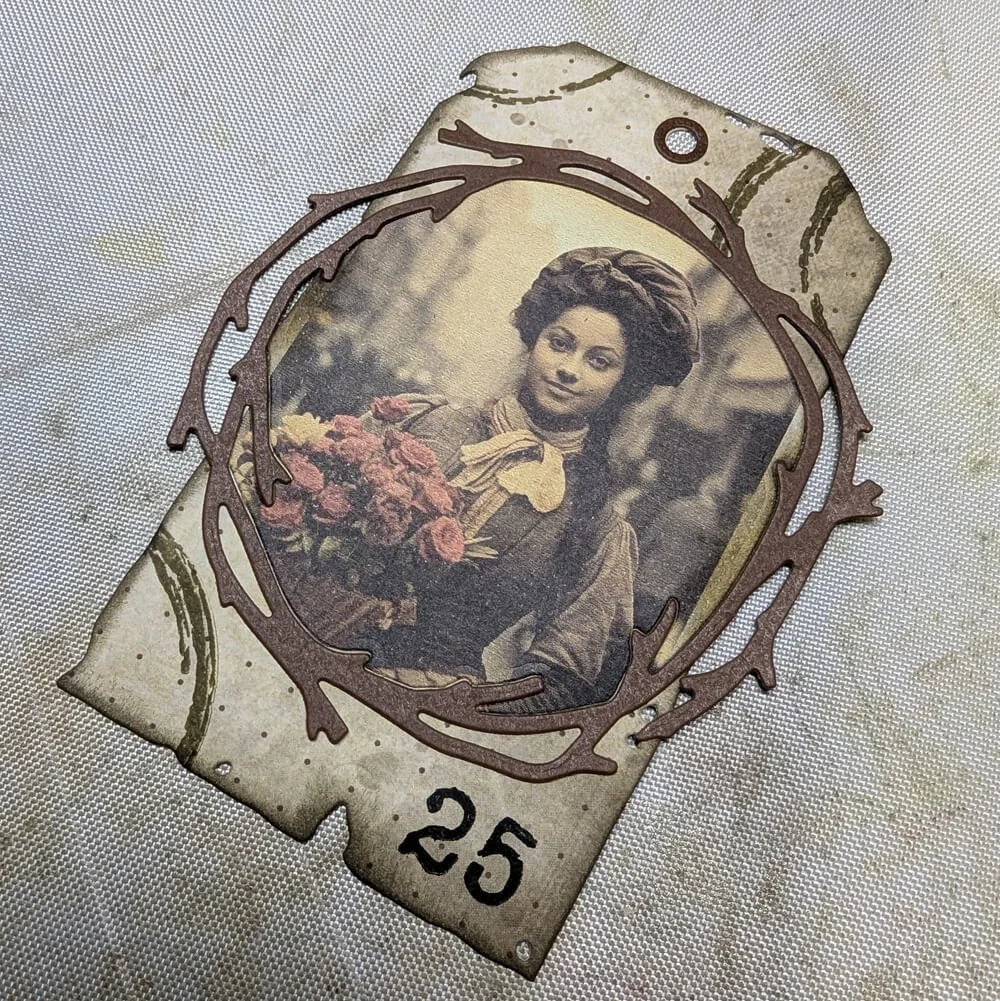
Step 9: As I mentioned before, I will add a different tag every month. On this tag, you can add a picture of a loved one whose birthday is that month. In this case, I used a picture from the Golden Season design paper.
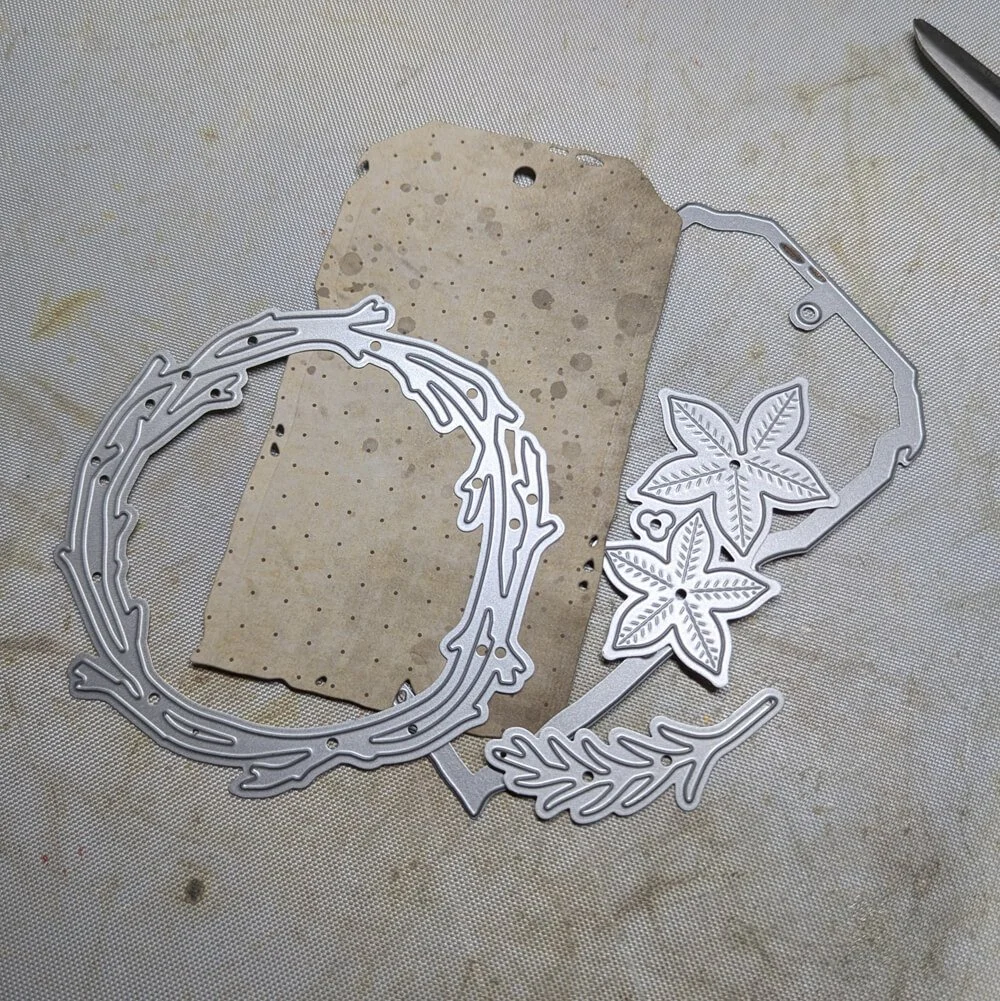
I’m using the gorgeous grungy tag from the Bloom File Folder as a base. I also used the branch circle and the same flowers/leaves as on the calendar sheet. I want my picture to fit in the branch circle, so I die-cut it to fit. This way the picture fits perfectly! I also stamp a birthday date on the tag and add the same coffee circles as on the calendar sheet.
The March page and tag are done! I hope to have inspired you, and I look forward to seeing your projects featuring the Dates to Remember stamp set.
With love, Reanna