
How to Make a One Page Wonder Folio Journal
Are you a crafter who’s looking to get the most out of a sheet of 12 × 12 paper, or maybe you’re always on the lookout for fun new folio ideas? In this tutorial, you’ll learn how to take one sheet of 12 × 12 paper and turn it into a One-Page-Wonder folio journal, full of pockets and spaces for tags and journaling. This is perfect for gift giving, popping in your bag, and sharing with friends.
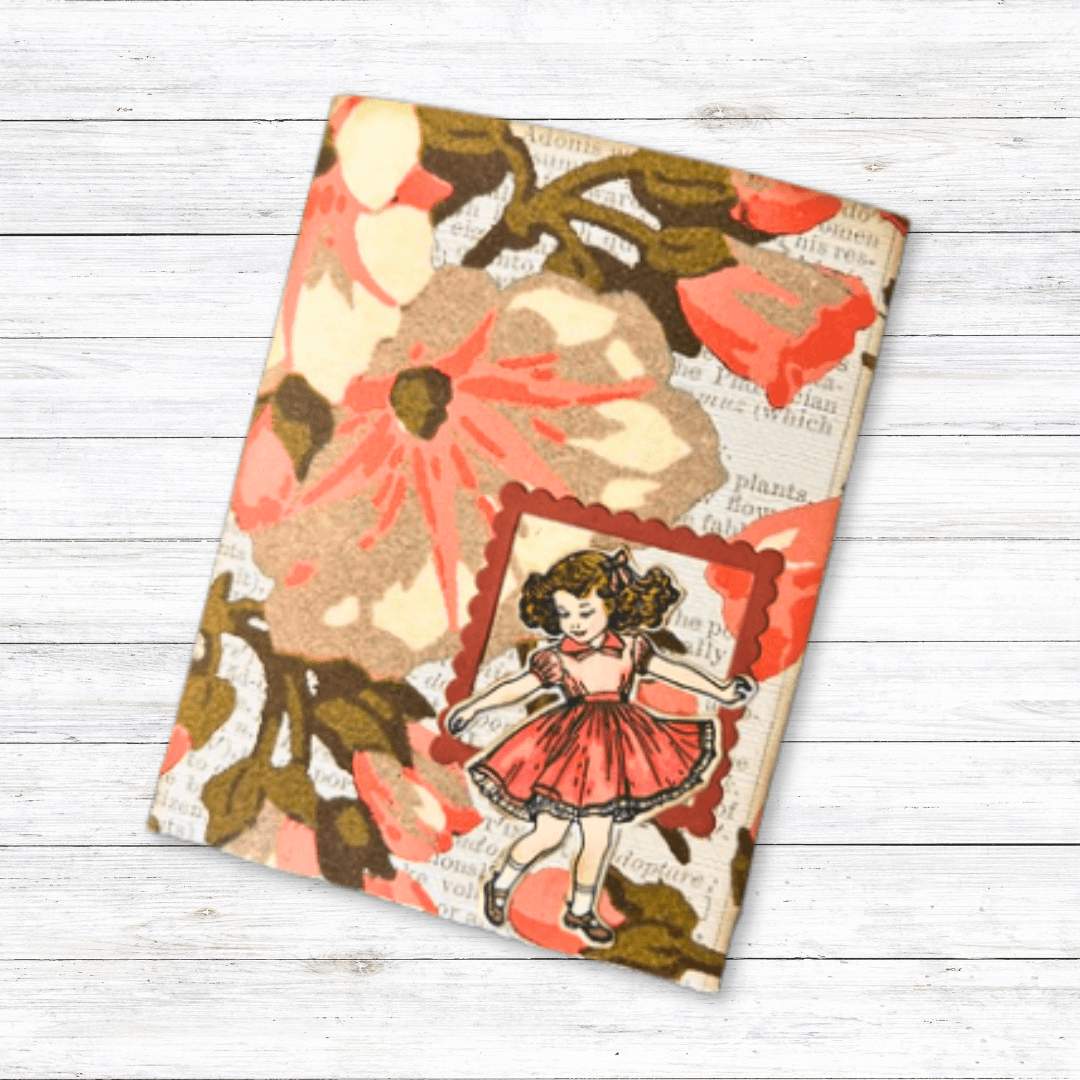
Hi Cindy, here with this week’s tutorial. Are you looking for a nice giftable folio that’s quick and easy to create? Here is a One-Page-Wonder Folio featuring the Everyday Memories Spring Splendor Paper and embellishments from the Joys of Spring Special dies and stamps.
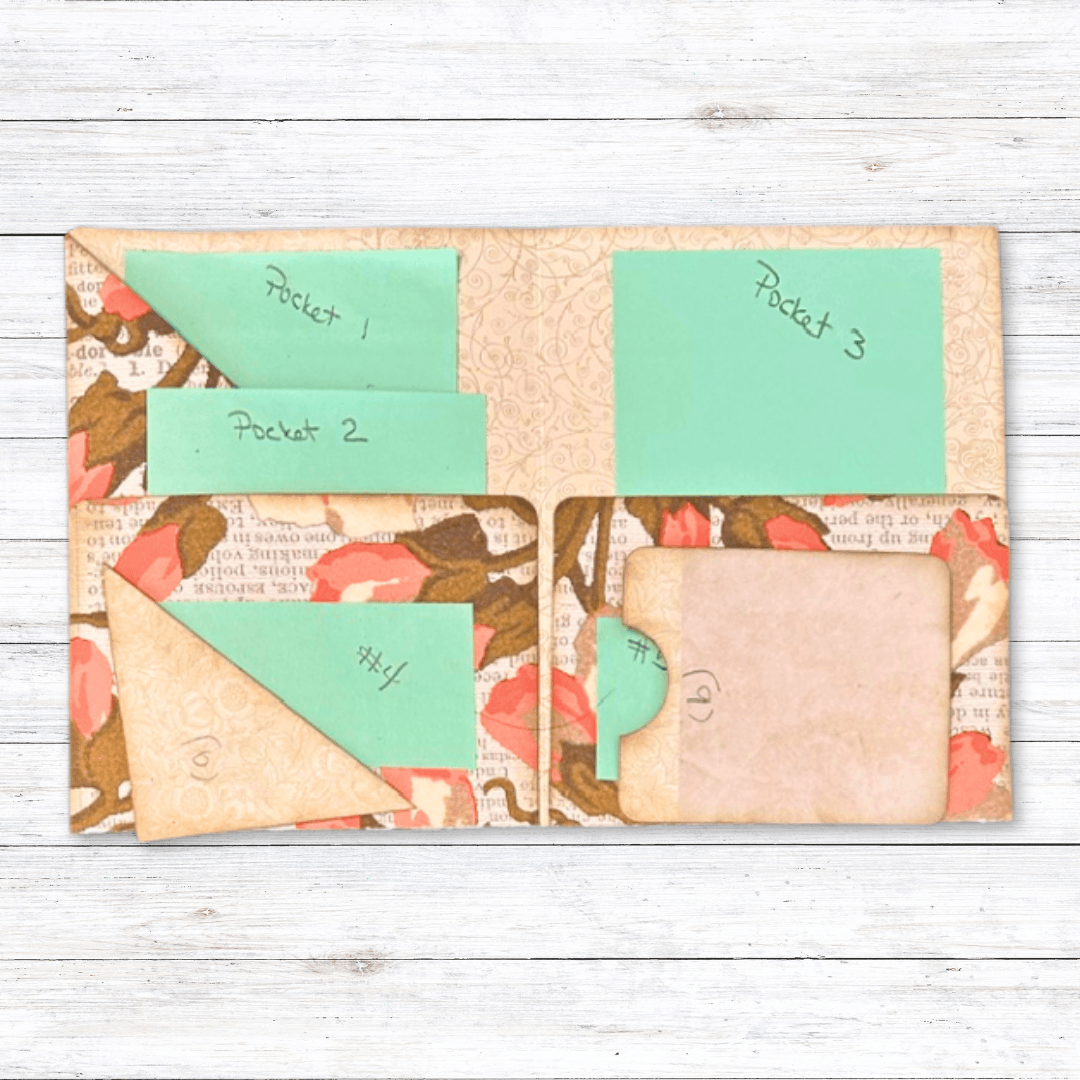
Step 1: Choose a 12 x 12” sheet of paper and cut it to 11 x 8-1/2”, being mindful that the design direction is landscape (11” side). From the top of the 11” side, score at 2-1/2” and at 6-3/4”. Turn to the right to the 8-1/2” side and score at 3” (bottom of paper). Gently fold at the score lines using a bone folder.
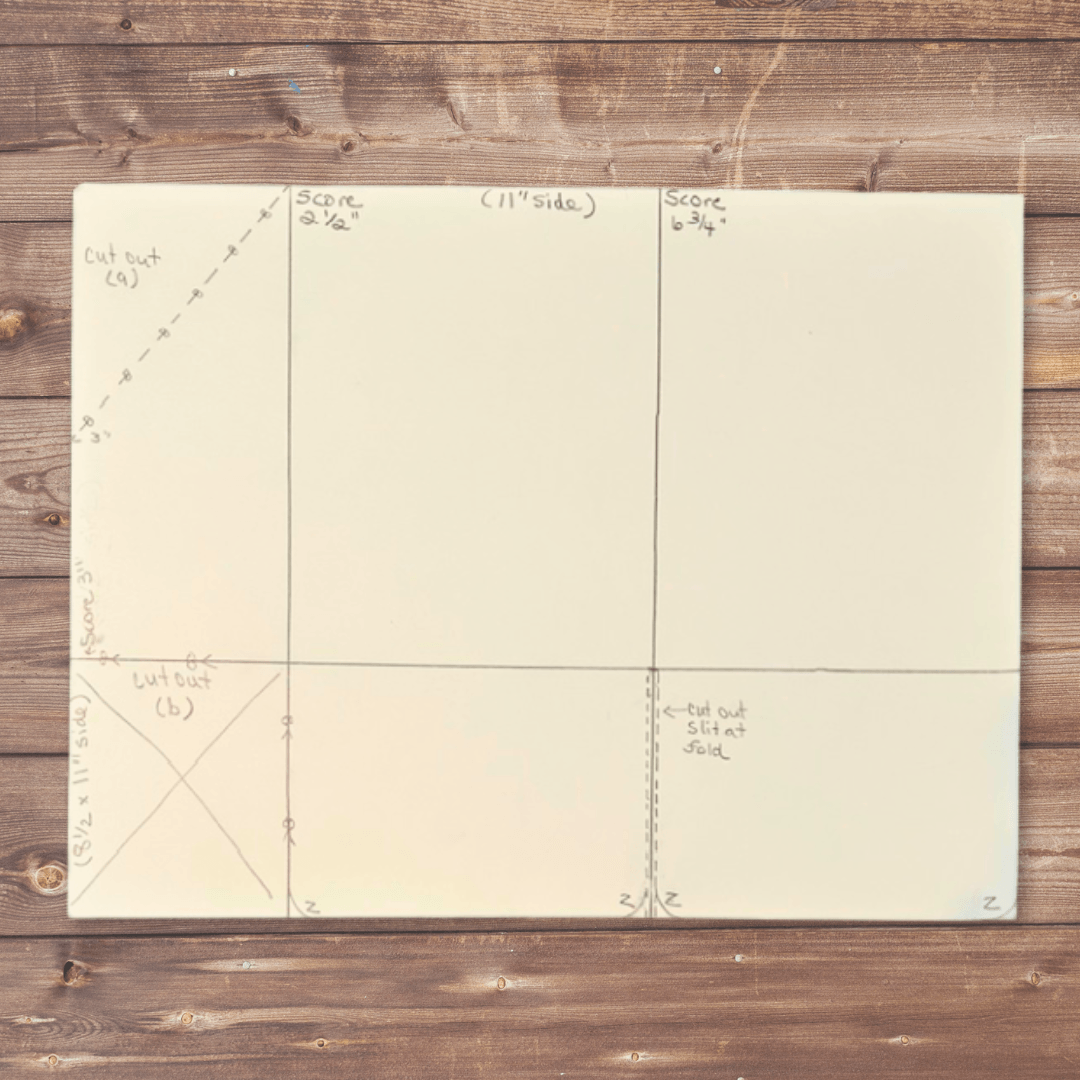
Step 2: In the upper left corner, cut out a diagonal at 3” to the first score at the top of the 2-1/2” score. Save (a). At the lower left corner, remove the 2-1/2” x 3” section (marked with an X in the photo). Save (b). At the second score mark at the bottom of the paper (6-3/4”), cut out a slit on either side of the fold and remove. Use a corner rounder at the 4 points shown with a Z.
Optional: I chose to burnish all edges and folds before proceeding to step three.
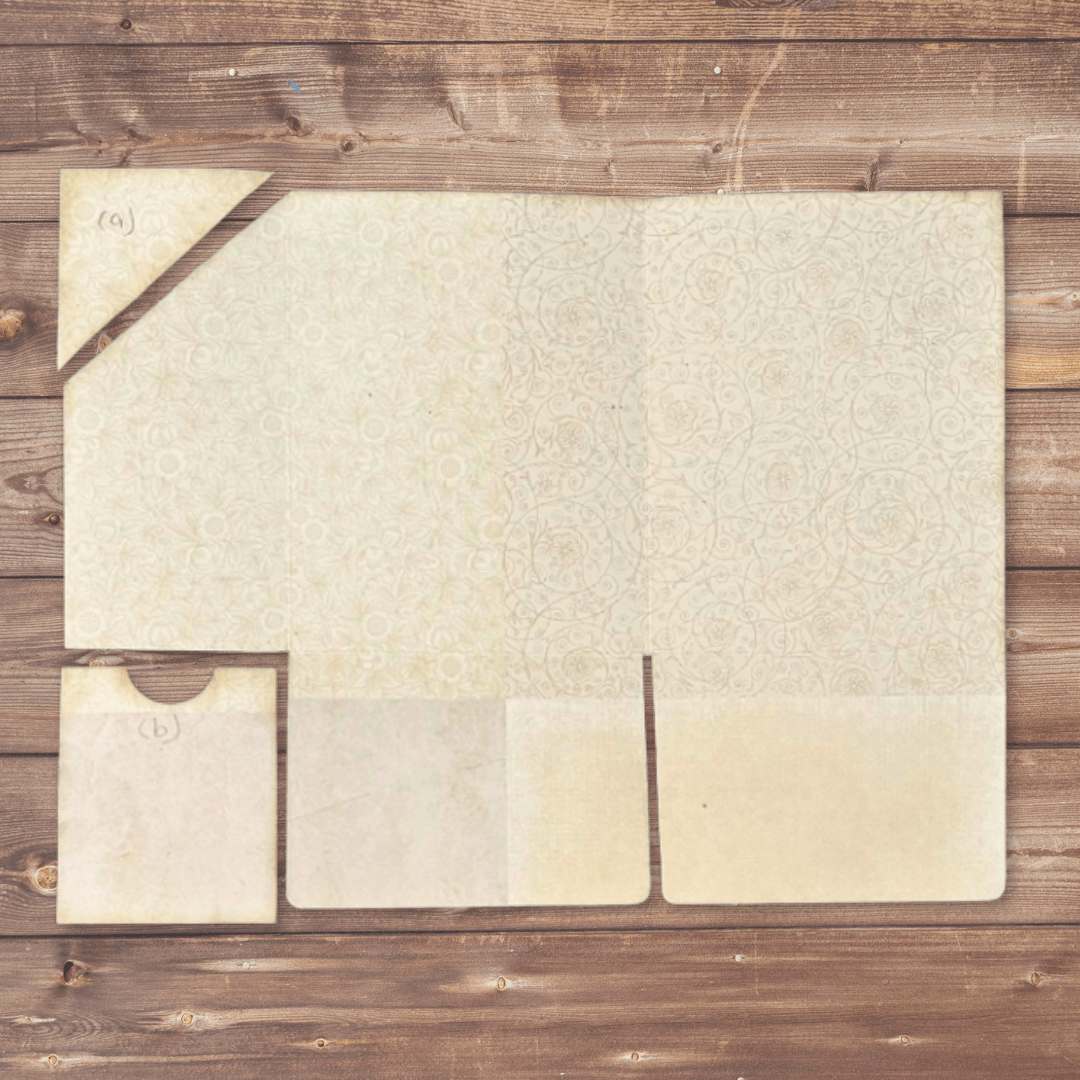
Step 3: Fold the flap with the missing triangle in (to the right) and fold the bottom up. Add glue to both sides of bottom flaps and fold up to create a pocket (this is actually a double pocket – inner with the triangle cut and outer from bottom flap). Fold up the next flap and glue on both sides as well to create another pocket.
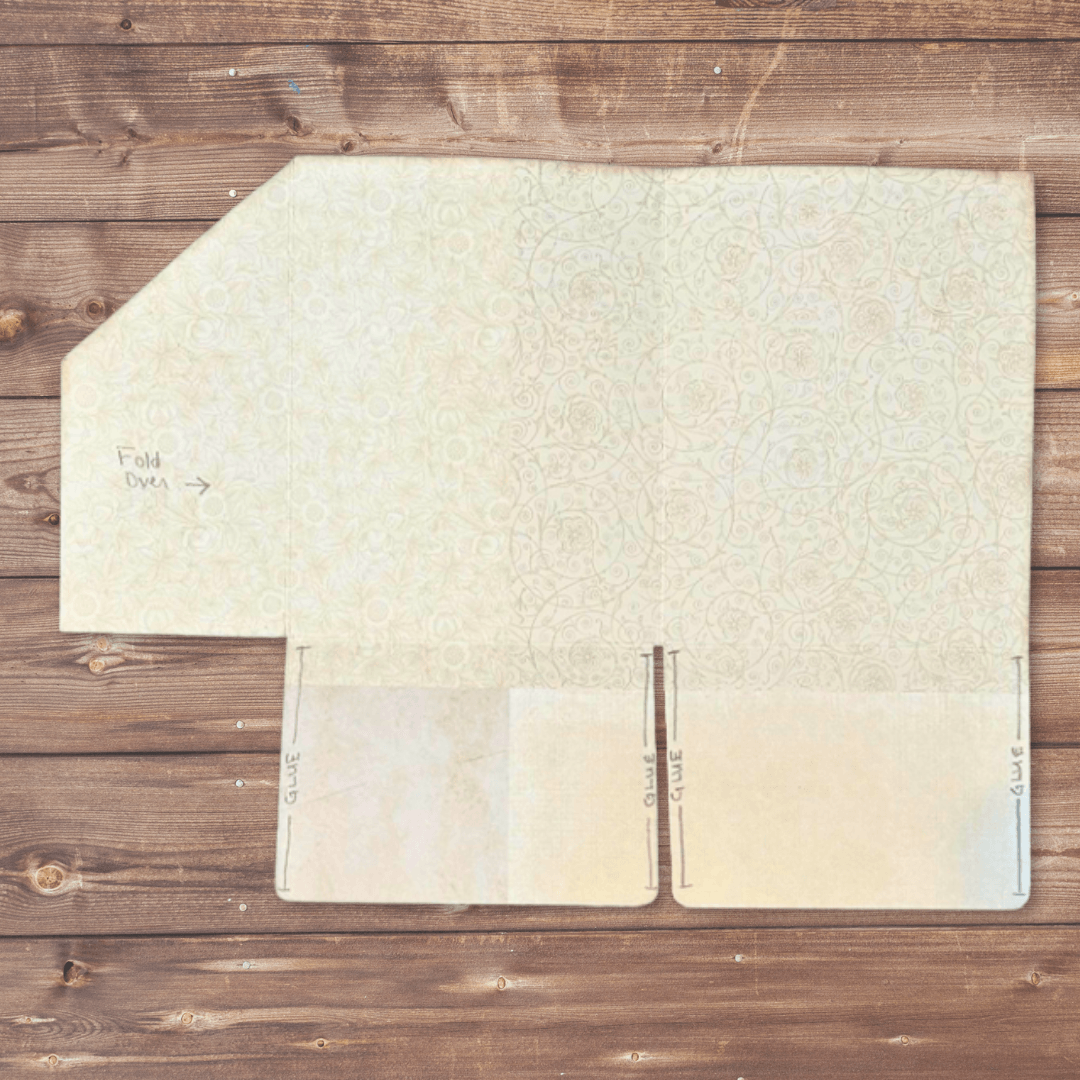
Step 4: On the left side, glue the triangle (a) in place near the bottom to form a tuck pocket. On the right side, you will glue the rectangle (b) to form another pocket. I cut a half circle on one side to make it easy to remove your tag, and used the corner rounder on all 4 sides. Put glue along the 3 straight edges and glue in place.
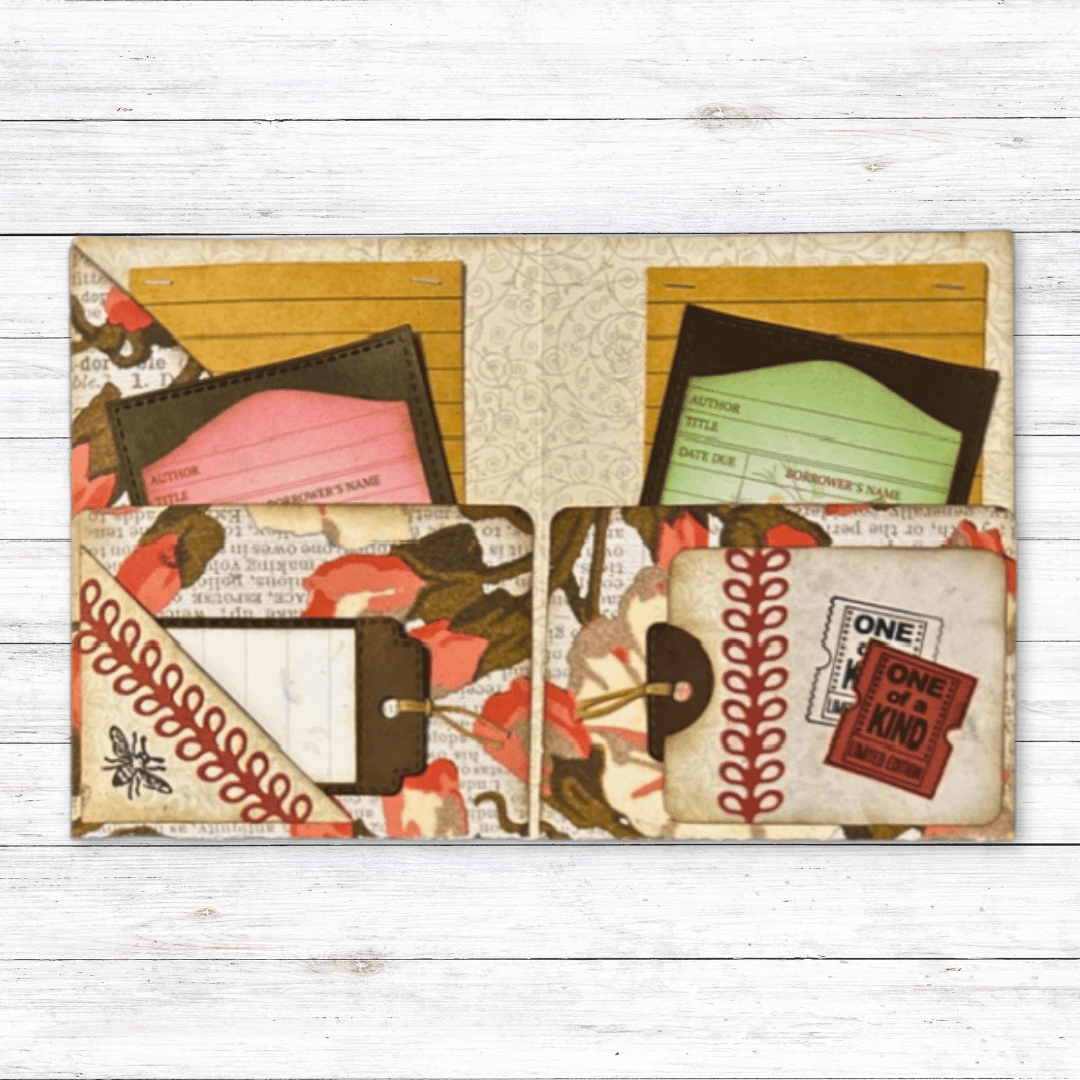
Step 5: Make two medium tags from either the paper left from your 12 x 12” paper, ephemera in the paper pack, or use a coordinating solid. These will go in the three large pockets. (I used two library cards from the Spring Splendor paper and the Delightful Discovery Pocket Page Insert 1, #2335 for the tags; and colored cardstock. Make two small tags for the two small pockets made with the (a) and (b) cut-outs. (I used Delightful Discovery Rounded Pockets w/tags, #2337, and two shades of card stock.) Embellish tags and pockets as desired with ephemera and stamps as desired. I also added two mini tablets (4 pages each, stapled) of lined paper behind the large tags on both sides of the folio for additional note-taking.
These little folio journals make a great gift that easily fit in a purse, briefcase, book, or bible for journaling or note-taking. I’ve made multiple folios with different designer papers, and each takes on its own look. I hope that you will consider giving this fun project a try!


Other products used: Scissors, Bone folder, Liquid Glue, Complementary Solid Paper.