4th Day Of Craftsmas!
It’s the 4th day of Craftsmas, and today, here’s design team member Denise with PaperKraftD sharing how she made a stunning decorative Christmas Wallet. Perfect if you want to give the gift of money this Christmas.
Hi paper crafting friends – this is Denise with PaperKraftD. Today I’m sharing a simple yet elegant Christmas Bauble Money Holder featuring the new Winter Bliss Collection and Reminiscence Book 8 from Esther Glas. I thought a money holder would be useful for those last-minute holiday gifts, but this design can easily be adapted to a slimline card if you still need a few holiday cards for friends and family.
Step 1: Cut Paper for Card
Prepare the card base by cutting white cardstock to 8.5” x 10” and scoring at 3.75” and 7.5.” Crease with bone folder. Cut Reminiscence Book 8 Christmas Tree patterned paper to 3.5” x 8.25” and 2.5” x 8.5” (see photo). Cut a 0.75” x 7.5” strip off the right side of the green ornament paper. Cut coordinating silver metallic cardstock 3.5” x 8.5.”
Step 2: Cut Decorative Elements
Fussy cut holly leaves from Reminiscence Book 8 green ornament paper. Die cut three evergreen boughs from this same paper using the Holly Jolly Die (from the Planner Essentials 2023 December Day by Day Kit #2090). Die cut a berry branch from kraft cardstock using the Floral Greenery Die (Paper Flowers #2088). Die-cut some berries using this same die set from cream cardstock. Die cut a label from white cardstock using The Pockets 1 Die (Planner Essentials #2174). Fussy cut a label from the Reminiscence Book 8 decorative paper that has bookplates & photos.
Step 3: Ink Evergreen Boughs
Darken 2 of the 3 evergreen boughs with a dark green ink.
Step 4: Assemble Berry Branch
Shade the berry branch with brown ink. Glue the berries to the berry branch. Add highlights to the berries with a white pen and add clear dimensional glaze.
Step 5: Die Cut Christmas Bauble
Line up the right edge of the Christmas Bauble Page Die (Planner Essentials #2192) with the right edge of the silver paper and the bottom of the die with the bottom edge of the paper. Tape the die down as shown in the photo and run it through your die-cut machine.
Step 6: Add Bow to Bauble
Cut a 12” length of ribbon and thread it through the top holes of the bauble die cut, as shown in the photo. Tie a bow.
Step 7: Assemble Card
Adhere the silver bauble die cut to the 3.5” x 8.25” decorative paper by lining up the upper left corners and left sides. Edge with black Stazon. Glue to the front center of the card (the side that’s 3.75” wide), leaving a white border all around the card. Create a pocket in the interior by gluing the top and bottom of the 2.5” right flap to the center panel, as shown in the photo.
Step 8: Decorate Inside Pocket
Ink the edges of the 2.5” x 8.5” decorative paper with warm gray ink and glue it on top of the pocket inside the card. Stamp the Merry Christmas sentiment from the Christmas from the Past 1 Stamp and Die Set (Planner Essentials #CSD380) on the die-cut label using dark green ink. Distress the edges of the label with warm gray ink and adhere the label to the pocket inside the card. A strip of ribbon under the label looks really nice.
Step 9: Decorate the Front of the Card
Arrange the fussy cut holly leaf as well as the die-cut evergreen boughs and berry branch into a decorative spray at the top of the bauble. Tuck the ends under the bow and glue them down.
Step 10: Assemble Belly Band
Fold the 0.75” x 7.5” strip of paper around the width of the card to create a removable belly band. Glue the belly band together at the back and trim off any excess paper.
Step 11: Decorate the Belly Band
Distress and ink the top and bottom of the belly band with warm gray ink. Adhere fussy cut label to the belly band. Add a metal or paper bookplate over the label. Close the card and put the belly band on to protect the contents, so they remain a surprise until gifted.
This money holder will fit into a letter size envelope, but it is so pretty it can sit under the tree with all the wrapped presents. If you would like to adapt this design to a slimline card, just cut off the 2.5” flap rather than folding and gluing it onto the center panel. The basic design is very quick and easy to make and can be embellished as much or as little as you like – or as time allows during the busy holiday season. I hope you have a holiday filled with love, joy, and time to nurture yourself with crafting fun.
We love to see your projects, make sure to share them in our Facebook Group HERE. We love to see what you create!
Never miss a thing and sign up for our emails today HERE.
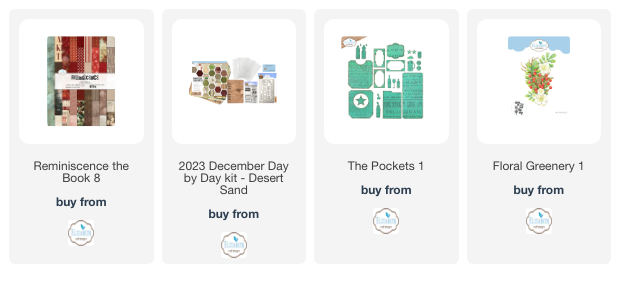
Elizabeth Craft Designs Products Used:


