
12th Day Of Craftsmas!

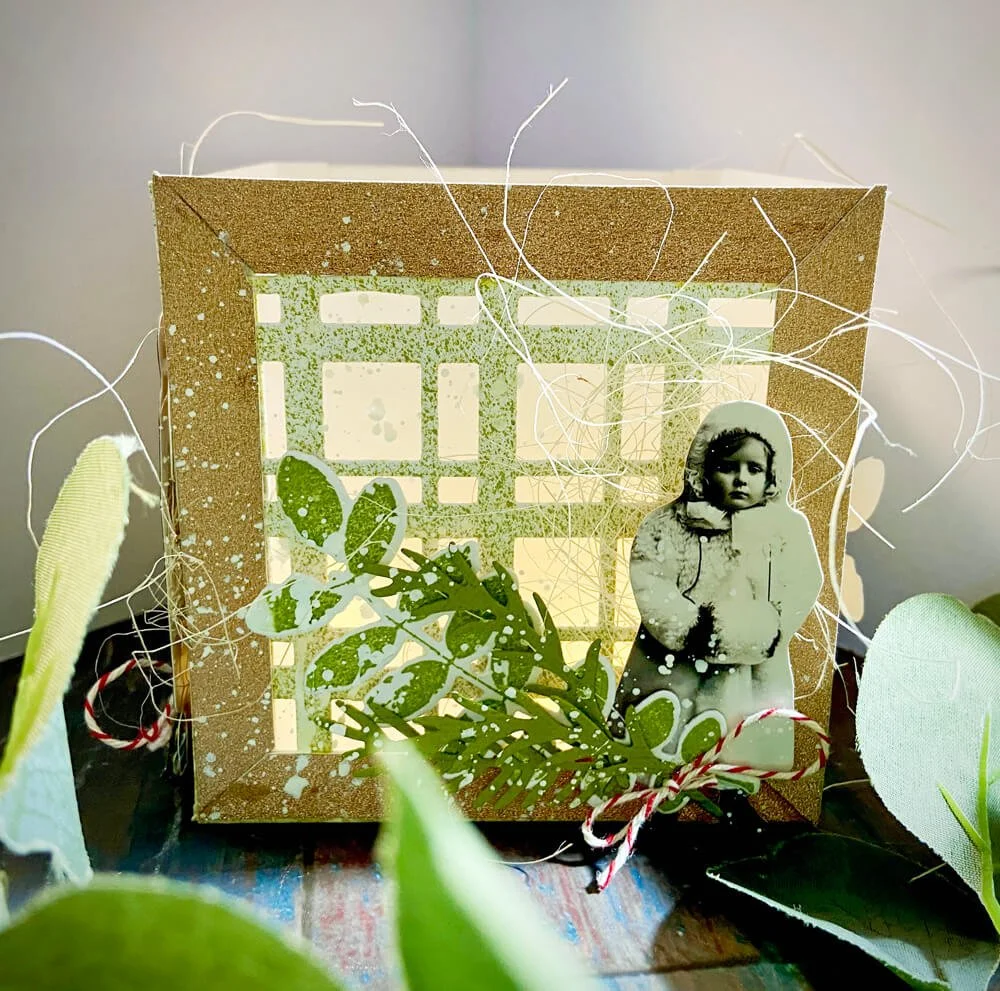
It’s the 12th day of Craftsmas, and today, we have a fun seasonal tutorial for you from the design team. If you’re a crafter who loves to add warm, handmade touches to your home? Or you’ve always wanted to try a 3D mixed-media project but weren’t sure where to start? You’ll want to join Rachel for this tutorial to learn how to create a luminary lantern, perfect for adding a soft light to your space as the evenings grow darker.
With simple mixed-media techniques and layering, this project is easy to customise to create pieces you’ll love displaying all year long.

Hello Rachel here. Let’s create a luminary to decorate and add a little light to your home as the evenings grow darker.
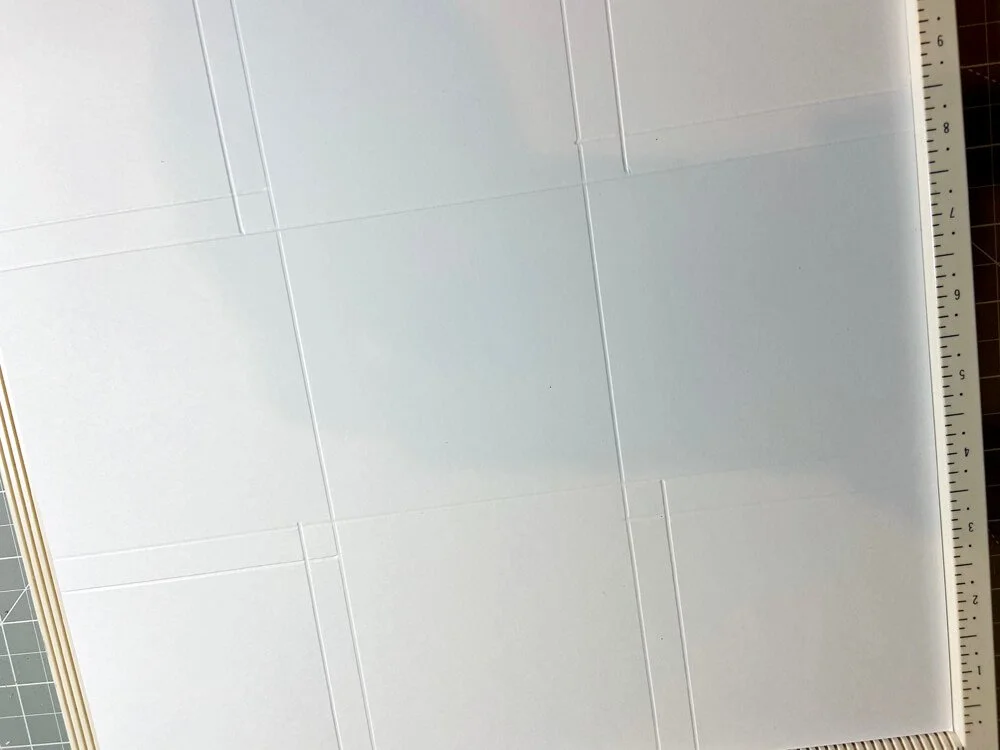
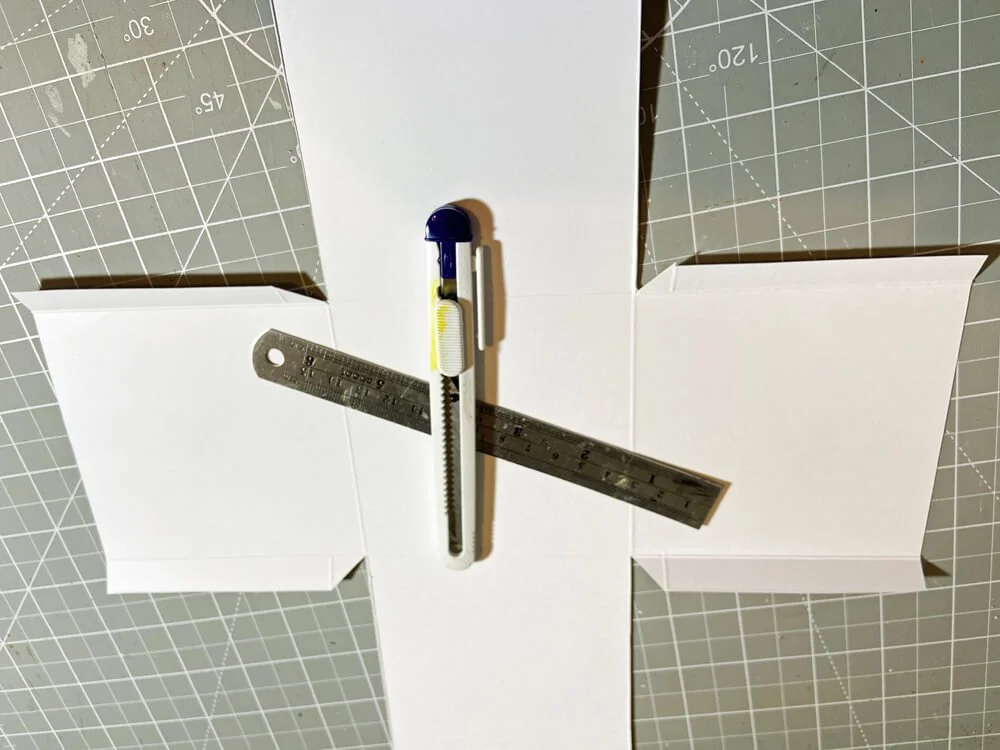
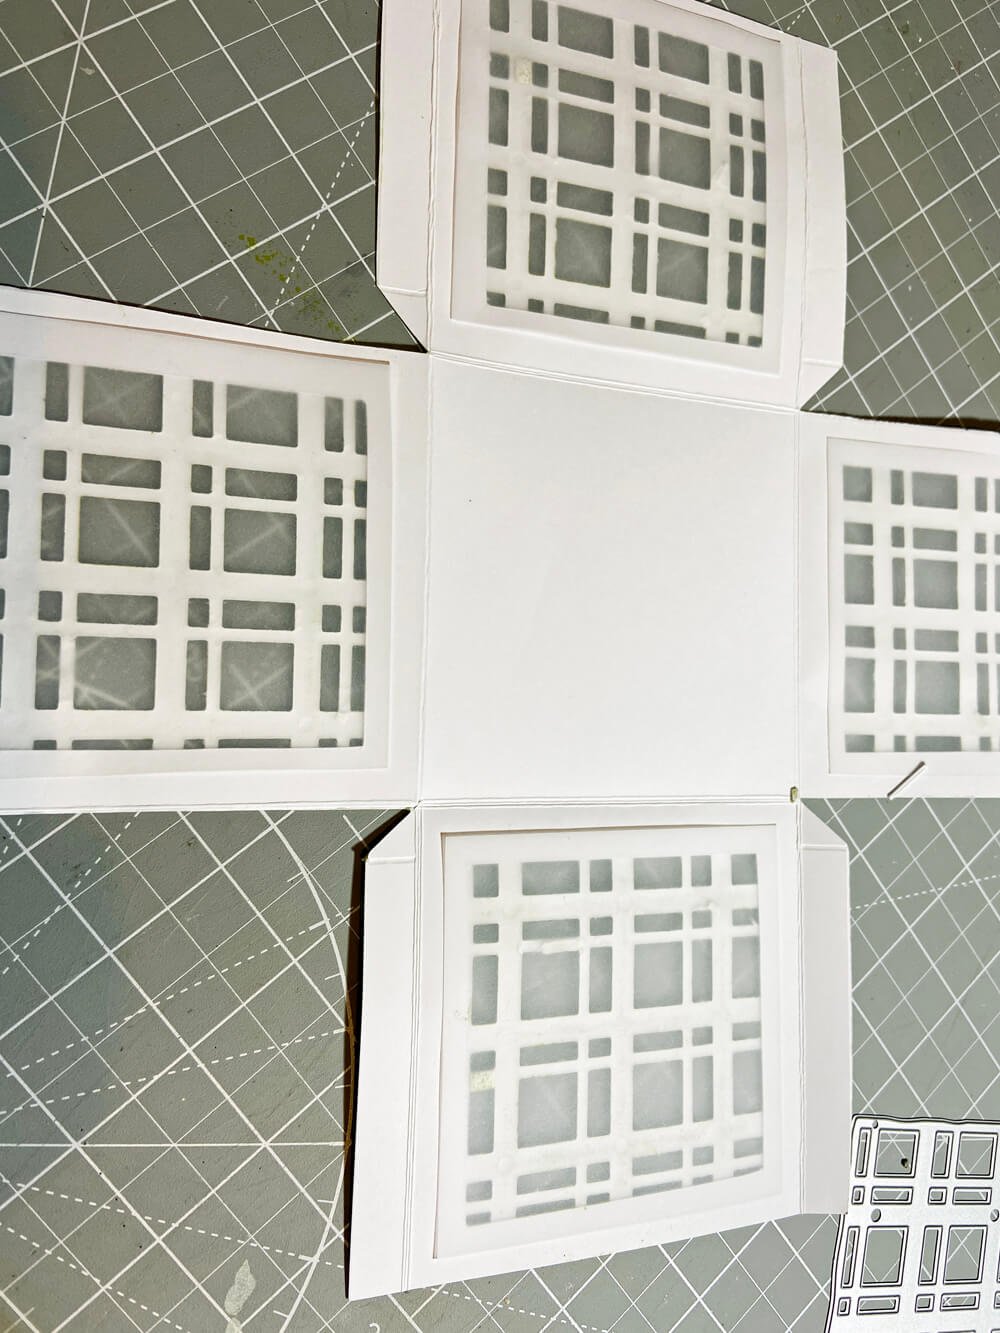
Step 1: Start with the 12x12 white cardstock and your scoreboard. Score at 4 inches and 8 inches, then turn the cardstock 90degrees and repeat, so you have 9 boxes in front of you. With the cardstock still on the scoreboard, score half an inch out from each of the central lines of the middle box, stopping before the horizontal score line of the next box. These will be the flaps that hold your box together. Repeat on the opposite side. Cut away the four corner squares, leaving the extra half-inch flaps.

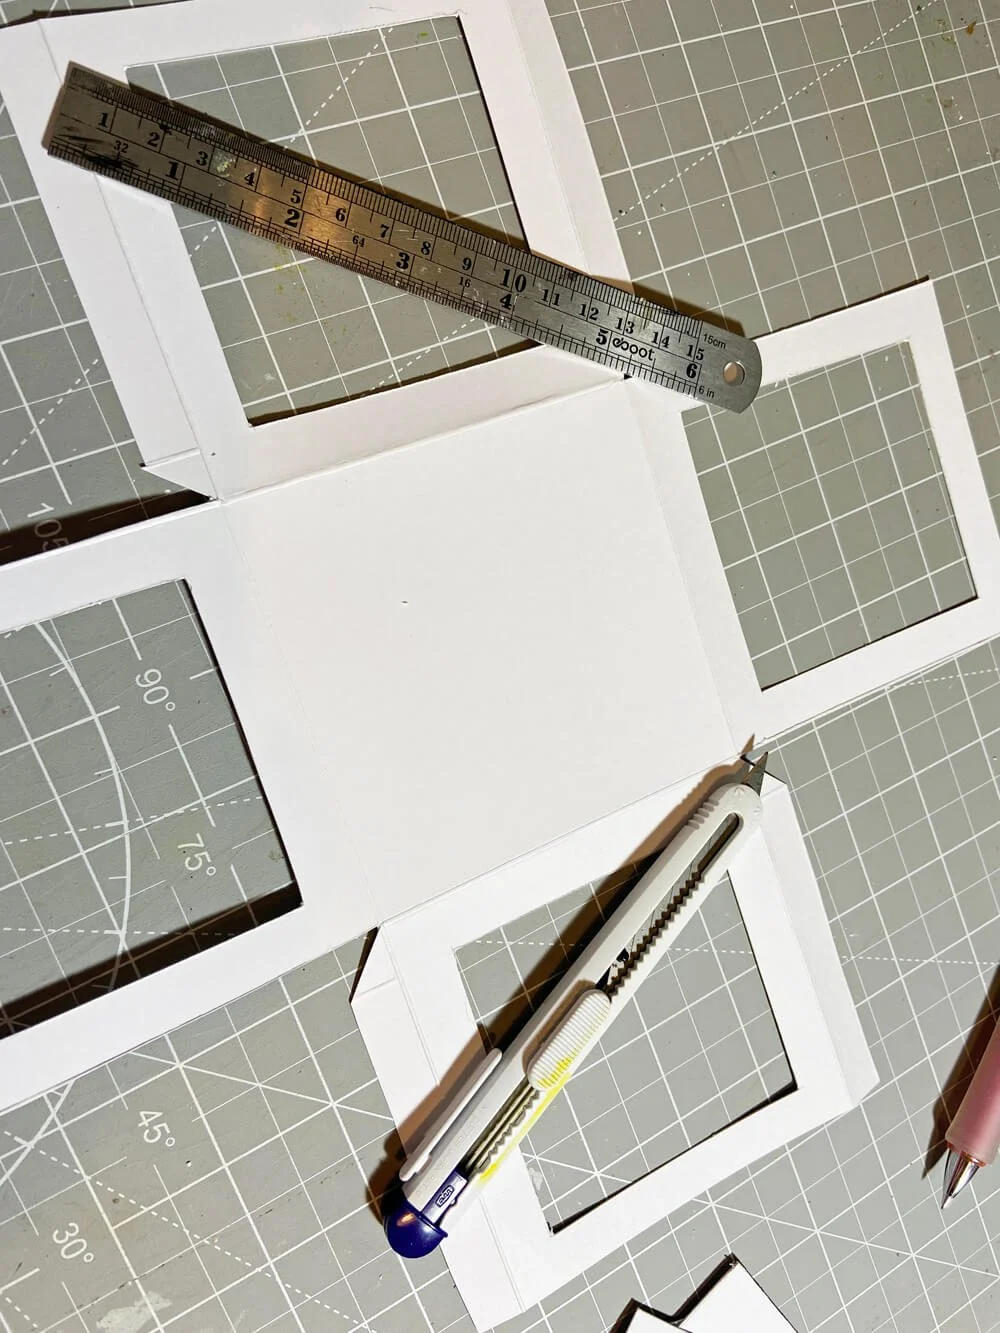
Step 2: Cut yourself a 3x3-inch square of scrap card, and use it as a template to cut a square from each of the four outer panels.
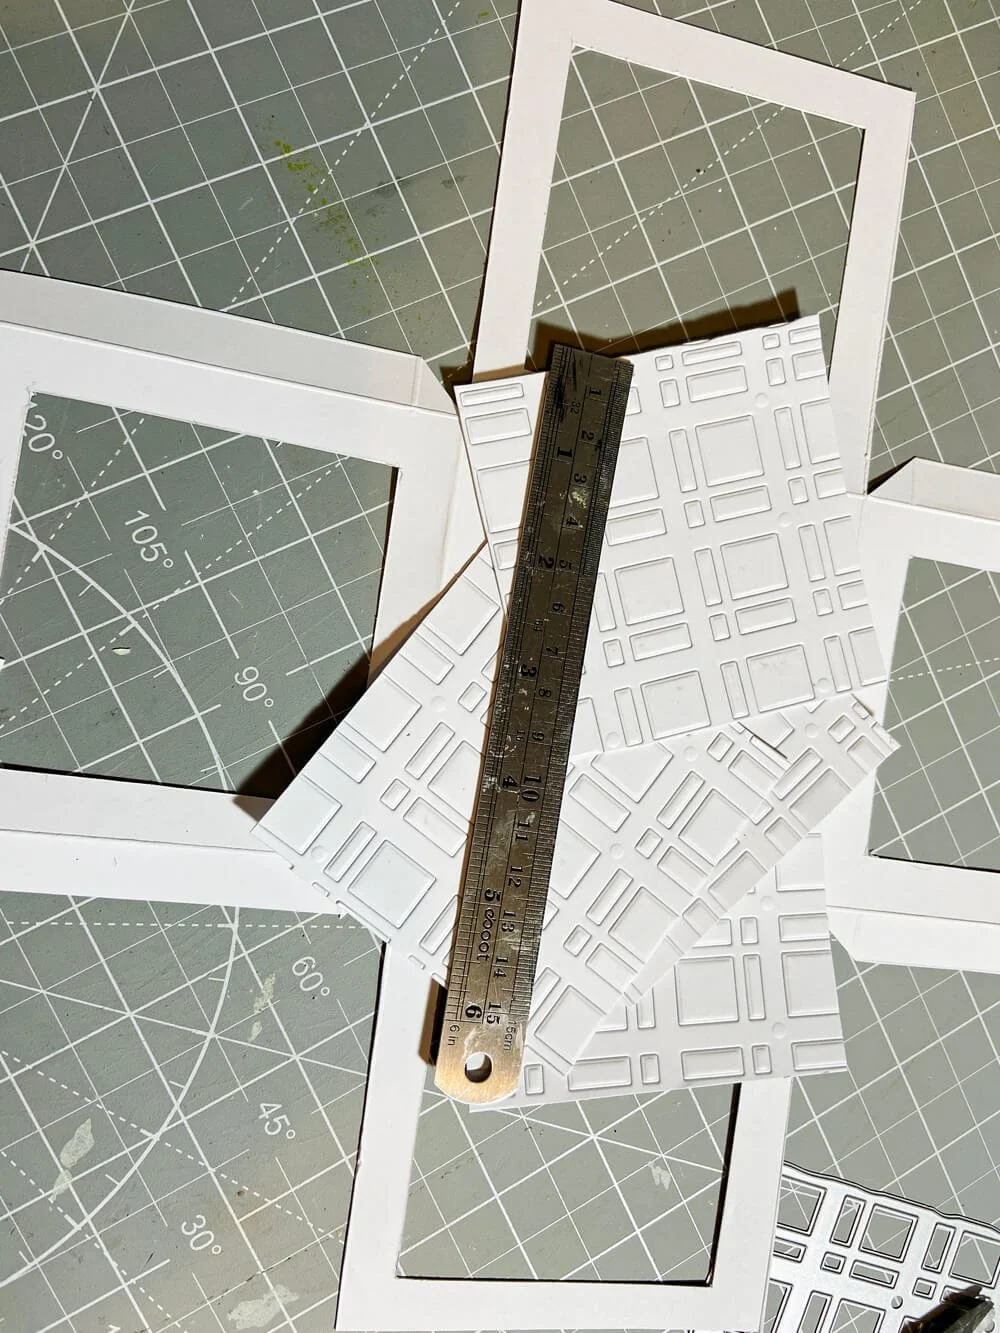
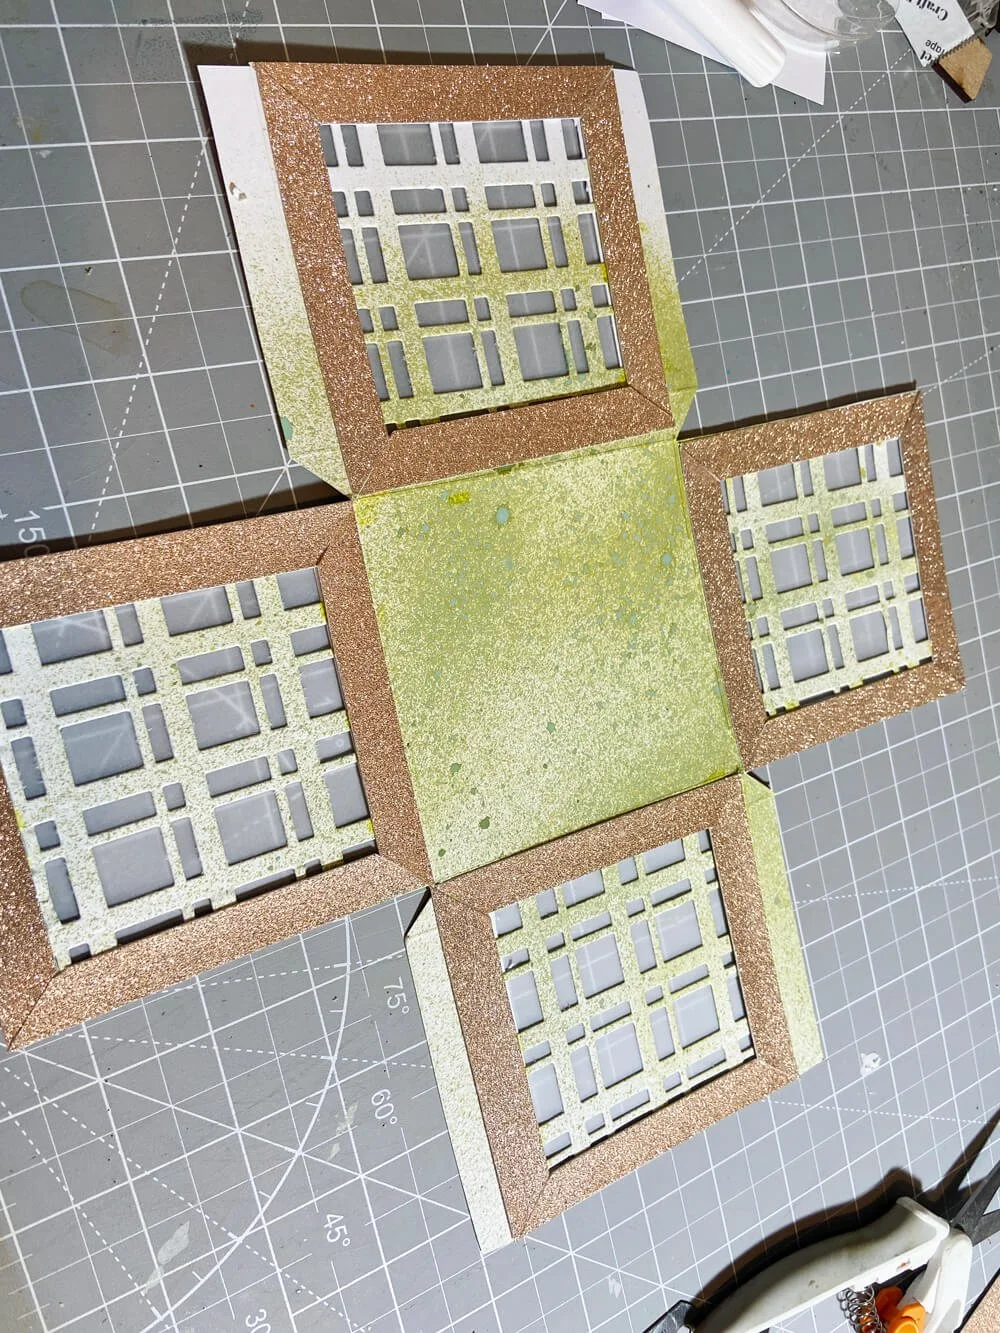
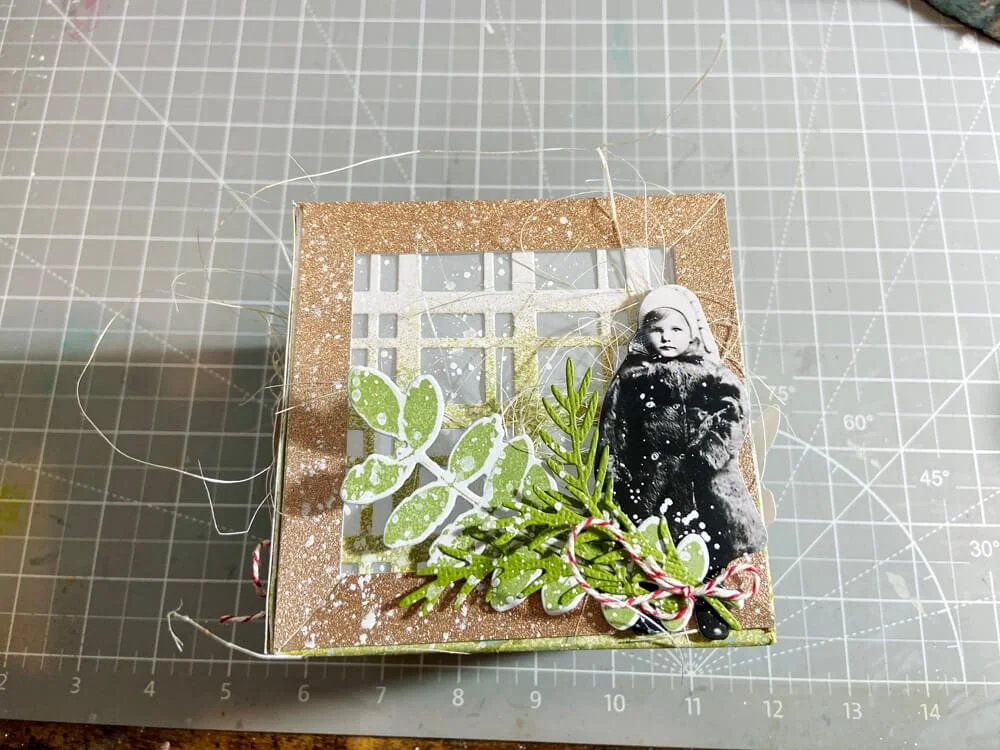
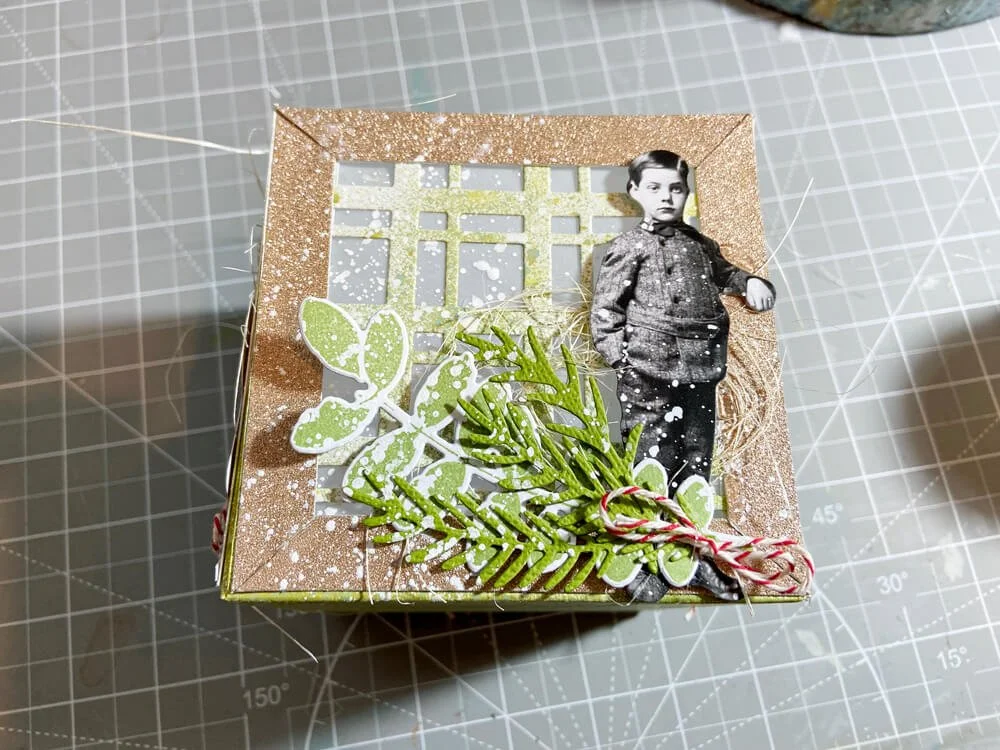
Step 3: Apply wide double-sided tape to white cardstock, then cut four panels with the plaid die. Trim the panels to 3 1/2 inches squares. Pop these on top of the apertures you cut out and spritz a little green color here and there.


Step 4: Then cut 4 squares of vellum measuring 3 1/2 inches by 3 1/2 inches. Adhere the vellum to the inside of each aperture, then peel off the backing from the plaid squares and place them on the outside of each aperture.
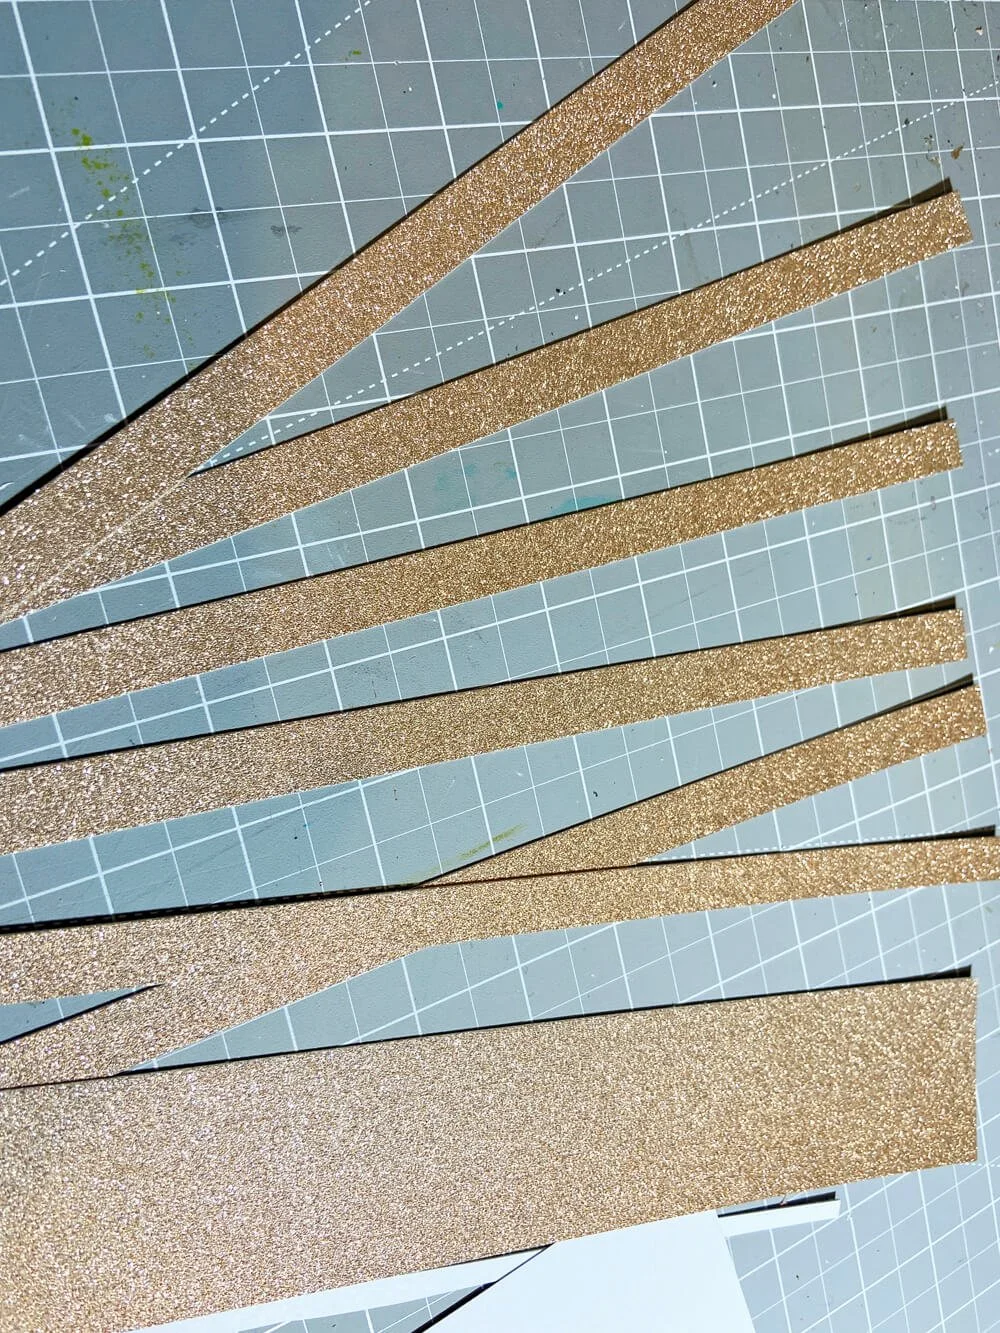
Step 5: Take some sparkly cardstock and cut it into 1/2 inch strips on a cutting mat. Arrange them to create 4 x 4-inch squares, and use a craft knife to cut diagonally along the corners of each overlap to create mitred strips. Adhere these around each aperture to create little frames.

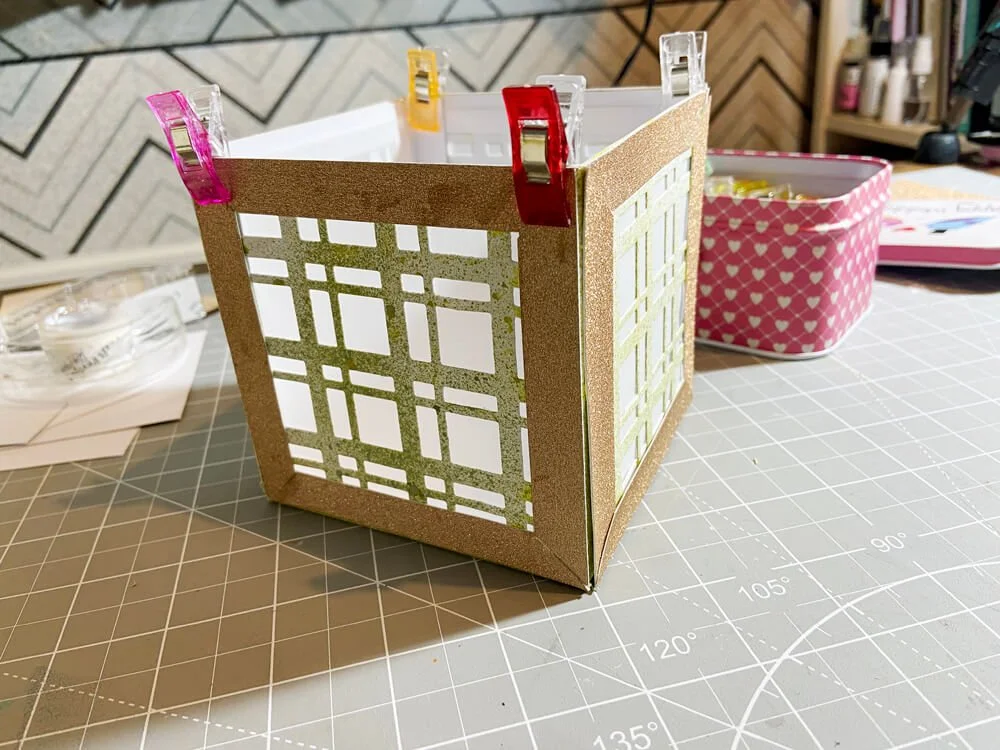
Step 6: Adhere your tabs to the inside of your box and hold them in place while they dry. You now have your main structure, which you can decorate.
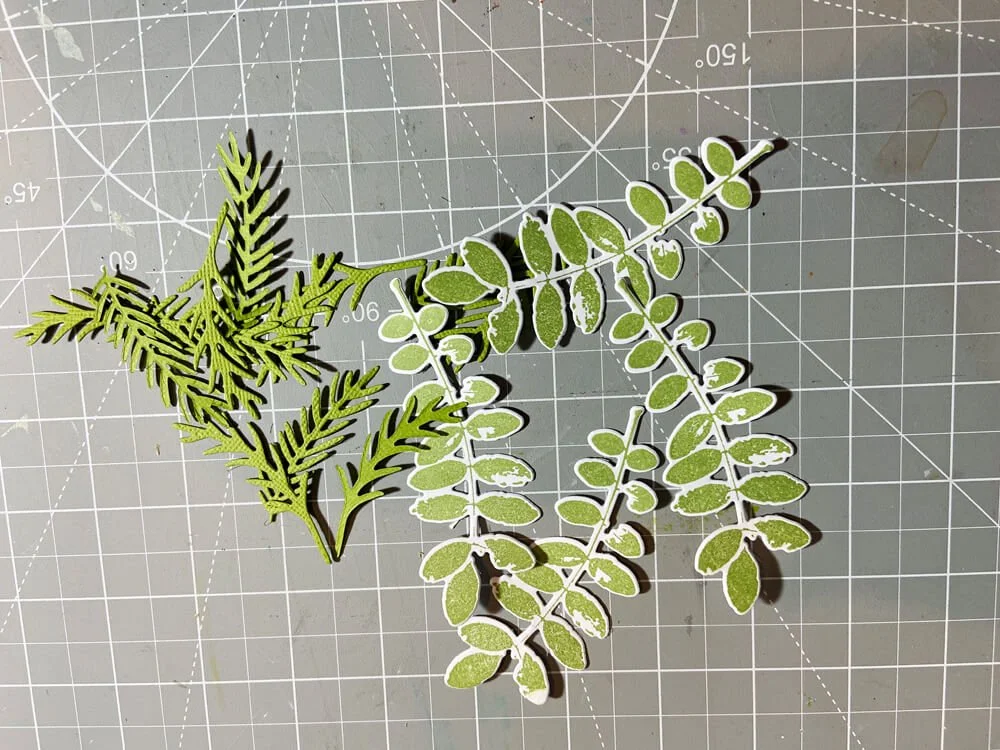
Step 7: Die-cut some leaves from green cardstock, then stamp, and die-cut a few more that look a little different; you want some variety. Select four little images and tie four little bows with your chosen string or ribbon.
Step 8: Now decorate each panel, starting with a small amount of sisal and adding your other elements. Once you are happy with each side, mix some white acrylic paint with water until it's splatterable, then splatter it onto each panel. Pop your string lights in, and you are good to go 🩷

Other Products Needed: 12x12 cardstock, A4 white cardstock, A4 vellum, green ink spray, green ink pad, sisal, thread, white acrylic paint, Glitter cardstock, and battery-operated lights.